The world of crochet is constantly evolving, and nothing transforms a simple blanket, scarf, or bag like a beautiful, highly textured, 3D stitch. If you’ve ever seen a pattern that makes you want to reach out and touch it, it was likely created using post stitches—stitches that wrap around the body of the previous row’s stitch, literally pushing the fabric forward.
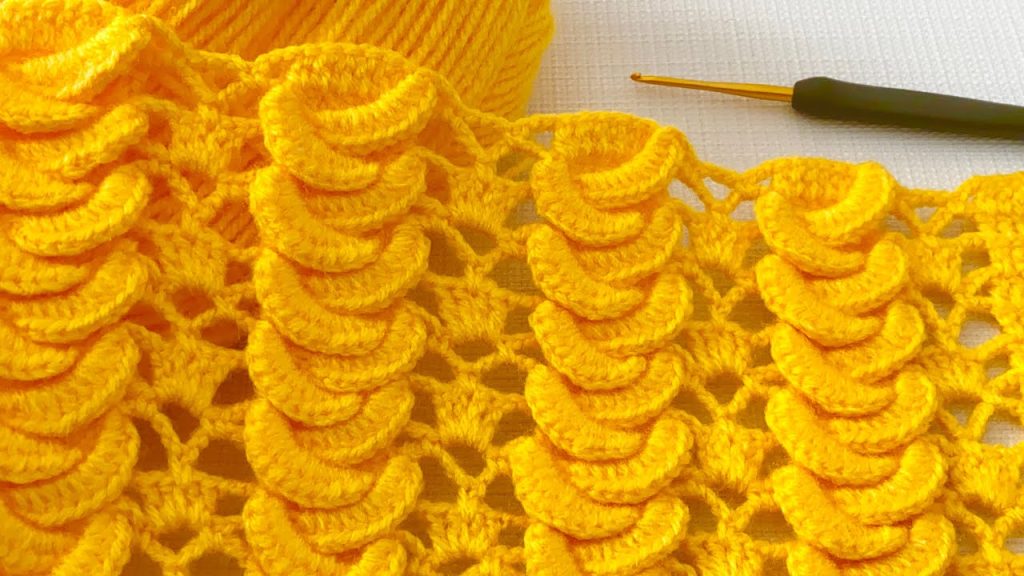
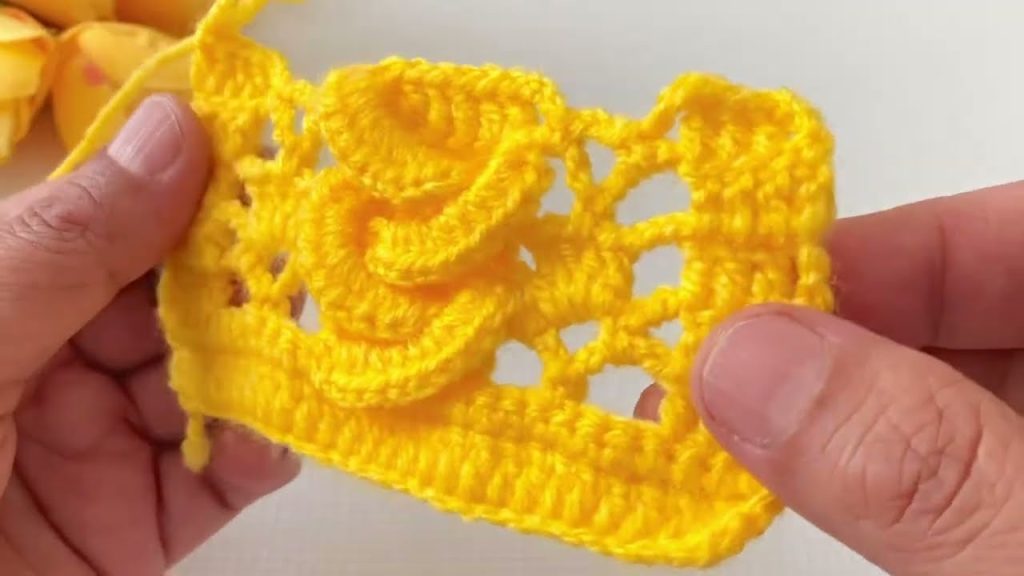
Inspired by the deeply ridged, geometric beauty of advanced textured crochet, we’ve designed an original, unique, and stunning pattern: The Celestial Diamond Stitch. This stitch creates a mesmerizing, repeating diamond motif that pops off the fabric, offering incredible depth and warmth. It’s perfect for luxury blankets, stylish cushions, winter scarves, and robust washcloths.
While the name may sound intimidating, this pattern is built entirely on basic stitches you already know (Single Crochet and Double Crochet) combined with the magic of Front Post and Back Post techniques. If you can handle a DC, you can master this stitch!
🛠️ Essential Supplies
To begin your Celestial Diamond journey, gather the following materials:
| Material | Details | Notes |
| Yarn | Worsted Weight (#4) | Choose a solid color to best highlight the 3D texture. Acrylic, cotton, or a blend works well. |
| Crochet Hook | 5.0 mm (H/8) | A standard size for this yarn weight. Adjust if your tension is very loose or tight. |
| Notions | Scissors, Yarn Needle | For weaving in ends. |
📏 Gauge (Approximate)
- 4-inch square: 14 stitches and 8 rows of the established pattern. Your personal gauge is not critical unless you are making a garment.
📖 Abbreviations & Special Stitches
Familiarize yourself with these standard and special crochet terms:
| Abbreviation | Meaning |
| ch | Chain |
| st(s) | Stitch(es) |
| SC | Single Crochet |
| DC | Double Crochet |
| sk | Skip |
| rep | Repeat |
| WS | Wrong Side (odd-numbered rows) |
| RS | Right Side (even-numbered rows) |
✨ Special Stitches Explained
The depth of this pattern relies on these two techniques:
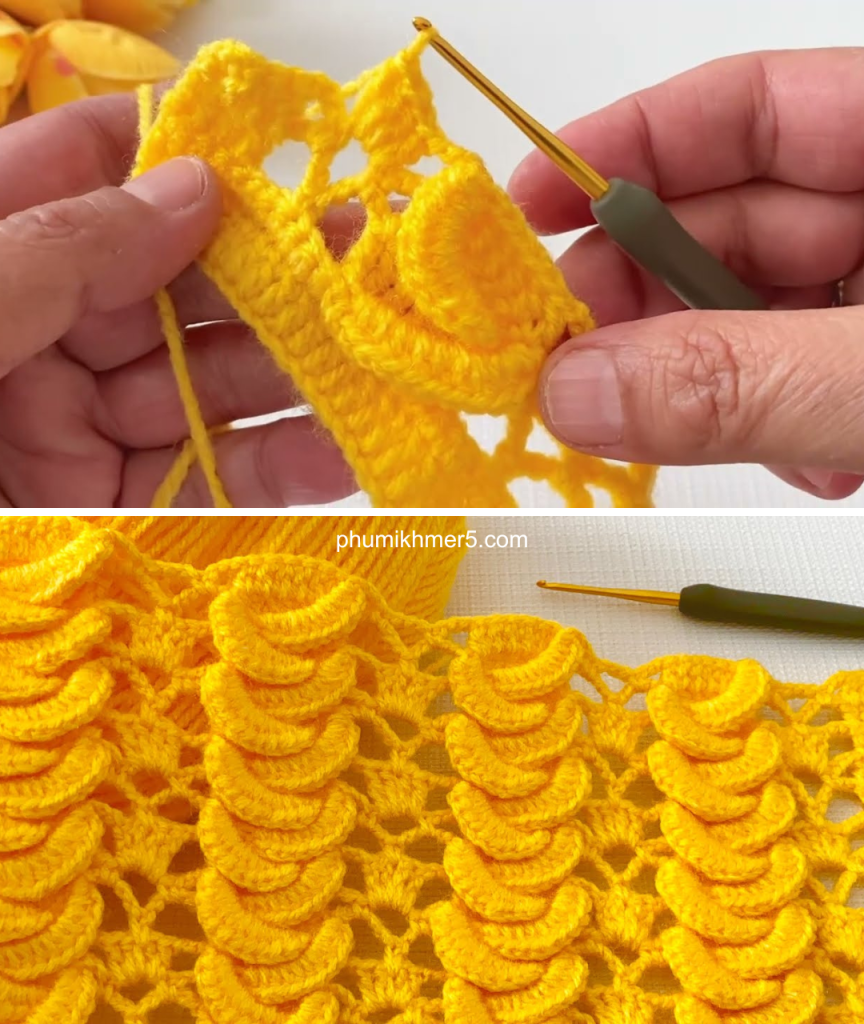
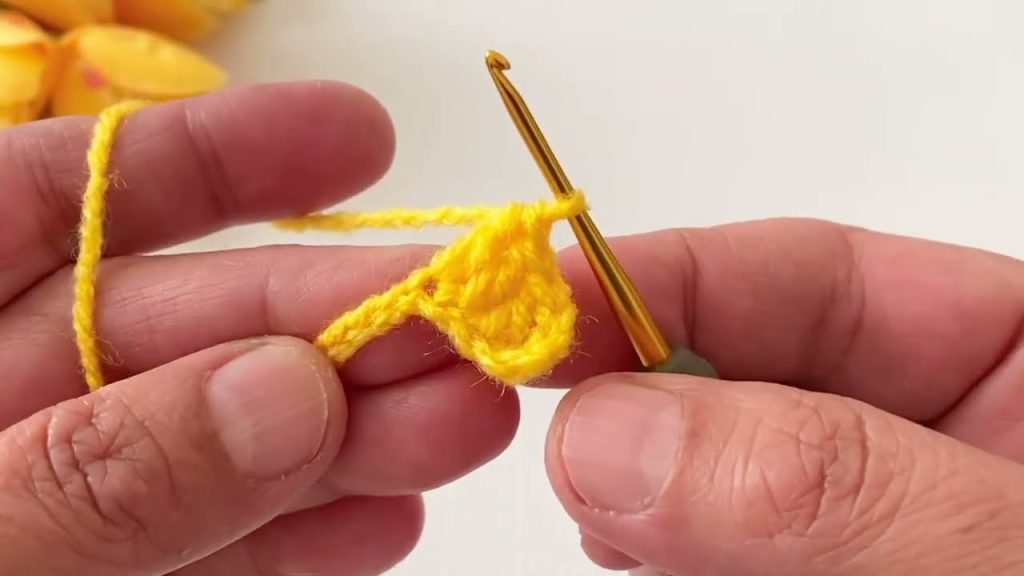
- Front Post Double Crochet (FPDC): Yarn over (YO), insert hook from front to back, then back out to the front (around the post of the stitch from the row below). YO, pull up a loop (3 loops on hook). YO, pull through 2 loops. YO, pull through remaining 2 loops. This stitch will push the texture towards you.
- Back Post Double Crochet (BPDC): YO, insert hook from back to front, then back out to the back (around the post of the stitch from the row below). YO, pull up a loop (3 loops on hook). YO, pull through 2 loops. YO, pull through remaining 2 loops. This stitch will pull the texture away from you, creating the recessed base of the diamond.
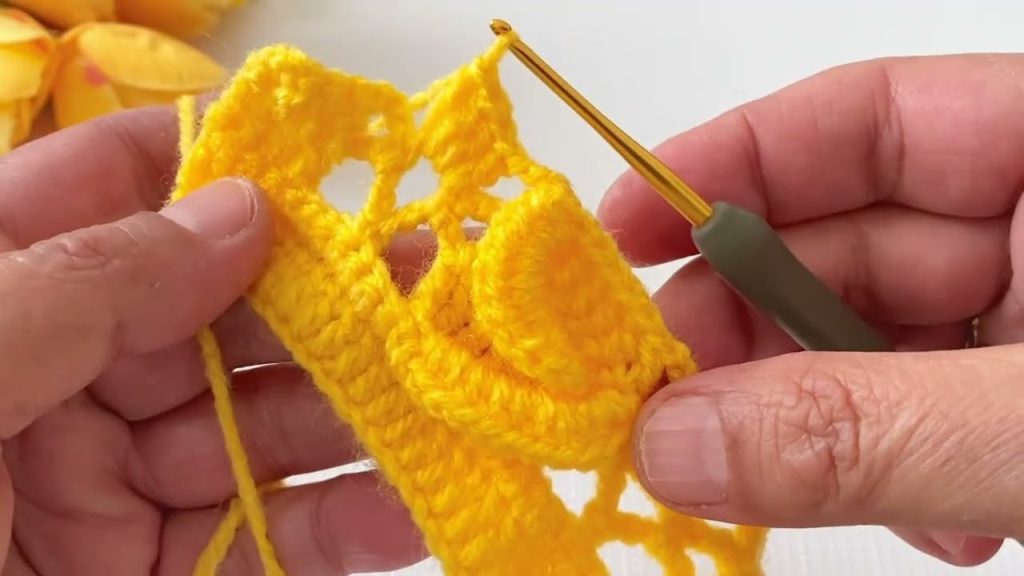
📝 The Celestial Diamond Stitch Pattern
This pattern requires a starting chain that is a multiple of 4, plus 3 (e.g., 23, 27, 31, 35, etc.).
Chain: Ch a multiple of 4 + 3.
Foundation & Base Rows
Row 1 (WS): SC in the 2nd ch from the hook and in each ch across. (Turn your work). Row 2 (RS): Ch 3 (counts as a DC), DC in the first st and in each SC across. (Turn your work).
Establishing the Texture (First Half of the Diamond)
Row 3 (WS): Ch 1, turn. SC in the first 2 sts. *BPDC around the next DC, SC in the next 3 DC.* Rep from * to * across, ending with SC in the last st. (Turn your work).
Row 4 (RS): Ch 3 (counts as a DC), turn. DC in the first 2 sts. *FPDC around the BPDC from Row 3, DC in the next 3 SC.* Rep from * to * across, ending with a DC in the top of the turning chain. (Turn your work).
Row 5 (WS): Ch 1, turn. SC in the first 2 sts. *SC in the next DC, BPDC around the FPDC from Row 4, SC in the next 2 DC.* Rep from * to * across, ending with SC in the last st. (Turn your work).
Row 6 (RS): Ch 3 (counts as a DC), turn. DC in the first 3 sts. *FPDC around the BPDC from Row 5, DC in the next 3 SC.* Rep from * to * across, ending with DC in the last 2 sts. (Turn your work).
Closing the Diamond
Row 7 (WS): Ch 1, turn. SC in the first 2 sts. *BPDC around the FPDC from Row 6, SC in the next 3 DC.* Rep from * to * across, ending with SC in the last st. (Turn your work).
Row 8 (RS): Ch 3 (counts as a DC), turn. DC in the first 2 sts. *FPDC around the BPDC from Row 7, DC in the next 3 SC.* Rep from * to * across, ending with a DC in the top of the turning chain. (Turn your work).
Repeating the Pattern
To continue the Celestial Diamond Stitch, repeat Rows 5 through 8. These four rows form the repeating core of the pattern and are what build the intricate 3D diamond texture.
💡 Tips for a Perfect Finish
Consistent Tension is Key
In 3D texture patterns, your tension is critical. Try to maintain consistent tension, especially on your post stitches (FPDC/BPDC). If your post stitches are too tight, the fabric will pucker. If they are too loose, the diamond texture will not stand out.
Edging Recommendation
The foundation chain and the final row will naturally be straight, but the post-stitch rows create a subtle, attractive texture. For a polished edge, we recommend a simple border:
- Round 1: SC evenly around the entire piece. Use 3 SC in each corner st.
- Round 2: DC evenly around the entire piece. Use 3 DC in the center SC of each corner.
🧵 Suggested Project: The “Gemstone Throw”
This pattern is heavy, luxurious, and warm, making it the ultimate cozy throw blanket.
- Size: Approximately 50″ x 60″
- Yarn Needed: About 2500 – 3000 yards of worsted weight yarn.
- Starting Chain: Chain 163 (which is (4 x 40) + 3).
- Instructions: Work in the Celestial Diamond Stitch pattern until the piece measures 59 inches. Finish with a two-round border as suggested above.
Happy Crocheting! This unique stitch will be a conversation starter and a treasured piece for years to come.
Video tutorial: