
Welcome to a pattern that’s both challenging and rewarding! The Sunburst Bloom Table Runner is inspired by the intricate, continuous, one-piece floral motif stitch shown in the video. This technique eliminates the need for endless seaming, allowing the motifs to grow into one another, resulting in a cohesive, lace-like fabric.
This pattern is a beautiful statement piece for any dining table or console. While the stitch is complex, we will break down the joining process step-by-step, transforming a difficult technique into an enjoyable and addictive repeat.
- Finished Size: Approx. 16 inches wide x 60 inches long (customizable length)
- Difficulty: Intermediate/Advanced (Requires familiarity with post stitches, popcorns/clusters, and motif joining).

Materials & Tools Checklist
The yarn choice is crucial for stitch definition, as the lace pattern needs to pop.
| Item | Quantity/Specification | Notes | | :— | :— | :— | | Yarn | 600 – 800 yards of Fingering/Sport Weight (Category 2) Cotton Yarn | Cotton or a crisp cotton blend is best for clear stitch definition. | | Hook | 3.0 mm Crochet Hook | A small hook prevents the lace from becoming too floppy. | | Notions | Stitch Markers (6-8), Tapestry Needle, Scissors | Markers are essential for marking join points. |
Gauge Check
- One Complete Motif (Round 5): Should measure approximately 4 inches (10 cm) across.
Essential Techniques & Glossary
The motifs rely on a combination of cluster stitches and chain spaces for their distinct floral shape.
- Popcorn Stitch (PC): Work 5 Double Crochet (DC) stitches into the specified stitch/space. Drop loop from hook, insert hook into the top of the 1st DC, grab the dropped loop and pull through (creating a puffed stitch).
- V-Stitch (V-St): (DC, Chain 1, DC) all in the same space.
- Cluster (CL): Yarn over, insert hook, pull up loop, yarn over, pull through 2 loops. Repeat 3 more times in the same space (5 loops on hook). Yarn over, pull through all 5 loops.
- Picot Join (PJ): Ch 2, Sl St to the corresponding Picot/Chain Space on the neighboring motif, Ch 1, Sl St to the 1st chain of the original Ch 2 (completes the Picot and joins).

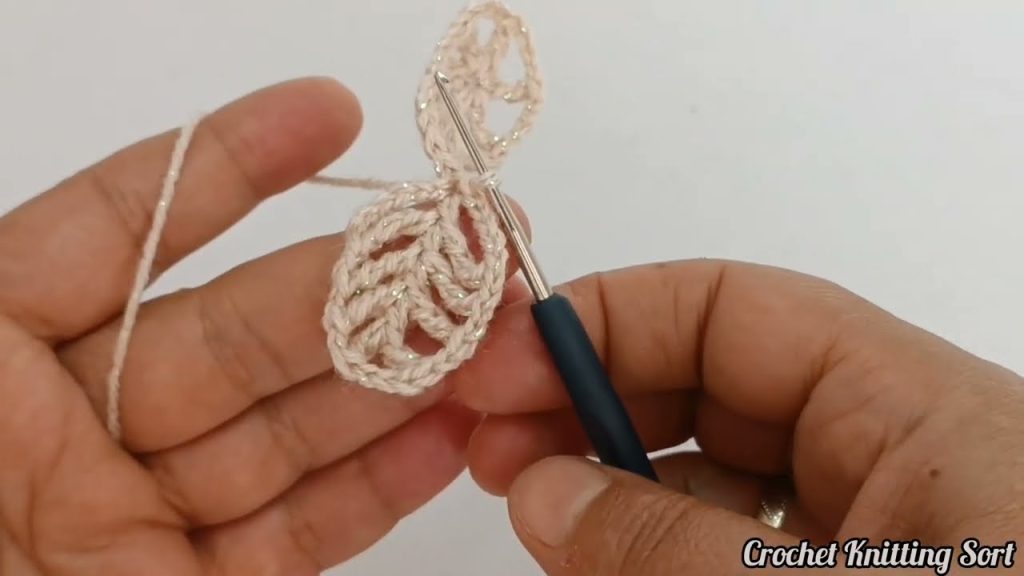
Part 1: The Initial Motif
You will work the first full motif before starting the continuous joining process.
- Round 1 (Center): Create a Magic Ring (MR). Ch 3 (counts as DC), work 15 DC into the ring (16 DC total). Sl St to the top of the starting Ch 3.
- Round 2 (Popcorn Base): Ch 3 (counts as DC). Work 4 more DC in the same stitch (Popcorn). Ch 3. Skip 3 stitches. Work 5-DC Popcorn in the next stitch. Ch 3. Repeat from * to * 3 more times (4 Popcorns total). Sl St to the top of the first Popcorn.
- Round 3 (Chain Arches): Sl St into the next Ch 3 space. Ch 1, SC in the Ch 3 space. Ch 5. SC in the next Ch 3 space. Ch 5. Repeat from * to * around (4 SC and 4 Ch 5 arches). Sl St to the first SC.
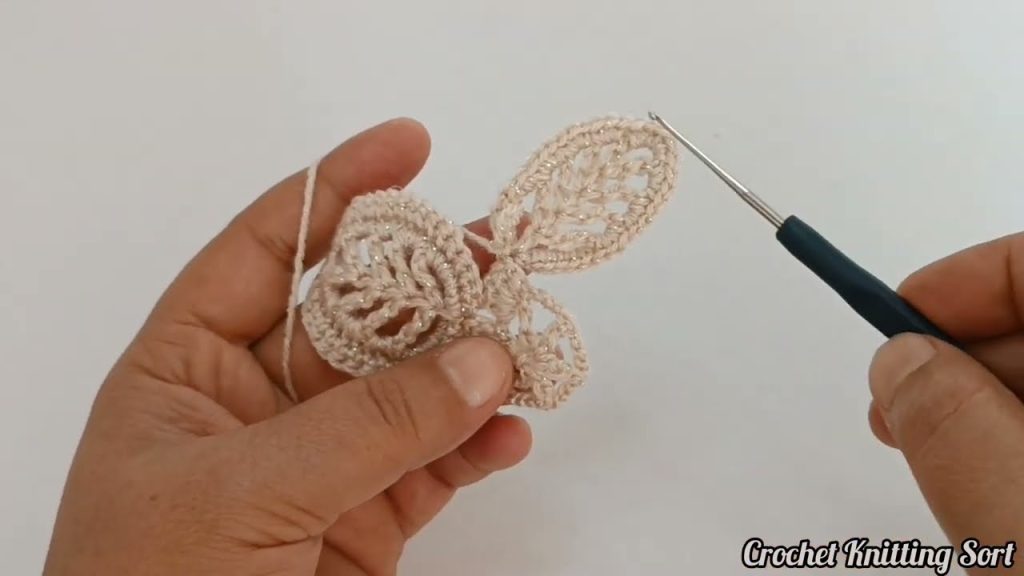
- Round 4 (Petal Clusters): Sl St into the Ch 5 space. Ch 3 (counts as DC). Work 3-DC Cluster in the same space. Ch 3. Work 4-DC Cluster in the same Ch 5 space. Ch 1. In the next Ch 5 space, work (4-DC Cluster, Ch 3, 4-DC Cluster). Ch 1. Repeat from * to * 2 more times. Sl St to the top of the starting Ch 3. (8 Clusters total).
- Round 5 (Final Edge): Ch 1. SC in the top of the first Cluster. (3 SC in the Ch 3 space. SC in the top of the next Cluster. Ch 3). Repeat * to * 7 more times. Sl St to the first SC.
Fasten off. This completes Motif 1.
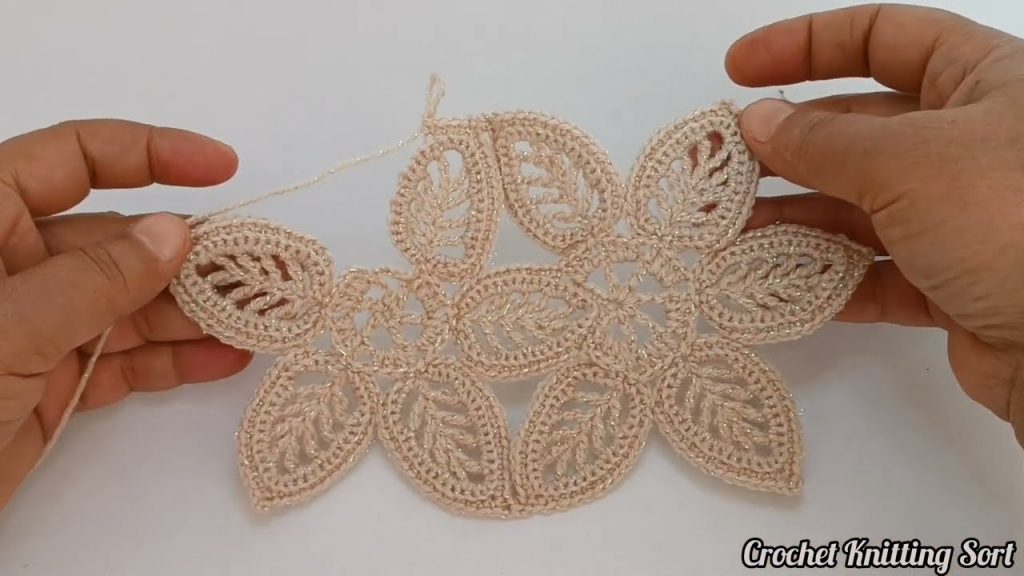
Part 2: The Continuous Join – Creating the Runner
The runner will be 4 motifs wide (4 motifs across). This means each motif joins to the previous motifs on two sides.
Instructions for MOTIF 2 (Joining to Motif 1)
Work Rounds 1–4 of Motif 2 the same as Motif 1. Do not fasten off after Round 4.
Round 5 (Final Edge & Join):
- Ch 1. SC in the top of the first Cluster. (3 SC in the Ch 3 space. SC in the top of the next Cluster).
- Joining Picot (Side 1): Ch 2. Sl St to the corresponding Ch 3 space on Motif 1 (use a stitch marker to find the center Ch 3 space of any side). Ch 1, Sl St back to the 1st chain of the original Ch 2.
- Continue with the unjoined side of Motif 2: (SC in the next 3 stitches. SC in the top of the next Cluster. Ch 3). Repeat two more times.
- Final Join (Side 2): Work the last side using the Joining Picot method to connect to the next available Ch 3 space on Motif 1.
- Finish the final unjoined side: (SC in the next 3 stitches. SC in the top of the next Cluster. Ch 3). Sl St to the first SC.
Fasten off. Motif 2 is complete and connected to Motif 1.
Instructions for MOTIF 3 and MOTIF 4 (Width)
Repeat the process for Motif 2, but join to the center Ch 3 space on the opposite side of Motif 1.
At the end of Motif 4, you will have a continuous strip of 4 motifs connected side-by-side (the 16-inch width).
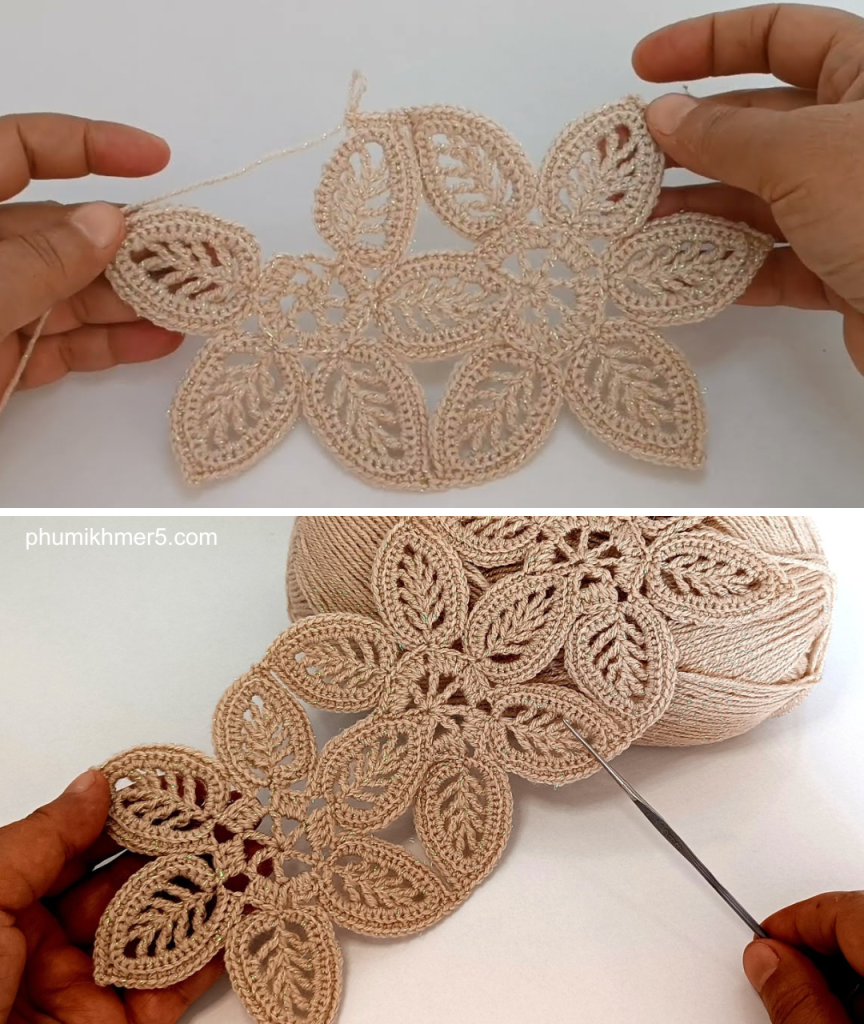
Part 3: Extending the Length
Now you will work in the second row, joining to the existing motifs along the runner’s length.
Instructions for MOTIF 5 (Starting the Second Row)
Work Rounds 1–4 of Motif 5 the same as Motif 1.
Round 5 (Final Edge & Join): Motif 5 will join to the corner where Motifs 1, 2, and the previous motif from the second row will meet.
- First Join Side: SC, 3 SC in Ch 3 space, SC in Cluster. Join Picot to the corner of Motif 1 (the Ch 3 space directly next to the join between Motifs 1 and 2).
- Second Join Side: Continue Motif 5: 3 SC in Ch 3 space, SC in Cluster. Join Picot to the corner of Motif 2 (the Ch 3 space that is NOT joined to Motif 1).
- Continue the remaining two sides normally (Ch 3, no join).
Motif 5 connects the two existing motifs, forming the first link in the next row.
Continuous Repetition:
- Continue working new motifs, connecting them along the length of the runner. Each new motif will connect to two adjacent motifs from the previous row using two Join Picots per connection point.
- The length of the runner is determined by the total number of motifs you complete. Stop when the desired length (e.g., 60 inches) is reached.
Part 4: Final Edging
Once the desired length is reached, a simple SC border will clean up the edges.
- Edging Round: Join yarn to a corner of the runner. Ch 1, SC evenly around the entire perimeter of the table runner.
- SC into every SC stitch.
- Work (SC, Ch 1, SC) into every unjoined Ch 3 space along the sides.
- Work 2 SC into every Ch 3 space used for a Join Picot along the center joins.
- Ensure the corners are worked neatly with 3 SC in the corner space.
- Sl St to join and Fasten off.
Block the finished runner lightly to open up the lace details.
Video tutorial:


