
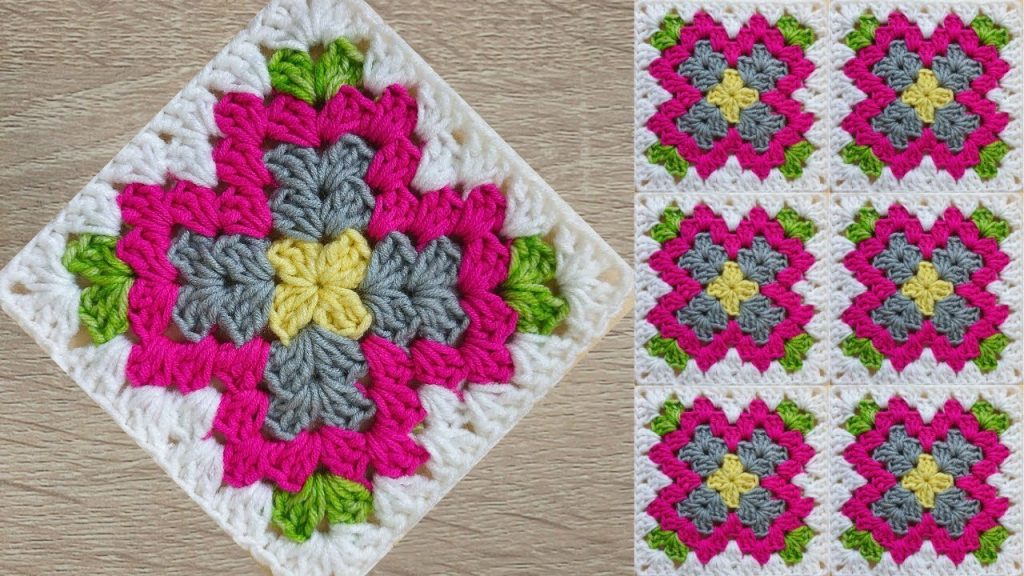
Granny squares are one of the most iconic motifs in the world of crochet. These small, modular pieces have stood the test of time, evolving from humble scrap projects into vibrant, intricate designs seen in fashion, home decor, and art installations. Among all their forms, the colorful granny square holds a special place — it’s a celebration of color, creativity, and tradition, all stitched together into one compact square.
Whether you’re a beginner looking to practice basic stitches or a seasoned crocheter aiming to explore endless design possibilities, colorful granny squares are both functional and artistic. This article dives deep into the history, construction, color theory, techniques, and modern uses of crochet colorful granny squares.
A Brief History of the Granny Square
Granny squares trace their roots back to the early 19th century, though the exact origins remain somewhat obscure. They gained mainstream popularity in the 1970s, during the resurgence of DIY and handmade crafts. The “granny” in the name doesn’t refer to elderly women, but rather the traditional and homely aesthetic they evoke.
Initially used as a thrifty way to use up yarn scraps, granny squares quickly became symbols of domesticity and self-sufficiency. During the hippie movement, they took on a new life as expressions of counterculture creativity — think vests, ponchos, and colorful afghans made from mismatched yarns.
Today, the granny square is both nostalgic and contemporary — adaptable to both minimalist and maximalist aesthetics.
What Is a Granny Square?
A granny square is a crocheted square that typically begins in the center and works outward in rounds. It’s built with basic stitches — usually double crochet (dc) in U.S. terms, or treble crochet (tr) in U.K. terms — and often features chain stitches to create corner spaces.
Although the traditional granny square is built from clusters of double crochets separated by chain spaces, modern variations now include:
- Solid granny squares (no holes)
- Spiral granny squares
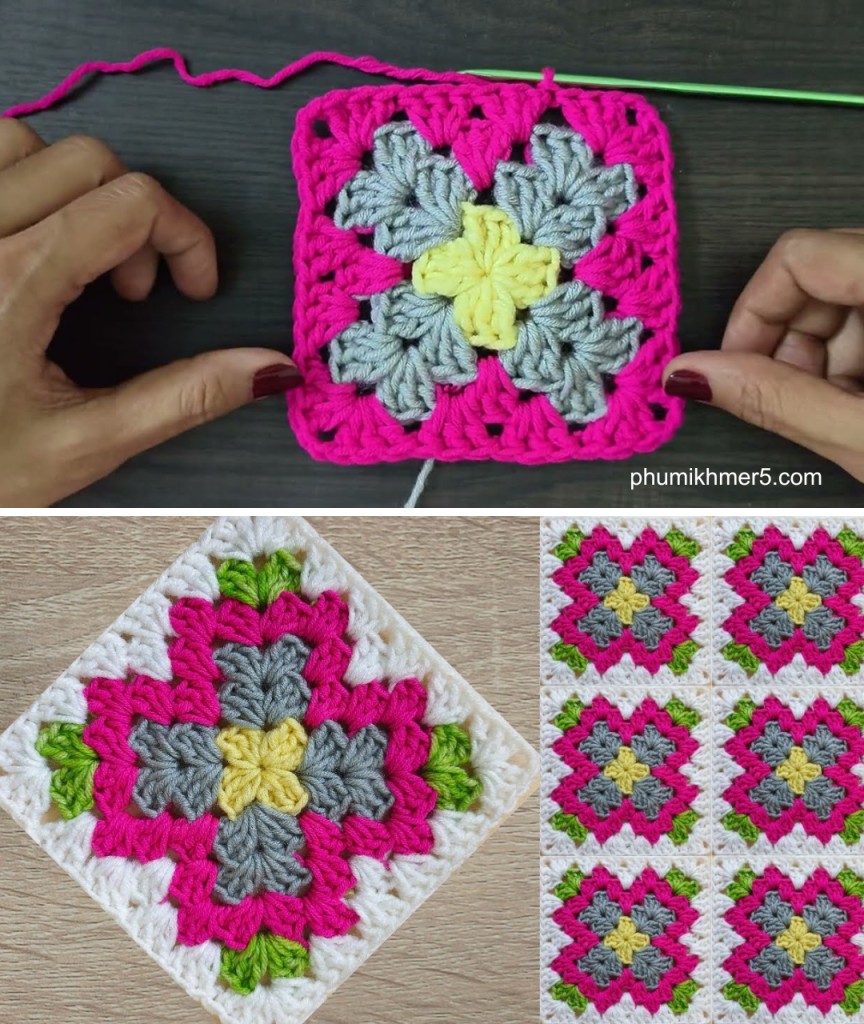
- Flower or mandala centers
- 3D and textured designs
When color enters the equation, the granny square transforms into a vibrant canvas that allows infinite creativity.

Why Crochet Colorful Granny Squares?
1. Creative Expression
You can mix and match colors to reflect seasons, emotions, or themes. Whether it’s a rainbow palette, soft pastels, or bold neons, each square becomes a mini artwork.
2. Great for Beginners
Learning how to crochet colorful granny squares is a great way to practice essential skills: chaining, double crocheting, changing colors, and joining.
3. Modular and Portable
Each square is a self-contained unit. This makes it easy to work on projects in small bursts or while traveling.
4. Eco-Friendly and Cost-Effective
Granny squares are ideal for using up leftover yarn, making them both sustainable and budget-friendly.
Materials You’ll Need
Yarn
Choose yarn that’s suitable for your project. Acrylic yarn is popular for beginners due to its affordability and wide color range. Cotton yarn gives a cleaner, firmer look. Wool offers warmth and elasticity.
Weight: Most granny squares are made using worsted (medium) weight yarn, but you can use any weight with the appropriate hook.
Crochet Hook
Check your yarn label for recommended hook size. Generally, for worsted yarn, use a 5mm (H-8) hook.
Tapestry Needle
Used for weaving in the ends after changing colors or joining squares.
Scissors
A sharp pair for trimming yarn tails.
Basic Colorful Granny Square Pattern (Step-by-Step)
Abbreviations (U.S. Terms)
- ch = chain
- dc = double crochet
- sl st = slip stitch
- sp = space
- st = stitch
Round 1: Center (Color A)
- Make a magic ring OR ch 4 and join with a sl st to form a ring.
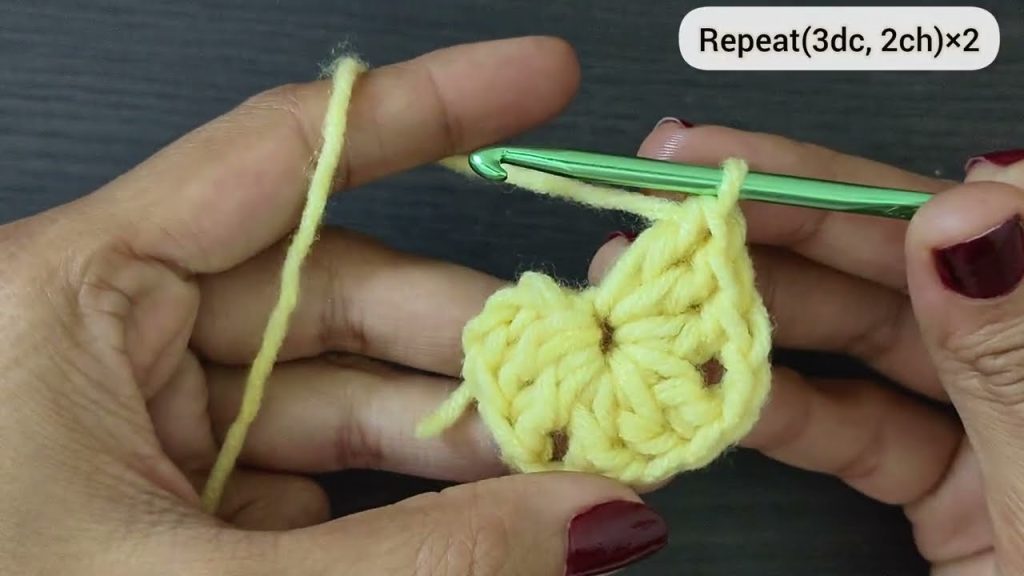
- Ch 3 (counts as 1 dc), 2 dc into the ring, ch 2.
- (3 dc into the ring, ch 2) repeat 3 more times.
- Join with sl st to top of beginning ch-3.
- Fasten off and change to Color B.
You now have four 3-dc clusters separated by ch-2 spaces (the corners).
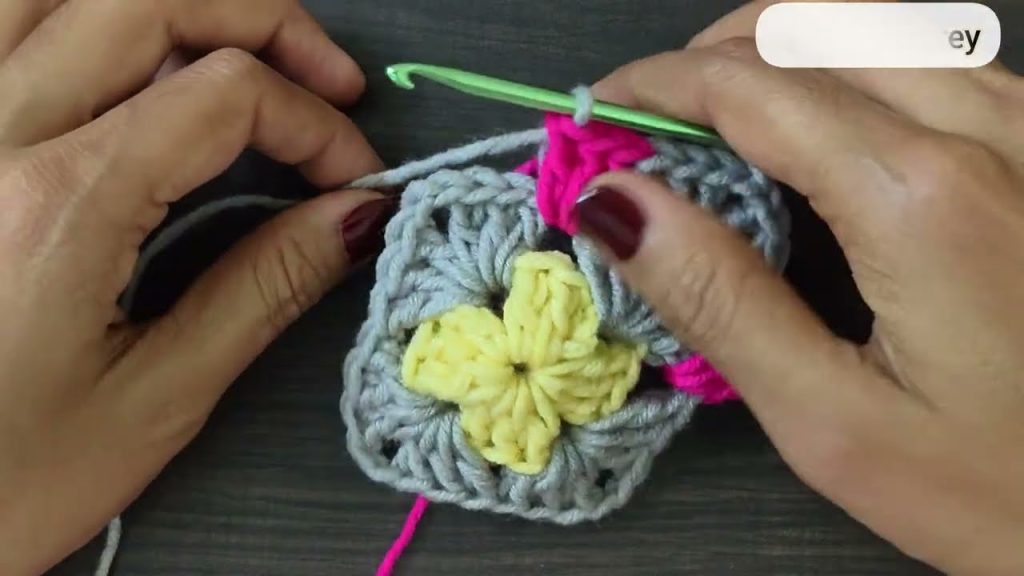
Round 2: Building the Square
- Join Color B in any corner space.
- Ch 3, 2 dc in same space, ch 2, 3 dc (1 corner made).
- (In next corner space: 3 dc, ch 2, 3 dc) repeat around.
- Join with sl st to top of beginning ch-3.
- Fasten off and switch to Color C.
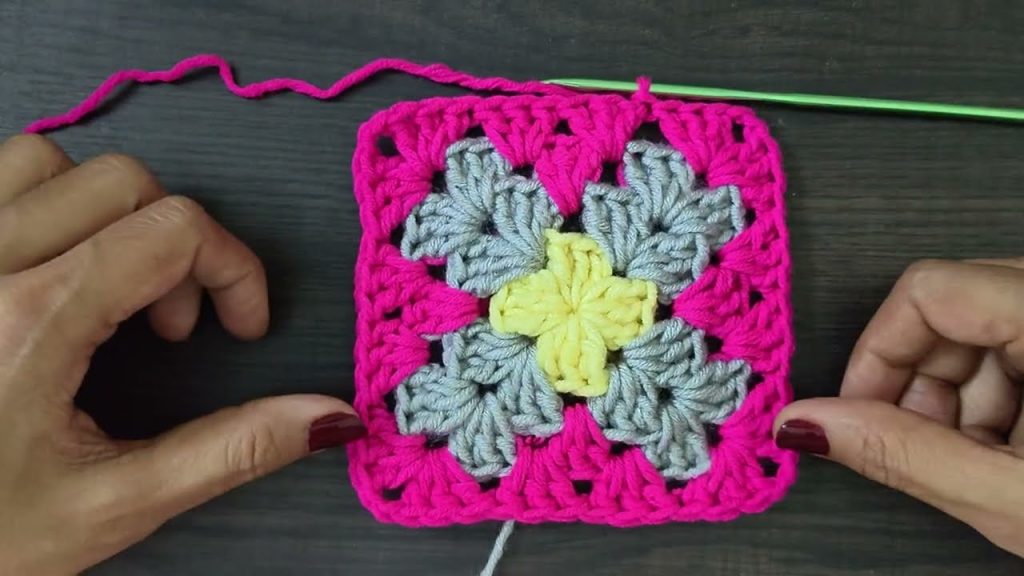
Round 3 and Beyond:
As the square grows, between the corner clusters, you’ll start working single 3-dc groups into side spaces. Always do (3 dc, ch 2, 3 dc) in corners.
Continue for as many rounds as you like, changing colors each round for maximum effect.
Tips for Combining Colors
Color is the soul of a colorful granny square. Here’s how to make yours pop:
1. Use the Color Wheel
- Complementary colors (opposite on the wheel, like blue and orange) create high contrast.
- Analogous colors (next to each other, like red, orange, yellow) create harmony.
- Triadic schemes (three evenly spaced colors) create bold, balanced looks.
2. Value Contrast
Mix lights and darks to add depth. A pastel surrounded by a darker border will stand out more than placing two mid-tones together.
3. Consistent Borders
Using the same color for the last round of each square helps tie diverse colors together when assembling them.
4. Yarn Swapping
Don’t be afraid to mix brands, as long as yarn weights and textures are compatible.
Joining Granny Squares
Once you’ve crocheted a bunch of colorful squares, it’s time to assemble them.
Popular Joining Methods:
- Slip Stitch Join: Place squares wrong sides together and slip stitch through both loops of each stitch.
- Single Crochet Join: Similar to slip stitch but adds a bit more texture.
- Whipstitch (Sewing): Use a tapestry needle and sew through the back loops.
- Join-As-You-Go (JAYG): Attach each square during the last round — efficient and seamless.
Project Ideas Using Colorful Granny Squares
The possibilities are endless. Some creative and practical ideas include:
Home Decor
- Afghans and throws
- Pillow covers
- Curtains or window valances
- Chair pads or rugs
Fashion
- Boho cardigans
- Scarves and shawls
- Bucket hats
- Bags and totes
Accessories
- Phone or tablet sleeves
- Patchwork-style journals or book covers
- Wall art or buntings
Upcycling
- Add granny squares to the back of a denim jacket, jeans, or tote bags for a DIY fashion upgrade.
Modern Trends and Inspiration
Thanks to social media, granny squares are enjoying a massive revival. Designers are blending traditional techniques with modern aesthetics — think muted palettes, geometric patterns, or mixing fiber types like mohair or metallics.
On platforms like Pinterest, Instagram, and TikTok, crocheters share daily squares as part of “granny square-a-day” challenges, which are perfect for skill-building and mindfulness.
Final Thoughts
The crochet colorful granny square is more than a stitch pattern — it’s a creative journey. Whether you’re crafting for therapy, function, or fashion, the process of choosing colors, crocheting each square, and piecing them together is incredibly satisfying. It’s also a living tradition, passed through generations, and constantly reimagined by contemporary makers.
So grab your hook, gather your yarn stash, and begin the joyful ritual of stitching your own colorful masterpiece — one granny square at a time.
Video tutorial:


