
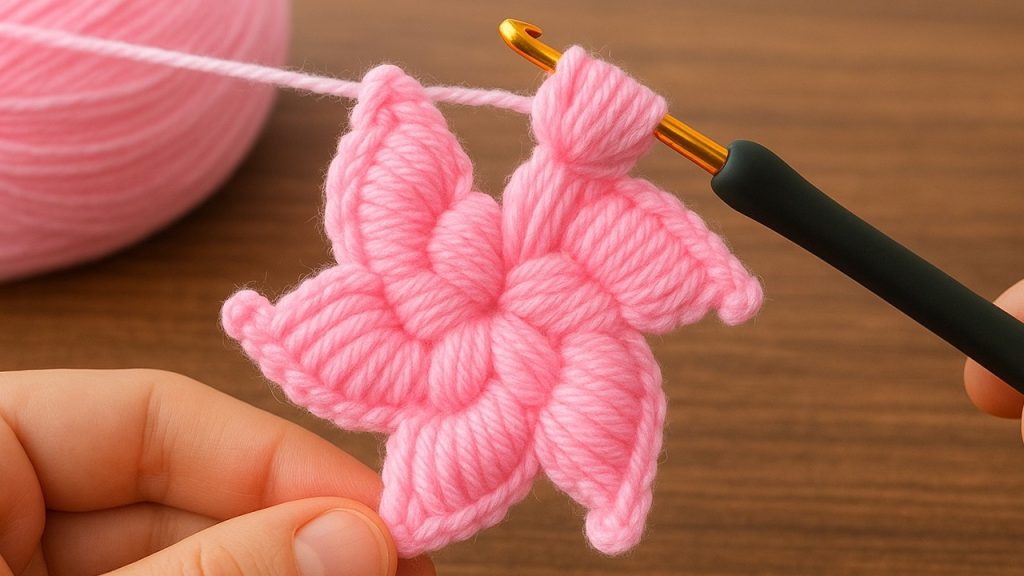
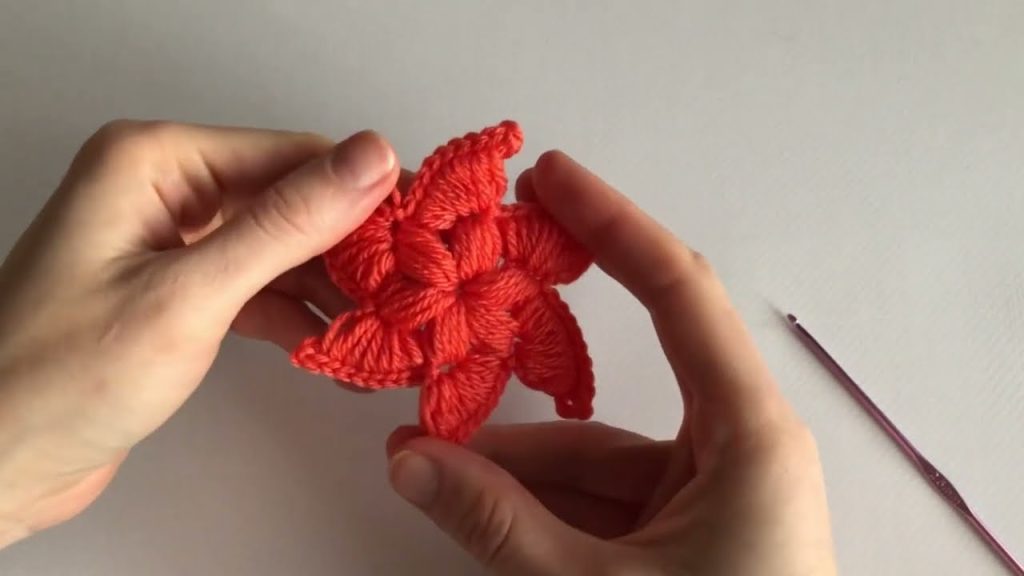
Hello, fellow crocheters and lovers of tiny details! Are you looking for a quick, charming project that uses up small yarn scraps and can instantly elevate any garment or accessory? I am excited to share the pattern for the Celestial Petal Appliqué—a beautiful, layered flower that is perfect for embellishment.
Inspired by a simple and easy crochet flower tutorial, this design builds upon basic stitches to create a delicate, dimensional bloom. It features two distinct layers of petals and a subtle center, making it a fantastic addition to hats, scarves, blankets, or even jewelry.
Grab your finest hook and your brightest yarn scraps, and let’s bring some floral beauty into the world!
Why You’ll Love Crocheting This Flower:
- Quick & Portable: A perfect “on-the-go” project that uses minimal yarn.
- Layered Dimension: The two-round petal structure gives the flower depth and texture.
- Beginner-Friendly: Relies heavily on chain stitches, slip stitches, and single crochet—ideal for practice.
- Versatile Appliqué: Can be sewn onto almost any project for an instant decorative touch.
What You’ll Need:
- Yarn: Fingering weight (#1) or DK weight (#3) yarn scraps. Cotton or acrylic works best for definition.
- Color A (Petals): A light or vibrant color.
- Color B (Center): A contrasting color (optional, can use Color A).
- Crochet Hook: 2.5 mm hook (or a hook size appropriate for your chosen yarn weight).
- Tools: Tapestry Needle (for weaving ends), Scissors.
Essential Crochet Abbreviations:
| Abbreviation | Description |
| ch | chain |
| st(s) | stitch(es) |
| sc | single crochet |
| sl st | slip stitch |
| sk | skip |
| R | Round |
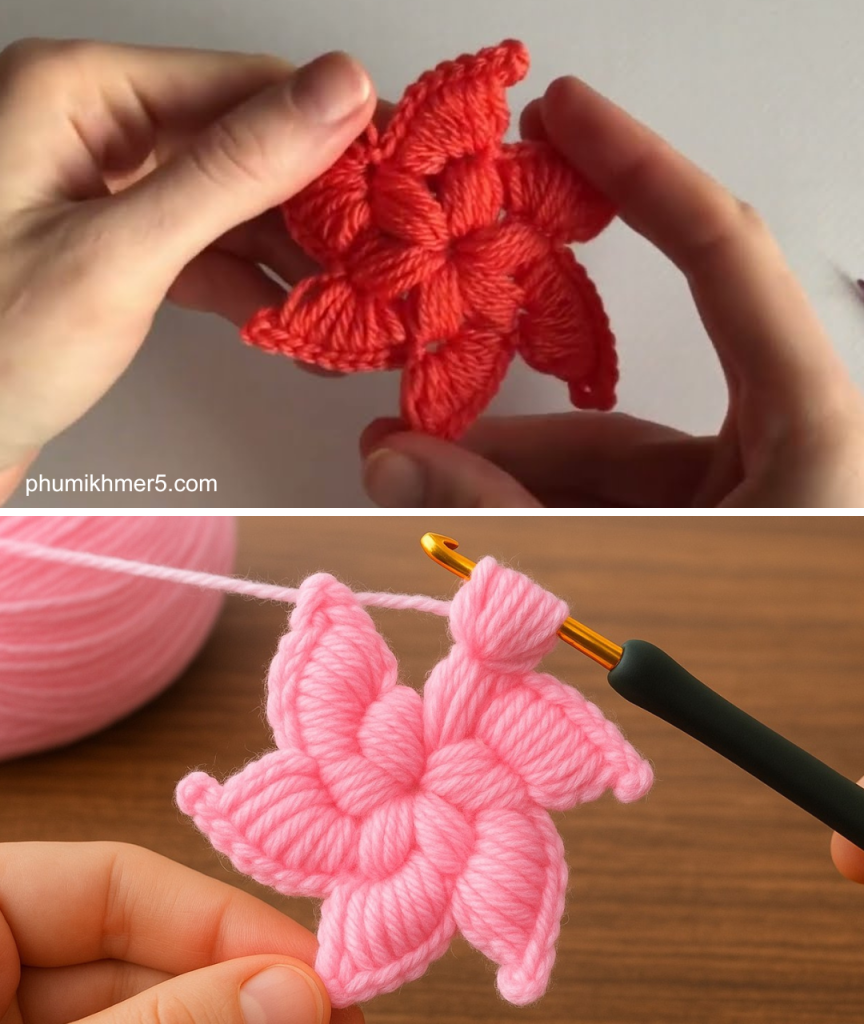
Instructions: The Celestial Petal Appliqué
This pattern is worked in the round, starting with a foundation chain to create the center ring.
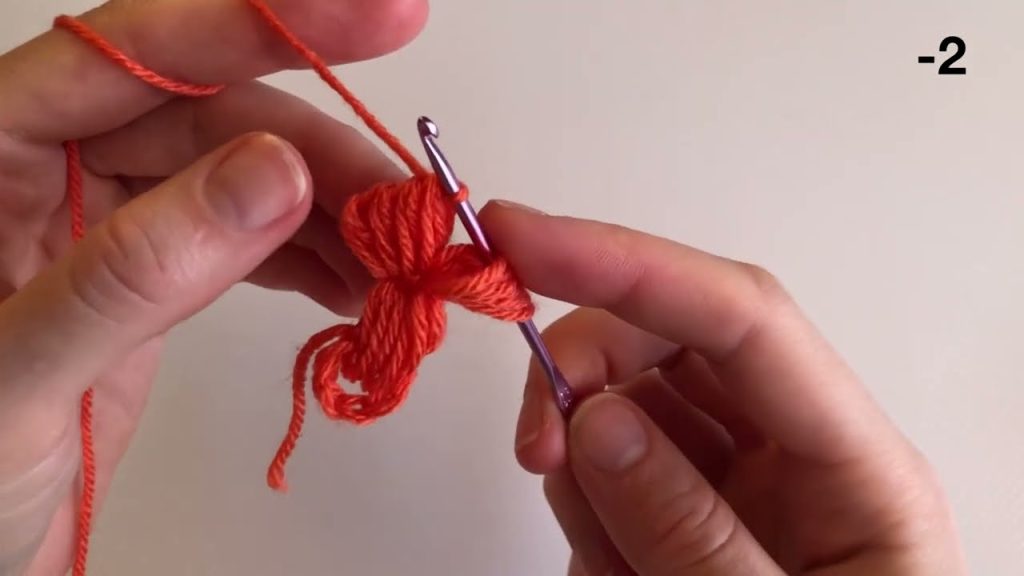
Part 1: The Center and Foundation (Color B)
- Foundation Ring: With Color B,
ch 7. Join with asl stto the first ch to form a ring. (If preferred, you may start with a Magic Ring). - R1 (Center Base):
Ch 1(does not count as st). Work12 scinto the center ring. Join with asl stto the firstsc. - Fasten Off Color B.
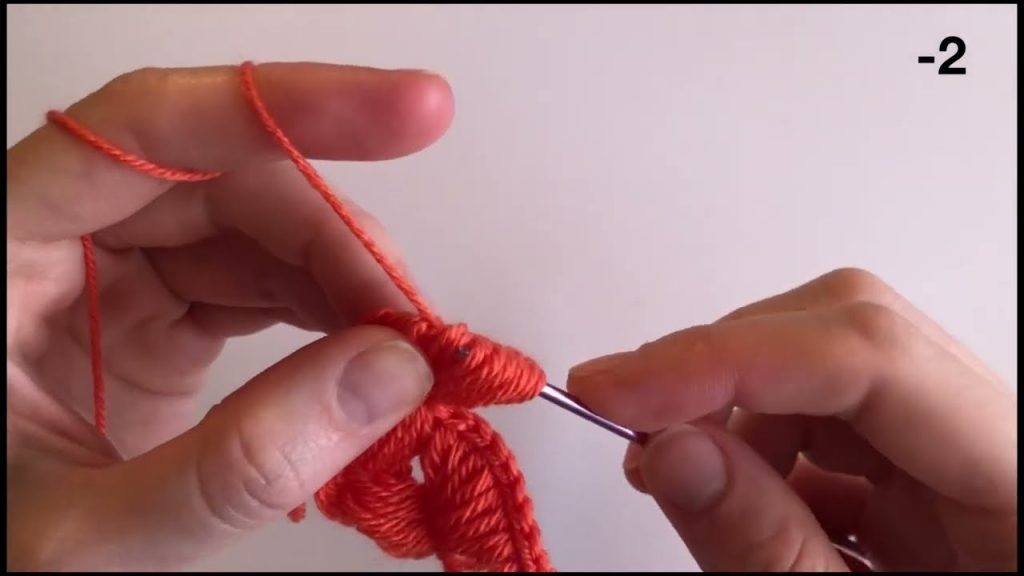
Part 2: The Inner Petals (Color A)
Switch to Color A and attach it to any single crochet stitch from R1.
- R2 (Petal Arches):
Ch 4.Sl stinto the same st where you joined the yarn.Sl stinto the next st.- Repeat the sequence
[Ch 4, sl st into the same st, sl st into the next st]around the entire ring. - You should have a total of 6 small ch-4 loops forming the arches for the inner petals.
- R3 (Petal Definition): This round works into the arches created in R2.
Sl stinto the center of the first ch-4 loop.- In the loop, work:
[sc 1, ch 1, sc 1, ch 1, sc 1]. This forms the first defined petal. Sl stinto thesl stbetween the arches.- Repeat the sequence
[Sl st into the next loop, work (sc 1, ch 1, sc 1, ch 1, sc 1) into the loop, sl st into the next sl st]for the remaining 5 arches.
- Fasten Off Color A.
Part 3: The Outer Petals (Color A)
The outer petals are created by working behind the inner petals, into the stitches of R1.
- Re-attach Color A: Join Color A with a
sl stinto any skipped single crochet stitch from R1 (the stitches the inner petals didn’t attach to in R2). - R4 (Outer Petal Arches):
Ch 5.Sl stinto the next available sc st from R1 (you will be skipping one st from R1 between each anchor point).- Repeat the sequence
[Ch 5, sk 1 st, sl st into the next st]around the ring. - You should have a total of 6 large ch-5 loops positioned behind the inner petals.
- R5 (Outer Petal Definition): This round works into the ch-5 arches created in R4.
Sl stinto the center of the first ch-5 loop.- In the loop, work:
[sc 1, ch 1, sc 1, ch 1, sc 1, ch 1, sc 1]. This forms the larger, defined petal. Sl stinto thesl stbetween the arches.- Repeat the sequence
[Sl st into the next loop, work (sc 1, ch 1, sc 1, ch 1, sc 1, ch 1, sc 1) into the loop, sl st into the next sl st]for the remaining 5 arches.
- Final Fasten Off: Cut yarn, leaving a long tail for sewing the appliqué onto your chosen item.
Part 4: Finishing
- Weave Ends: Carefully weave the initial yarn tails into the back of the flower.
- Steam Block (Optional): Gently steam or mist the flower to help the petals lie flat and open up the definition of the two layers.
- Attach: Use the long tail from the final round and a tapestry needle to sew your beautiful Celestial Petal Appliqué onto a hat, bag, or anything that needs a touch of handmade charm!
Congratulations! You’ve mastered this stunning, layered flower—a quick project with a magnificent result!
Video tutorial:


