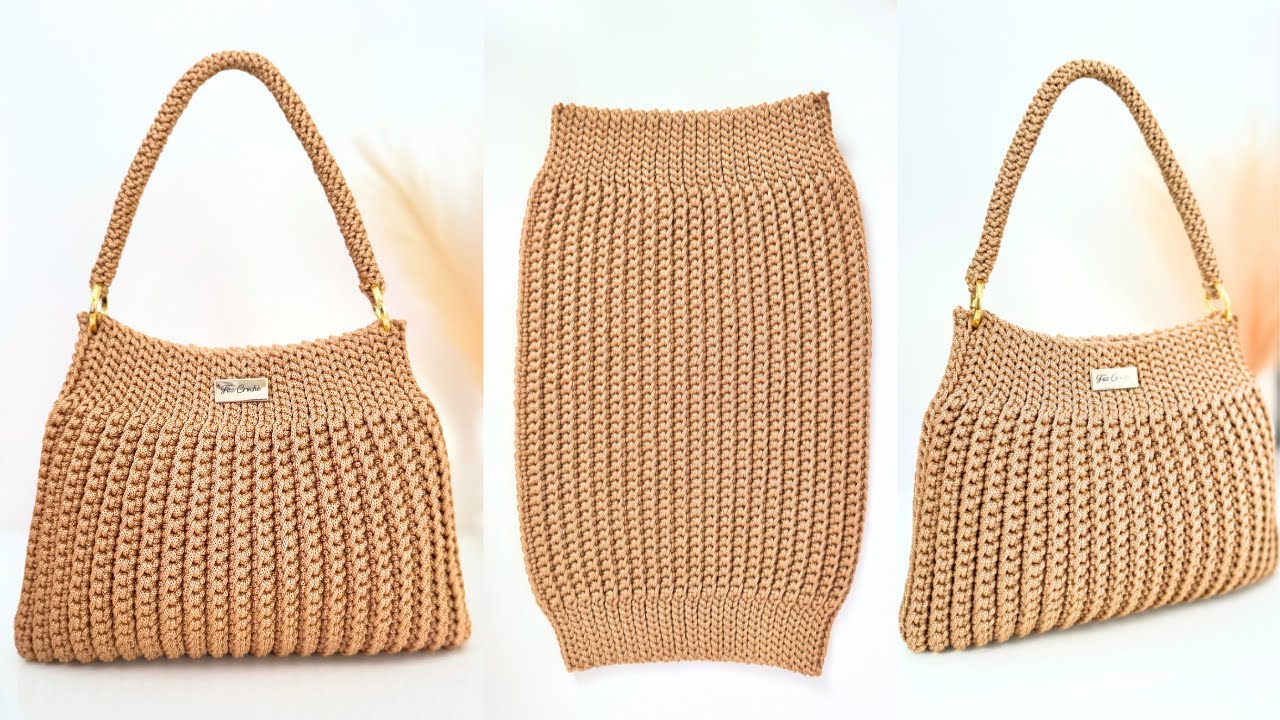
If you’re looking for a quick-turnaround project that delivers maximum style, the Teresa Bag is your answer. Inspired by the instructional video Bolsa de Crochê Incrivelmente Fácil e Rápida | Passo a Passo da Bolsa Teresa by Faz Crochê, this pattern uses a simple, repetitive flat panel construction and a dense center-stitch technique to create a beautifully structured, medium-sized shoulder bag that requires minimal shaping. The clean, visible seam adds a touch of bespoke craftsmanship.

📋 Project Details & Materials
This pattern is written using US crochet terms.
| Item | Detail | Notes |
| Project | The Teresa Bag (Bolsa Teresa) | Medium Shoulder Bag (Approx. 46 cm x 30 cm finished) |
| Yarn | 500g of 3mm Nautical Polypropylene Cord (Fio Náutico) | Nautical Cord is recommended for a rigid structure. |
| Hook | 5.0 mm (for the main body) | Use 5.0mm for thicker cord; size down for softer cord. |
| Handle Hook | 4.5 mm (for the handle) | Used for a tighter, denser strap. |
| Hardware | 2 x 3 cm Carabiner Snap Hooks (Mosquetões) | For attaching the handle. |
| Closure | 1 x 18 mm Magnetic Snap Button (Botão de ímã) | |
| Notions | Tapestry Needle, Scissors, Lighter (for sealing cord ends), 0.30 Nylon Thread & Regular Sewing Needle (for button). |
Gauge
While a precise gauge is not strictly necessary, your stitches should be tight and consistent, particularly if using nautical cord, to give the bag its required firm structure.
📝 Key Techniques Spotlight
The structured, woven look of the Teresa Bag comes from two specific methods:
- Foundation Row: Working in the Back Bumps (Alcinhas de trás):
- Instead of working into the top loops of your foundation chain, you will flip the chain over and work into the small “bumps” that run along the back. This leaves a neat, chain-like edge along the bottom of the bag.
- All Subsequent Rows: The Center Stitch (Ponto baixo centrado/Meio do ponto):
- For Row 2 onwards, you will insert your hook directly into the center of the ‘V’ of the stitch from the previous row, instead of under the two top loops. This technique pushes the stitch threads to the top, creating a dense, tapestry-style fabric that gives the bag stiffness and body.

Part 1: The Main Body Panel
The bag is constructed as a single rectangle, worked flat. The shaping of the top is achieved by transitioning between tight slip stitches and single crochet across each row.
Step 1: Foundation Chain and Initial Tail
- Prepare Tail: Before starting your slip knot, pull out approximately 1 meter (40 inches) of yarn. This tail will be used later for seaming the side.
- Chain: Ch 61. (The chain should measure approximately 50 cm / 20 inches.)

Step 2: Row 1 (Working in Back Bumps)
- Skip the first back bump from the hook.
- Work into the back bumps for the entire row:
- 9 Sl St (Tapered End 1)
- 42 SC (Main Body)
- 9 Sl St (Tapered End 2)(Total Stitches: 60)
Step 3: Repeating Rows 2–41 (Working in Center Stitch)
This is the main repeating section that forms the height of the bag. Remember to use the Center Stitch technique for every stitch.
- Ch 1, Turn.
- 9 Sl St (Center Stitch)
- 42 SC (Center Stitch)
- 9 Sl St (Center Stitch)
- Repeat Row 2 (the sequence above) for a total of 41 rows.

Step 4: Final Row
To match the texture and height of the initial foundation row, the last row is worked entirely in Single Crochet.
- Ch 1, Turn.
- SC (Center Stitch) into the center of all 60 stitches across the row.
Panel Finished: Cut the yarn, leaving a second long tail of approximately 1 meter (40 inches). Pull the tail through the last loop and secure. Your finished rectangle should measure around 46 cm (length) x 30 cm (width).
Part 2: Assembly and Finishing
Step 5: Seaming the Sides
The bag is formed by folding the rectangle in half and sewing the side edges together using the long yarn tails you left earlier.
- Thread the Needle: Thread the starting tail onto your tapestry needle.
- Fold: Fold the crochet panel in half lengthwise, matching the starting chain edge with the final row edge.
- Seaming Technique:
- Work from the top opening down to the folded bottom edge.
- Use a whipstitch, but only catch the inner-most vertical bar/loop of the corresponding stitch on the front and back layers of the fabric. This creates a tight, neat seam that sits on the exterior.
- Secure and Hide: Once the seam is complete, thread the yarn tail to the inside of the bag. Weave it securely through the dense internal stitches. Trim the excess cord and carefully melt/seal the end with a lighter (if using nautical cord).
- Repeat: Repeat the seaming process for the second side using the final long tail.
Step 6: Installing the Magnetic Snap Closure
- Center Alignment: Locate the exact center of the bag’s top opening.
- Stitch Material: Thread your regular sewing needle with the 0.30 Nylon Thread. The nylon thread is strong and nearly invisible.
- Sewing: Place the first half of the 18mm magnetic snap button at the center point and stitch it securely to the fabric using the nylon thread. Repeat for the second half directly across on the opposite side, ensuring both snaps align perfectly when the bag is closed.

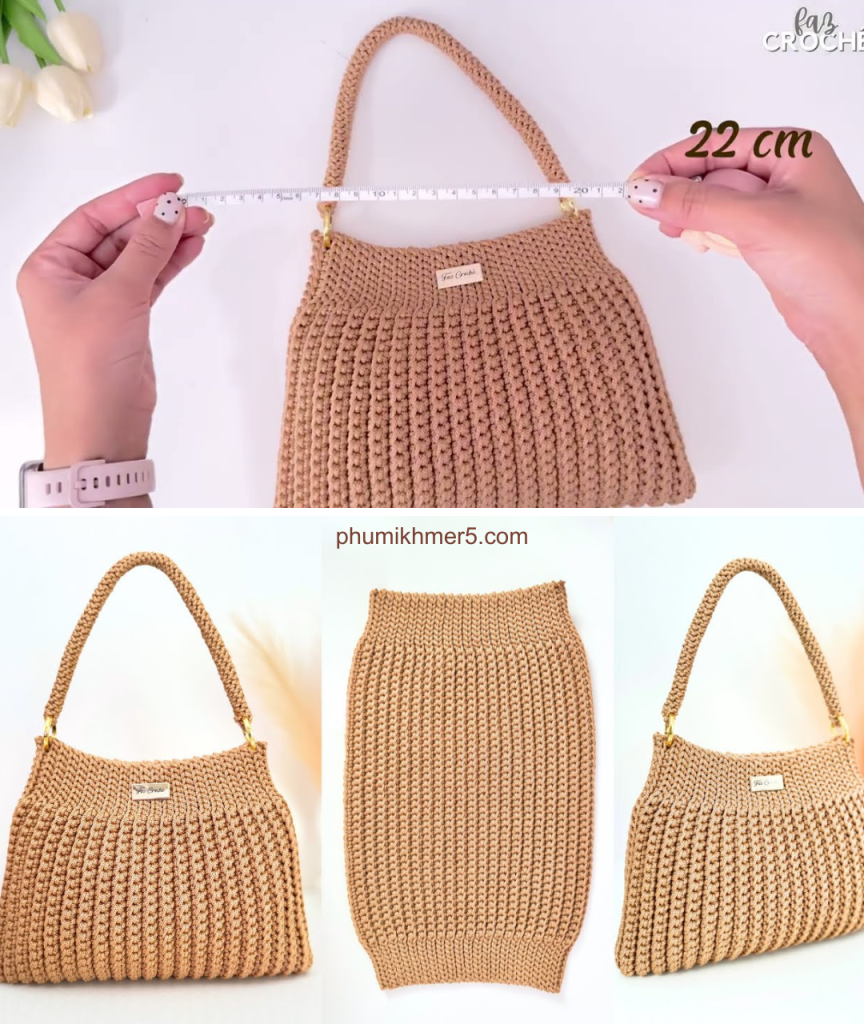
Part 3: The Structured Handle
The handle is a sturdy, dense spiral cord created using a continuous slip stitch technique.
Step 7: Creating the Spiral Cord
- Hook Change: Switch to the 4.5 mm hook for a tighter cord.
- Initial Setup:
- Make a loose slip knot (do not tighten).
- Ch 3.
- Continuous Spiral:
- Work a Sl St into the loose slip knot to start the loop.
- Rotate the cord slightly. Insert the hook under the next available side loop/strand that appears on the edge of the cord.
- Work a Sl St through this loop.
- Repeat: Continue rotating the cord and working a Sl St into the next available side loop. This process creates a tight, round spiral.
- Length: Continue until the handle measures approximately 40 cm (15.75 inches).
- Finishing:
- Cut the yarn, leaving a tail.
- Use a tapestry needle to thread the tail through the final loops to close the opening and secure the cord.
- Trim and carefully seal the ends of the cord with a lighter.
Step 8: Final Assembly
- Attach Hooks: Slide one 3 cm carabiner snap hook onto each end of the finished handle.
- Connect to Bag: Clip the carabiner hooks to the sturdy top edge of the bag, near the side seams.
Enjoy your beautiful, quick, and structured Teresa Bag!
Video tutorial: