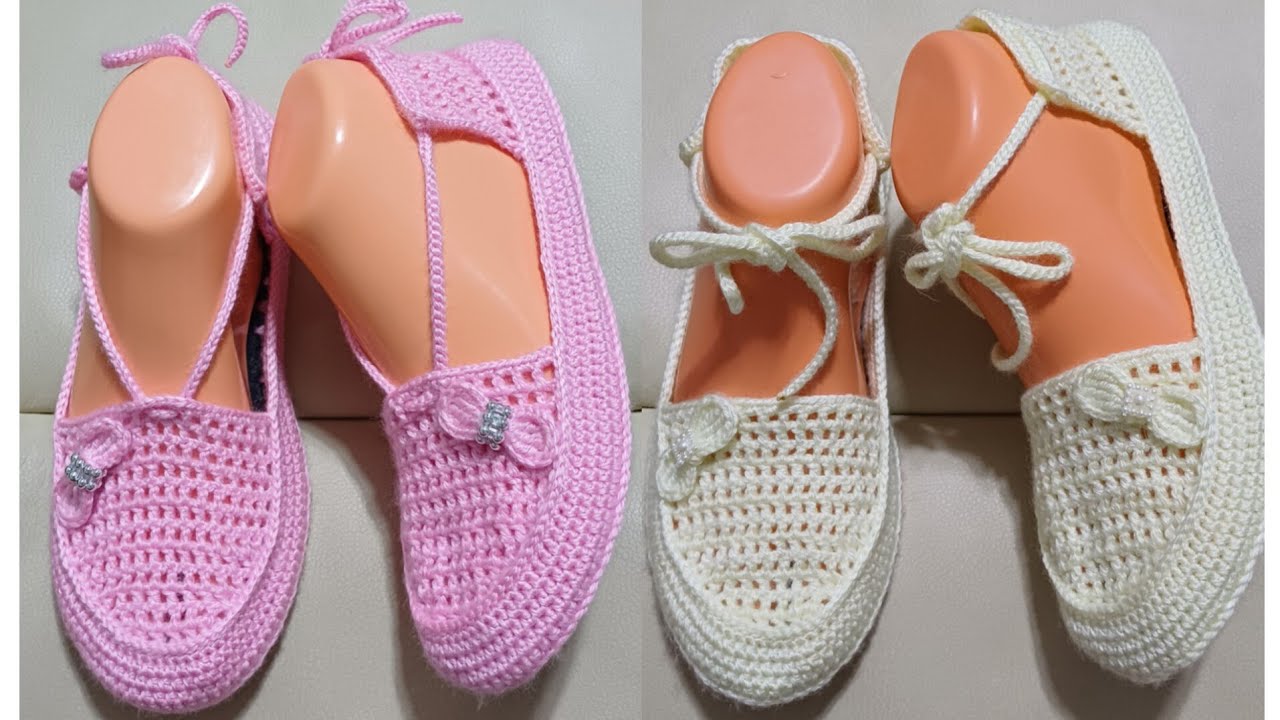
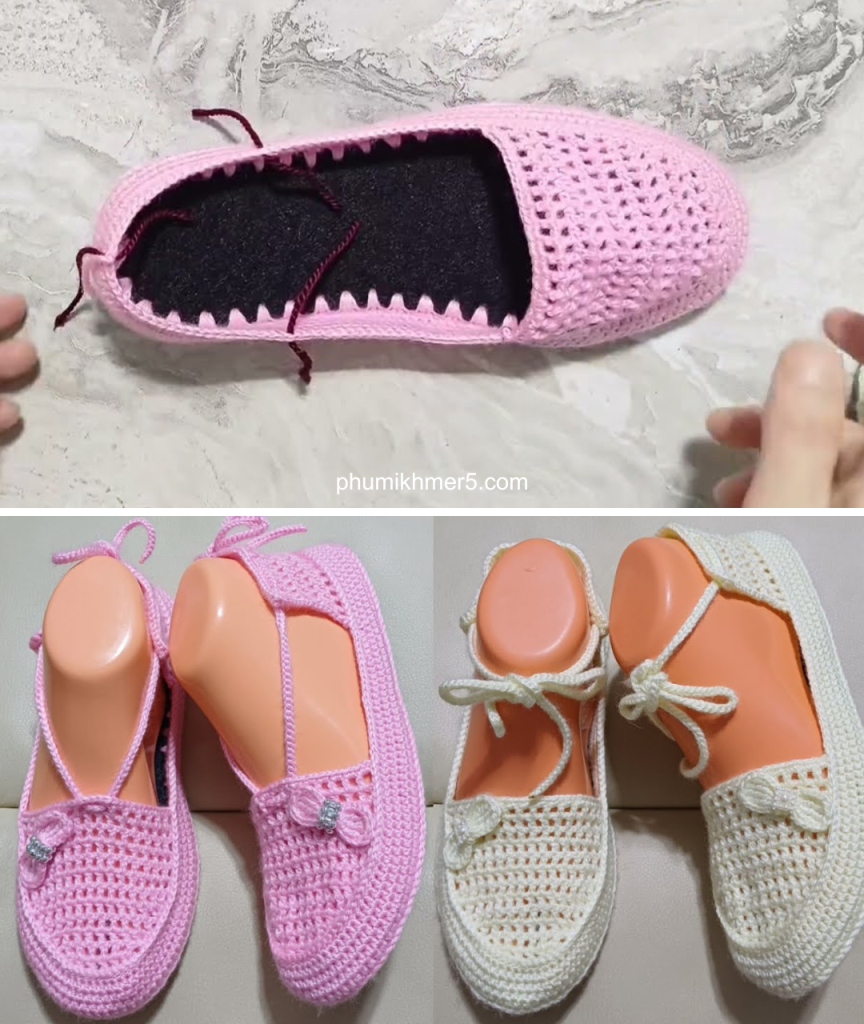
Hello, comfortable crafters and summer sock enthusiasts! Are you ready to create the perfect cozy footwear for warmer weather? I am excited to share the pattern for the Artisan Lattice Summer Slipper—a chic, sandal-style ankle bootie featuring an openwork filet mesh and an optional decorative lace-up strap.
Inspired by beautiful summer slipper designs worked on a ready-made sole, this pattern combines comfort with style. The use of the filet mesh technique (a simple repetition of double crochet and chain) creates a light, breathable fabric, making it ideal for indoor wear during spring and summer.
Grab your preferred ready-made sole, your softest yarn, and let’s craft a pair of beautiful, custom-fit summer slippers!

Why You’ll Love Crocheting These Slippers:
- Light & Breathable: The simple chain-and-double-crochet lattice creates an open, cool fabric perfect for summer.
- Ready-Made Sole: Starting with a finished sole (pre-punched or crocheted) ensures comfort and durability.
- Modular Construction: The pattern is divided into logical sections (Cuff, Toe, Heel) for easy tracking.
- Custom Sizing: The height and width can be easily adjusted by changing the number of increasing rows or the total row count.
Materials & Notions
- Sole: A pair of ready-made foam or plastic soles, pre-punched for crochet (e.g., 37/38 EU size, or your size). Alternatively, you can crochet a dense sole base.
- Yarn: Approximately 100-150g of Sport Weight (#2) or DK Weight (#3) yarn. A soft, durable cotton blend is recommended for comfort.
- Hook:
- Sole Edging: A smaller hook (e.g., 2.0 mm) for the sole edging.
- Slipper Body: Your main hook (e.g., 3.0 mm), or size needed for gauge.
- Notions: Tapestry Needle, Scissors, Stitch Markers (essential for marking the center toe and heel).
- Optional: Approximately 90 inches (230 cm) of chain-stitched cord for the lace-up detail.
Essential Crochet Abbreviations
| Abbreviation | Description |
| ch | chain |
| st(s) | stitch(es) |
| sl st | slip stitch |
| sc | single crochet |
| hdc | half double crochet |
| dc | double crochet |
| BLO | back loop only |
| sk | skip |
The Pattern: Artisan Lattice Summer Slipper
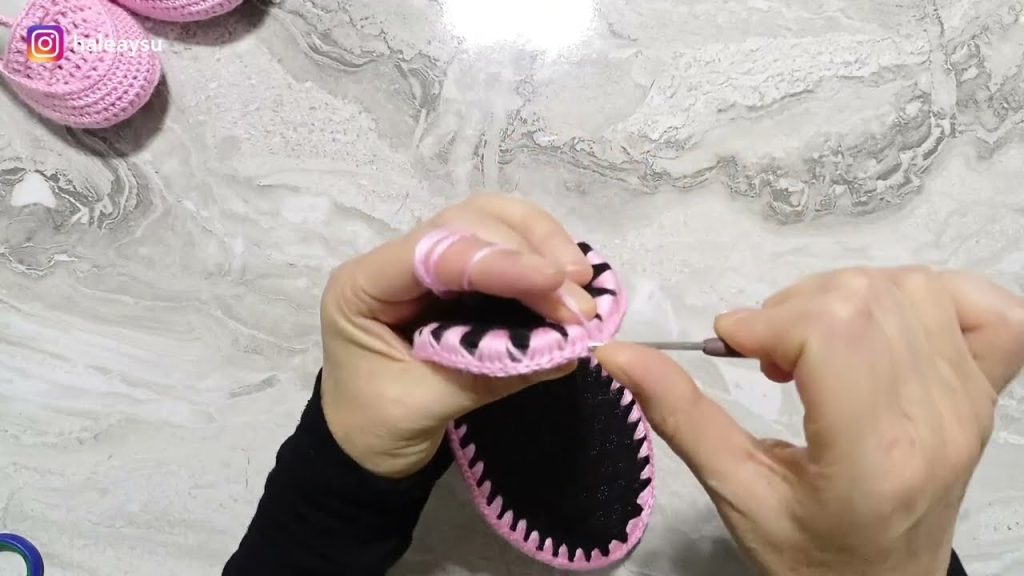
This pattern assumes you have already pre-tatted (crocheted a SC border) around your ready-made sole.
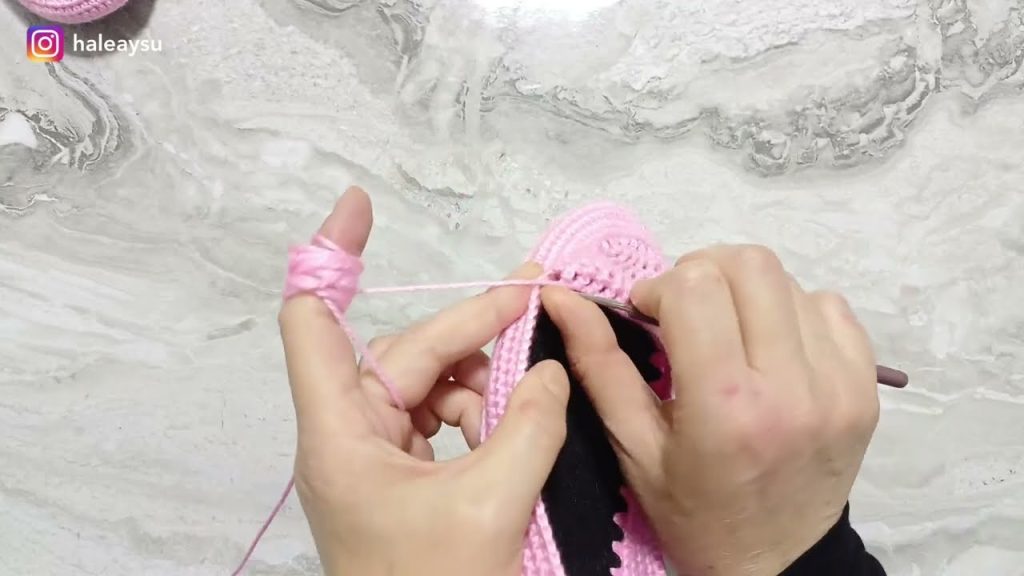
Part 1: The Base Cuff (Inner Slipper)
This section is worked in rounds along the perimeter of the sole, using the Inner Loop Only of the stitches from the tatted edge.
- Preparation: Sl st around the entire perimeter of the sole using the inner loop of the tatted edge, joining back to the starting point. (This creates a clean foundation and leaves the outer loop for final edging later).
- R1 (Initial Height): Ch 1, turn. Hdc in the inner loop of the first st. Hdc in the inner loop of every st around. Join with sl st to the first hdc.
- R2-R5 (Initial Height): Ch 1, turn. Work 4 rows of Hdc around, working into the inner loop (BLO) of each stitch. This creates the ribbing texture for a flexible cuff. (You can substitute these 4 rows with SC if you prefer a tighter fit, as shown in the video).
- R6 (Mesh Setup): Ch 1, turn. Sc in the first st and in every st around. Join with sl st to the first sc.
Part 2: Marking the Toe & Heel
Before starting the lattice, find the exact center of your slipper (this should be the stitch directly on the sole’s midpoint).
- Center Toe: Mark the center stitch on the front/toe area. Count out 6 stitches to the left and 6 stitches to the right of the center stitch. Place markers on the 7th stitch on each side. (Total 13 stitches for the toe shaping area).
- Center Heel: Mark the center stitch on the back/heel area. This will be your joining point.
Part 3: The Toe Shaping (Lattice Mesh)
The lattice pattern is worked in turned rows across the front of the foot, turning back before reaching the heel area.
Start Row (Right Side): Attach yarn at the second marker (6th stitch from center).
- Row 1 (Lattice): Ch 3 (counts as dc), turn. Dc in the next st (the marker st).
Ch 1, sk 1 st, dc in the next st (FPDC).Rep this sequence across the 13-stitch toe area.- You should end with
dc in the st before the marker st. (You will have 5 open lattice spaces).
- Row 2 (Increase): Ch 3 (counts as dc), turn. Dc in the first dc.
Ch 1, sk ch-1 space, dc in the next dc.Rep across.- In the last st (the turning chain of R1), work:
dc 1, ch 1, dc 1. (2 increases: one at each edge).
- Row 3 (Increase): Ch 3, turn. Dc in the first dc.
Ch 1, sk ch-1 space, dc in the next dc.Rep across.- In the last st (the turning chain of R2), work:
dc 1, ch 1, dc 1. (2 increases).
- Row 4 (Increase): Ch 3, turn. Dc in the first dc.
Ch 1, sk ch-1 space, dc in the next dc.Rep across.- In the last st (the turning chain of R3), work:
dc 1, ch 1, dc 1. (2 increases).
Shaping Check: You should have increased the width significantly, reaching approximately 13-15 lattice spaces across the widest part of the toe.
Part 4: Straight Body Rows
This section works straight, without increases, to cover the arch of the foot.
- Row 5 – Row 10 (or until desired length): Ch 3, turn. Dc in the first dc.
Ch 1, sk ch-1 space, dc in the next dc.Rep across. End with dc in the last st.- Stop the straight rows when the mesh reaches the front of your ankle bone (the instep).
Part 5: Joining & Heel (Creating the Sandal Opening)
The remaining rounds will close the slipper by joining the mesh rows to the side and heel band.
- Joining Row: At the end of the last mesh row, instead of turning, sl st into the next available stitch on the main side/cuff band (R6) and continue to sl st into the following 2 stitches. Ch 1, turn.
- Side Extension (SC): Sc back along the top of the lattice mesh row, working 1 sc into each dc and 1 sc into each ch-1 space.
- Continue Heel: Once you reach the other side, sl st into the next available st on the main side/cuff band and sl st into the following 2 stitches. Ch 1, turn.
- Repeat Steps 1-3: Continue this process—working a mesh row across, and joining with 3 sl st on each side of the cuff band—until you reach the center heel stitch.
- Final Heel Join: Work the last mesh row and sl st directly to the center heel stitch (the second marker from Part 2).
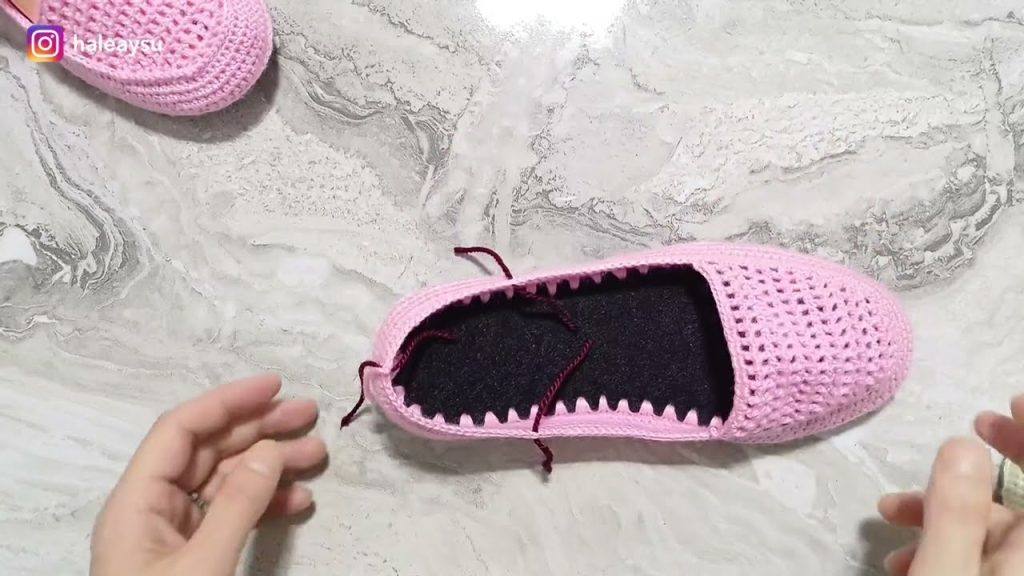
Part 6: Final Edging & Straps
- Top SC Edging: Ch 1, work 1 round of SC around the entire ankle opening (including the top edge of the lattice mesh and the heel band).
- Lace-Up Detail (Optional):
- Count 7 cells (ch-1 spaces) back from the center toe on the top edge of the lattice.
- Using a contrasting color, sc in the ch-1 space. Ch 1. Sc in the next ch-1 space.
Ch 5, sk 3 sc.Rep around the ankle opening to create small eyelet loops. - Weave the long 230-chain cord in and out of these eyelet loops around the ankle for a decorative, adjustable finish.
Final Step: Fasten off and weave in all ends securely. Repeat the entire process for the second slipper.

Your Artisan Lattice Summer Slippers are now ready—an elegant, breezy, and comfortable addition to your warm-weather wardrobe!
Video tutorial: