
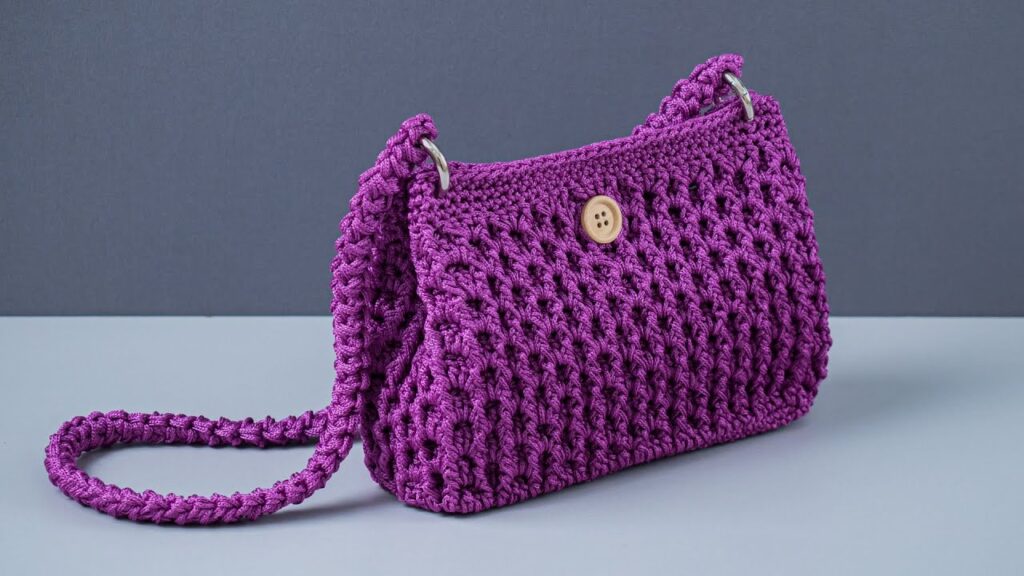
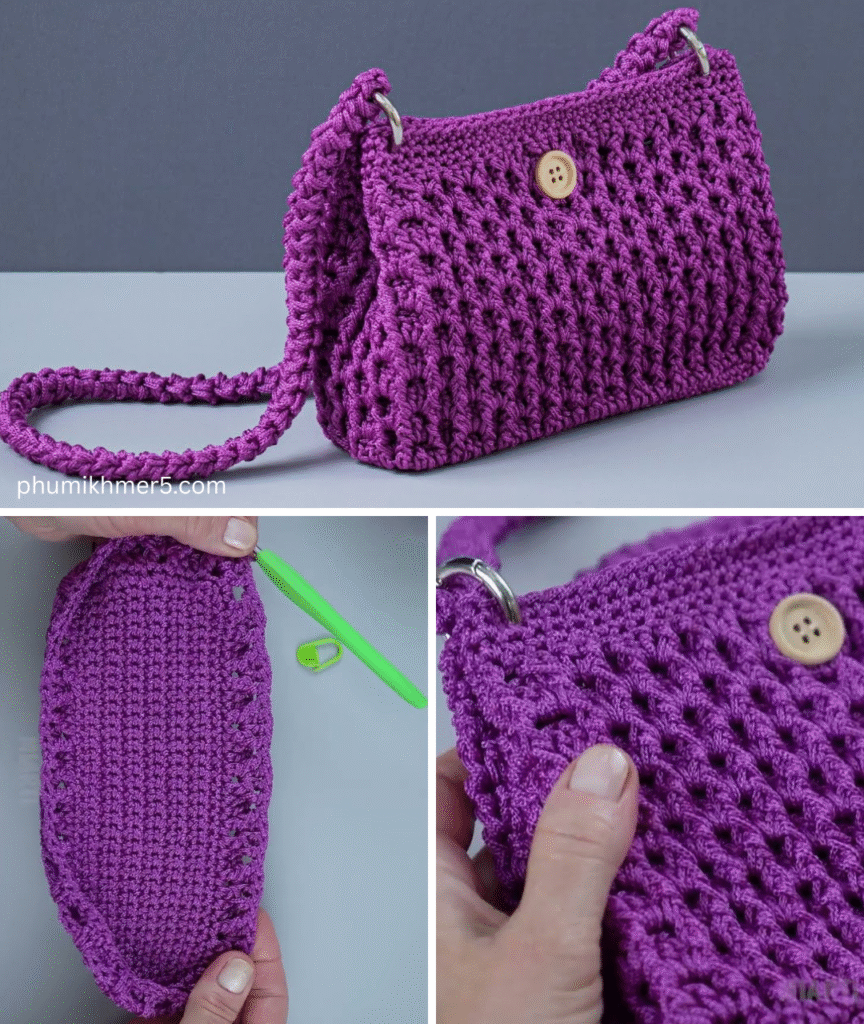
Crochet bags are a great DIY project that combine creativity with practicality. Whether you’re new to crocheting or looking for a quick and easy project, this tutorial will guide you through creating a simple and stylish bag from start to finish.
🧰 Materials You’ll Need
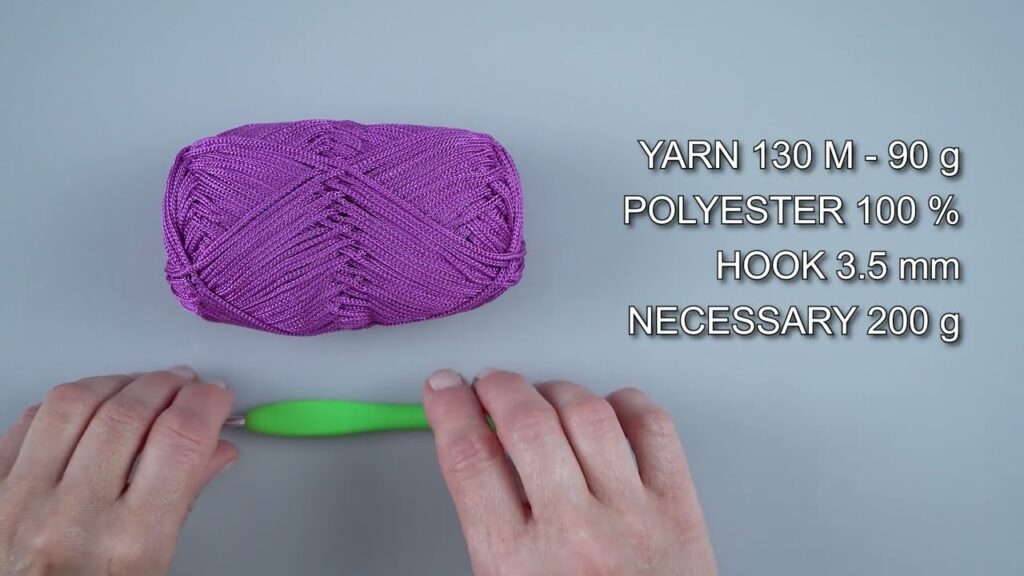
Before you start, gather the following supplies:
- Yarn: Medium weight (worsted weight) cotton yarn is ideal. Choose a durable fiber like 100% cotton for a sturdier bag. Approx. 200–300 yards.
- Crochet hook: 5.0 mm (H-8) or size suitable for your yarn.
- Scissors
- Yarn needle (for weaving in ends)
- Stitch markers (optional, but helpful)
- Bag handles (optional, if not crocheting handles)
📏 Bag Dimensions (Adjustable)
- Width: 10–12 inches (25–30 cm)
- Height: 10–12 inches (25–30 cm)
- Strap length: 20–30 inches (adjustable)
🧵 Basic Stitches Used
- Chain (ch)
- Slip Stitch (sl st)
- Single Crochet (sc)
- Half Double Crochet (hdc) (optional for texture)
- Double Crochet (dc) (optional for more openness)
If you’re new to these, I can provide a guide or video reference for each.
🪢 Step-by-Step Instructions
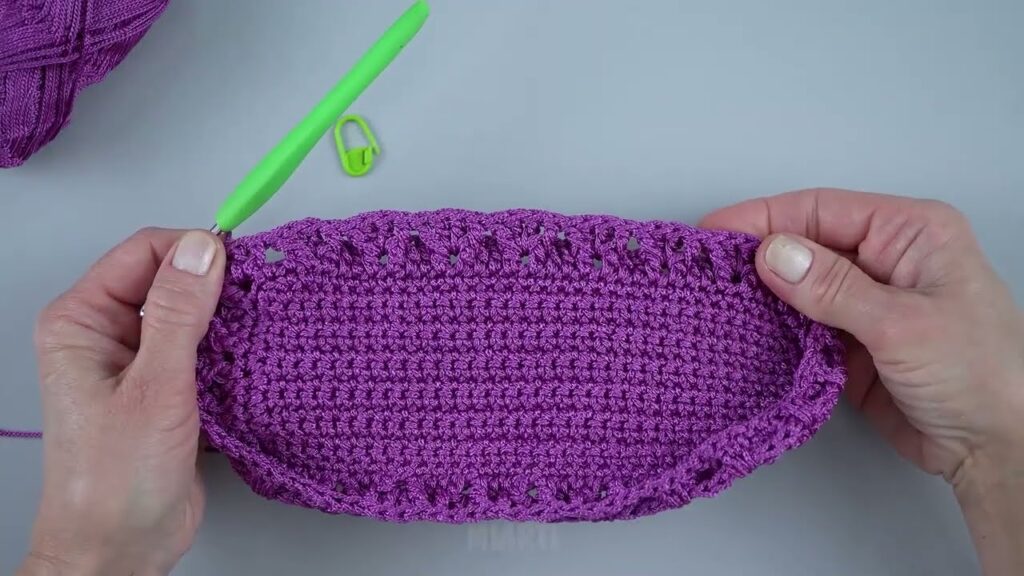
🥇 Step 1: Make the Base (Rectangle or Oval)
For a rectangular base:
- Chain 31 (for a 10” base; adjust length as needed).
- Row 1: Single crochet (sc) in the second chain from the hook and in each chain across. (30 sc)
- Row 2-10: Chain 1, turn. Sc in each stitch across.
- You should now have a rectangle roughly 10” x 3”.
TIP: For a flat bottom, continue until the width is your desired base depth.
🥈 Step 2: Build the Body of the Bag
- Turn the rectangle into a 3D base by crocheting around the perimeter:
- Chain 1, sc evenly around all four sides of the rectangle, placing 3 sc in each corner.
- Join with a slip stitch to the first sc.
- Begin working in the round:
- Do not turn your work.
- Continue sc (or hdc for a thicker texture) around the edge of the base.
- Repeat for 20–25 rounds, or until your desired bag height.
Optional: Add a pattern by alternating between sc and dc rows for texture.
🥉 Step 3: Add Handles or Straps
Option A: Crochet Handles (Built-In)
- From your last round of the body, decide the placement of the straps (e.g., 20 stitches apart).
- Round with handle gaps:
- Crochet to the strap location.
- Chain 30 (or more for longer handles), skip 15 stitches, then continue crocheting around.
- Repeat on the other side for a second handle.
- Next round:
- Crochet into each chain to reinforce the strap.
- Continue around for 2–3 more rounds for extra strength.
Option B: Add Store-Bought Handles
- Sew on leather, wooden, or rope handles using a yarn needle and matching yarn or thread.
🧼 Step 4: Finishing Touches
- Fasten off the yarn and cut, leaving a 6-inch tail.
- Use a yarn needle to weave in all ends neatly.
- Block your bag (optional): Spray lightly with water, shape it, and let it dry for a more polished look.
🌟 Optional Customizations
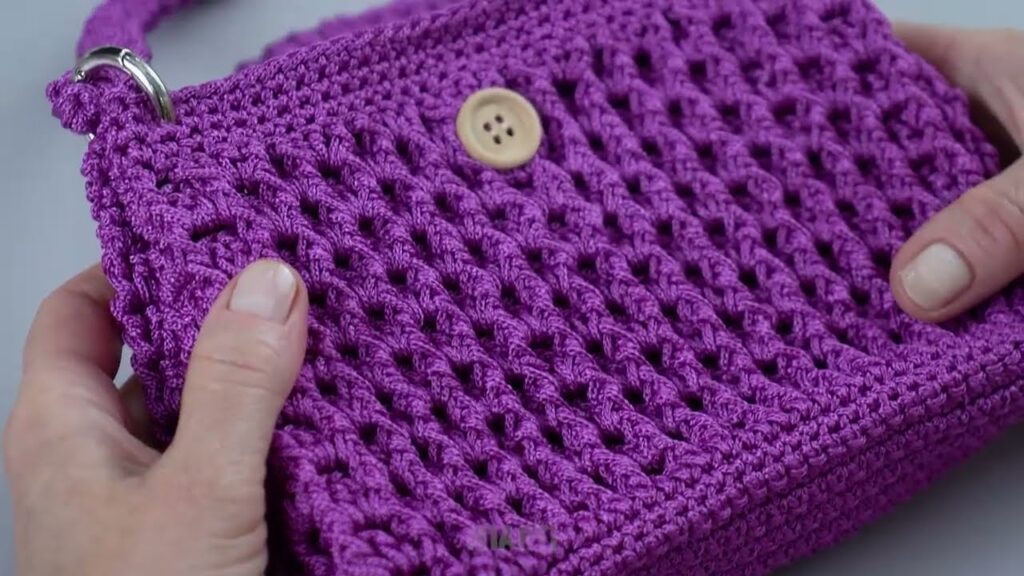
- Add a button or magnetic snap for closure.
- Line the inside with fabric (sew with a machine or by hand).
- Embroider initials, flowers, or a patch.
- Use multi-color yarn or create stripes.
🎉 Final Thoughts
This easy crochet bag project is perfect for beginners who want to practice basic stitches and construct something functional. You can scale it up for a beach bag or make it smaller for a child’s purse.
Video tutorial:


