
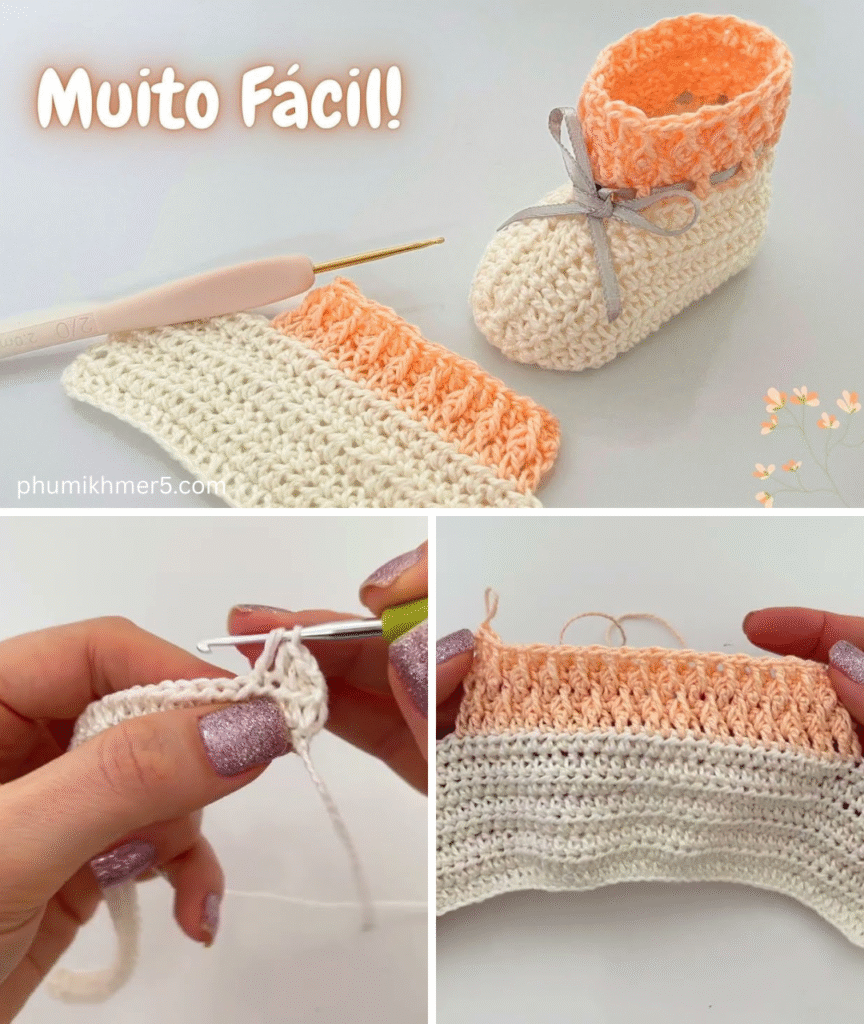
Crochet shoes are a cozy, functional, and stylish project for crocheters of all levels. They’re perfect as house slippers, lounging footwear, or casual indoor shoes. With just a few basic stitches and some soft yarn, you can create a beautiful and practical pair of crochet shoes in no time.
This tutorial will guide you through making a basic adult crochet shoe/slipper that you can customize in color, size, and style.
📏 Finished Size
This basic pattern is designed for women’s shoe size 7–8 (US) but includes tips on how to adjust for any size.
🧰 Materials You’ll Need
- Yarn: Medium weight yarn (worsted weight / Category 4), approximately 150–200 yards
- Crochet hook: 5.0 mm (H-8) or as recommended by yarn label
- Scissors
- Yarn needle (for weaving in ends)
- Stitch markers (optional)
- Non-slip sole grips or felt (optional for traction)
🧵 Stitches & Abbreviations Used
- ch – chain
- sl st – slip stitch
- sc – single crochet
- hdc – half double crochet
- dc – double crochet
- sc2tog – single crochet decrease
- BLO – back loop only
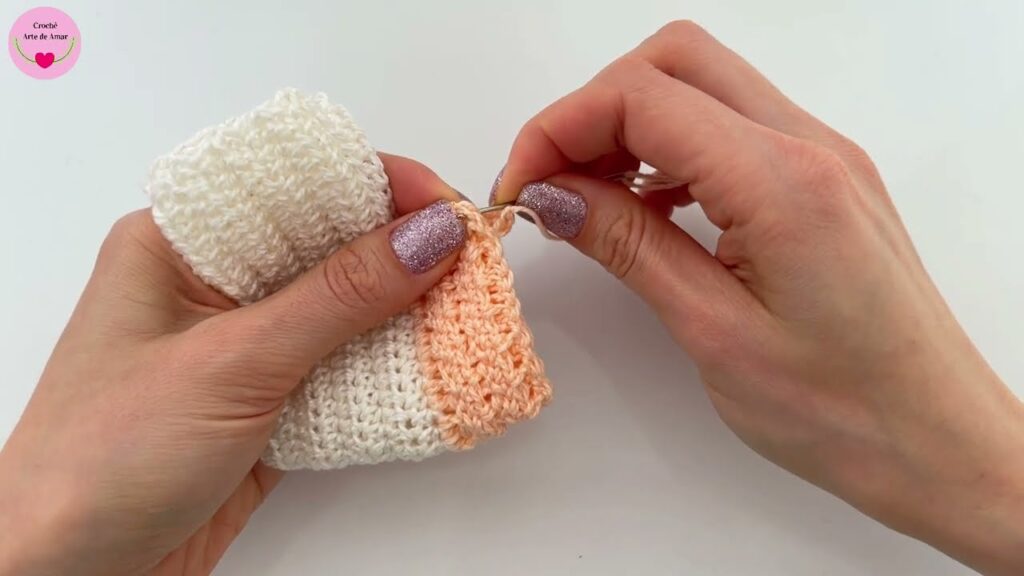
👣 Step-by-Step Instructions
🥇 Step 1: Make the Sole (Using Basic Oval Shape)
- Ch 12 (for medium adult size; add/subtract 2 chains to adjust for size).
- Round 1:
- Sc in 2nd ch from hook, sc in next 9, 3 sc in last ch.
- Rotate your work and continue on the opposite side of chain: sc in next 9, 2 sc in the last st. (24 sts)
- Sl st to join.
- Round 2:
- Ch 1. Sc in each st around, putting 2 sc in each of the 3 corner sts on both ends of the sole to expand the oval.
- Sl st to join. (Approx. 30–32 sts)
- Round 3:
- Repeat increases at the curve ends to keep the oval flat. You should end with ~36–38 sts.
✅ Tip: Try the sole against your foot or use a paper cutout to check the size. Add more rounds if needed.
🥈 Step 2: Build the Shoe Sides (Upper Body)
- Round 4:
- Work in BLO (back loop only) and sc around.
- This creates a clean edge and turns your sole into a shoe base.
- Round 5–8:
- Work regular sc (or hdc if you want more height) around.
- Sl st to join each round.
👟 Optional: For a snugger fit, reduce a few stitches evenly across the round by using sc2tog (single crochet two together).
🥉 Step 3: Shape the Front (Top of the Foot)
- Find the center front of the shoe. Use stitch markers if needed.
- Start a row across the top 10–12 stitches at the front to build the toe area:
- Row 1: Attach yarn at one side, sc across 10–12 sts.
- Row 2–5: Ch 1, turn, sc across.
- Row 6: Start decreasing (sc2tog at both ends).
- Continue until the toe section is gently rounded. Fasten off and leave a long tail.
- Sew the toe top down to the front of the shoe body using your yarn needle and whip stitch.
👣 If you prefer an open-toe or slipper style, skip this top flap and just add edging.
🧶 Step 4: Add Heel or Back Strap (Optional)
- Option A: Leave as a slipper.
- Option B: Crochet a back heel:
- Attach yarn at back side, ch 1.
- Sc across 8–10 stitches at heel area.
- Continue 4–6 rows, decreasing slightly if needed, to form a snug heel.
- Sew edges together at the top of heel.
✨ Step 5: Add Edging & Customization
- Add a decorative edge around the ankle using a round of reverse sc (crab stitch) or slip stitches.
- Optional: Add a button, strap, bow, or pom-poms.
💡 Sizing Tips
- For smaller sizes: Start with fewer chains for the sole.
- For larger sizes: Add more foundation chains or rounds in the sole.
- Adjust the height of the shoe body by adding/removing rows.
🎁 Optional Add-Ons
- Soles: Add felt or silicone grip pads to the bottom for safety and durability.
- Lining: Sew in a fabric liner for comfort and a polished look.
- Insoles: Insert memory foam cutouts for added support.
🧶 Final Thoughts
These easy crochet shoes are a fantastic project for beginners and a quick win for experienced crocheters. With only basic stitches, you can craft a cozy, handmade shoe perfect for lounging or gifting.
Once you’ve mastered the basics, you can explore more designs like:
- Mary Jane crochet slippers
- Flip-flop sole crochet shoes
- Baby or toddler size variations
- Boot-style crochet slippers
Happy Crocheting! 🧵
Video tutorial:


