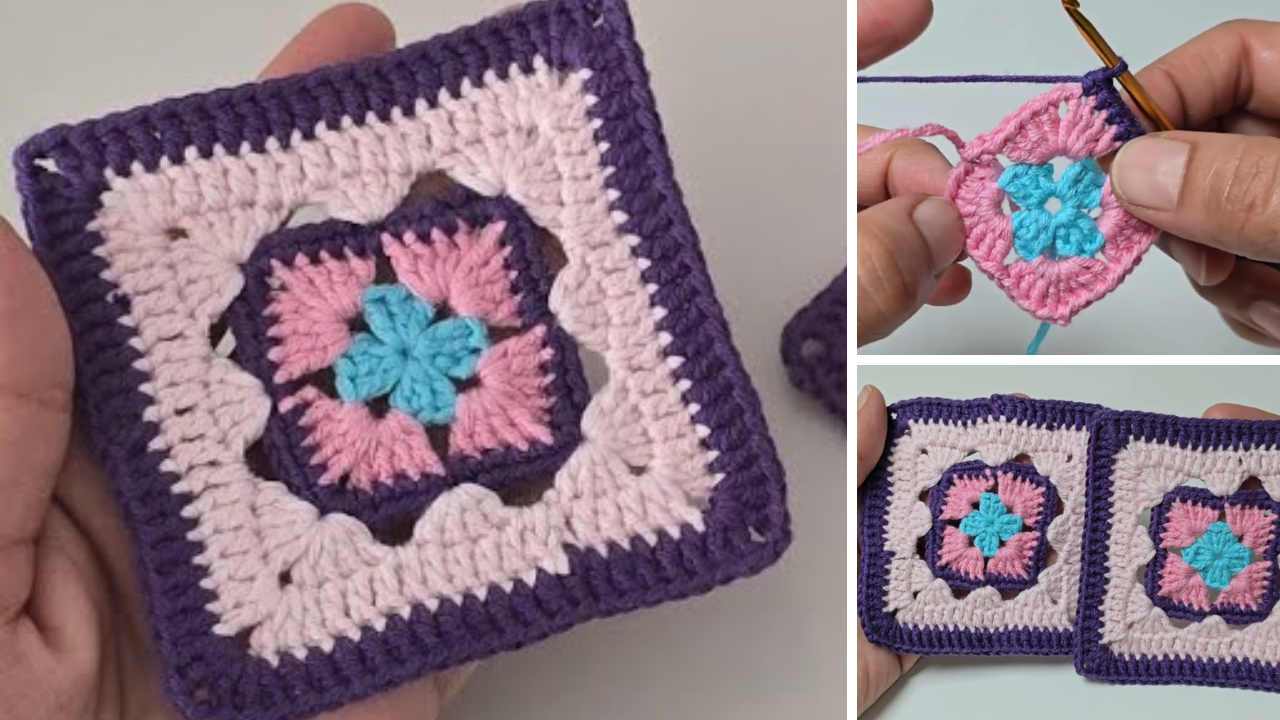
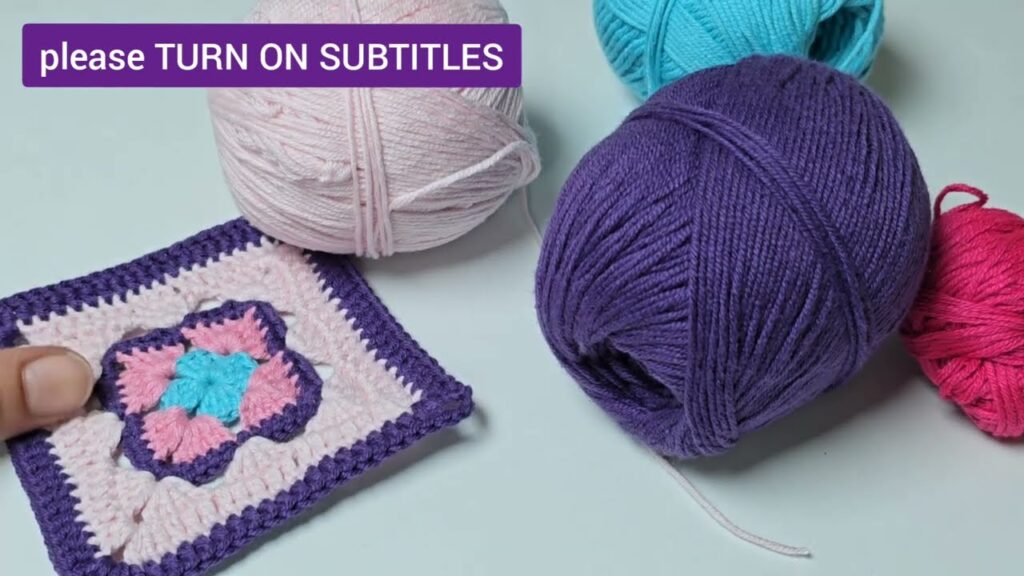
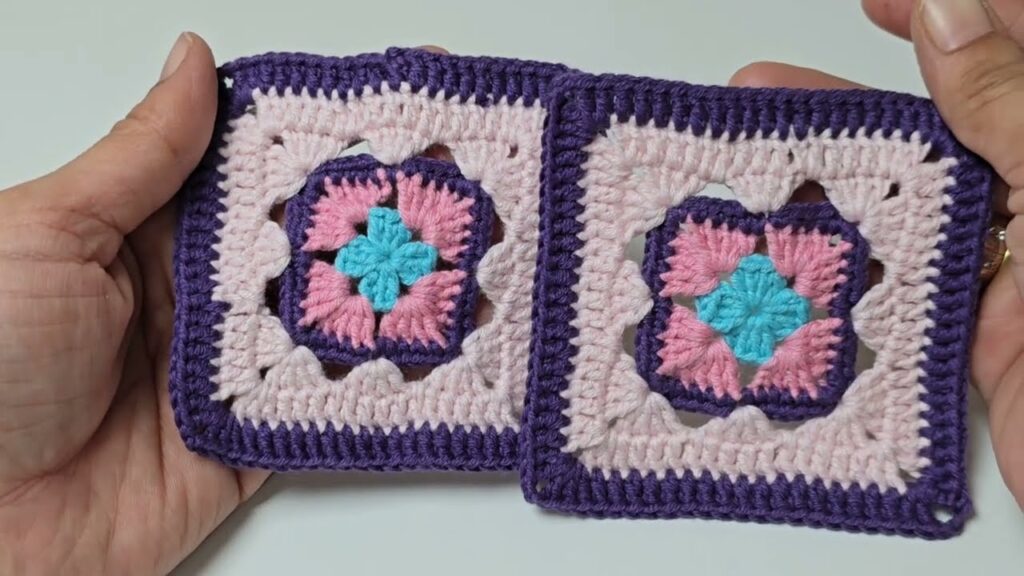
The granny square: humble, iconic, and often one of the first stitches a crocheter learns. But beyond the traditional blanket, this versatile little square holds a universe of creative possibilities! If you’re looking to move beyond the expected and infuse your projects with personality, it’s time to explore some truly unique granny square crochet ideas.
Whether you’re a seasoned crocheter looking for a fresh challenge or a beginner eager to see the full potential of your newfound skill, these ideas will inspire you to transform the classic granny into something utterly adored.
Why the Granny Square Still Charms
Before diving into unique applications, let’s appreciate what makes the granny square so beloved:
- Versatility: It’s a modular unit, meaning you can join many small pieces to create larger, complex designs.
- Yarn Buster: Perfect for using up small amounts of leftover yarn in a riot of color.
- Portable: Easy to work on a few squares at a time, making it a great on-the-go project.
- Beginner-Friendly: Its repetitive nature makes it easy to learn and master.
- Timeless Appeal: It has a nostalgic charm that never truly goes out of style.
Unique Granny Square Project Ideas
Move beyond the traditional throw with these inspiring applications:
1. Geometric Wearables: Modernizing the Classic
Forget shapeless, bulky garments. Modern granny squares can be cleverly arranged to create stunning, structured wearables.
- The “Granny Hexagon” Cardigan/Sweater: Instead of squares, learn to crochet a granny hexagon. Two large hexagons, folded and joined, magically form the body and sleeves of a comfortable, stylish cardigan or sweater. It’s surprisingly simple and creates a beautiful drape.
- Color Block Tops: Design a top where granny squares form distinct color blocks or geometric patterns on the front, back, or sleeves. Think solid color blocks mixed with a few intricately colored squares for pops of interest.
- Statement Jackets: Piece together a vibrant, eclectic granny square jacket. This is a fantastic way to showcase a variety of squares and colors, creating a truly unique outerwear piece. Mix traditional grannies with solid squares or different textured squares for a bespoke look.
- Boho Vests: A simple vest constructed from a few large granny squares for the back and smaller ones for the front panels can add a touch of bohemian chic to any outfit.
2. Functional & Chic Accessories: Small Squares, Big Impact
Granny squares are perfect for turning into everyday items that add a handmade touch to your life.
- Crossbody or Tote Bags: The density and structure of granny squares make them ideal for bags. Use a tight join and perhaps even line the bag for extra durability. Experiment with different granny square sizes for the body and flap, or create a unique pattern with mini grannies.
- Laptop/Tablet Sleeves: Protect your tech in style. Construct a snug sleeve using a repeating granny square pattern, possibly adding a simple button or flap closure. The thickness of the granny square provides natural padding.
- Boho Headbands/Hair Scarves: A long strip of joined granny squares can make a unique headband or a stylish hair tie. Mini grannies (just a few rounds) are perfect for this.
- Sunglasses Cases: A quick and easy project! Crochet two small granny squares and join them along three sides to create a soft, protective pouch for your glasses.
- Coasters & Trivets: Go beyond the basic square. Try hexagonal grannies or even join four small grannies for a larger, more decorative trivet. Use cotton yarn for heat resistance.
3. Home Decor with a Twist: Beyond the Blanket
While blankets are classic, granny squares can bring charm to every corner of your home.
- Pillow Covers with Texture: Combine traditional granny squares with squares featuring different textures (like bobble stitch grannies or solid grannies) for a tactile, inviting pillow cover.
- Wall Hangings/Tapestries: Create a statement piece by joining a large array of granny squares in a compelling color palette. Add fringe or tassels for a bohemian vibe. You can even experiment with “stained glass” grannies by using black yarn for the outlines.
- Storage Baskets: By working granny squares in the round to form a cylinder, or joining square panels, you can create surprisingly sturdy storage baskets. Use a tighter stitch and a larger hook/thicker yarn for more rigidity.
- Curtains or Room Dividers: For a truly ambitious project, crochet a series of large, openwork granny squares and join them to create light-filtering curtains or a unique room divider. This adds a fantastic element of texture and color.
- Potted Plant Cozies: Dress up your houseplants! Crochet a simple granny square long enough to wrap around your pot, then join the ends.
Tips for Unique Granny Square Projects
- Experiment with Color: Don’t be afraid to try unusual color combinations. Ombré, gradient, neon pops, or muted monochrome can completely change the feel of a granny square.
- Vary the Stitch: The classic granny is 3 DC, Ch 1. But try solid grannies (working SC or HDC in each stitch), bobble grannies, puff stitch grannies, or even lacy grannies to add texture and interest.
- Join Matters: How you join your squares can dramatically alter the final look. Experiment with:
- Slip Stitch Join: Creates a neat, almost invisible seam.
- Single Crochet Join: Creates a visible, raised seam that can add a design element.
- Join-as-You-Go (JAYG): Connects squares as you crochet them, saving time and creating a continuous look.
- Blocking is Your Friend: Especially for wearables or structured items, blocking your finished squares (and the final piece) will help them lie flat, even out stitches, and give your project a professional finish.
- Think Outside the Square: While “granny square” implies a square, the same stitch pattern can be adapted to hexagons, triangles, or even circles, opening up even more design possibilities.
The humble granny square is a powerhouse of potential, far beyond the traditional blanket. By pushing the boundaries of its application and experimenting with colors, stitches, and arrangements, you can create truly unique and adored crochet pieces. So grab your hook, dive into your yarn stash, and let your imagination transform the classic granny into your next favorite creation!
How to Crochet a Granny Hexagon Cardigan: The Magical Transformation!
The granny hexagon cardigan is a brilliant crochet garment because of its clever, simple construction. You’ll make two identical granny hexagons, fold them, and join them in a way that creates the body and sleeves of a cardigan. It’s a fantastic project for using up yarn scraps, creating stunning color combinations, or working with self-striping yarn for an effortless gradient effect.
Understanding the Magic: How It Works
Imagine a hexagonal “star” made of granny stitches. When you fold this hexagon in half, two of its six sides become the armhole, one side becomes half of the back, and the remaining three sides form the front opening. Do this twice, then join the two halves down the back and across the top of the shoulders, and voilà – you have a cardigan!
1. Planning Your Granny Hexagon Cardigan: Size & Yarn
The beauty of this project is its adaptability.
- Sizing: This pattern is highly customizable. The size of your finished hexagon directly relates to the size of your cardigan.
- Small/Medium: Aim for a hexagon that measures approximately 17-20 inches (43-51 cm) from point to point (across the widest part).
- Medium/Large: Aim for 20-23 inches (51-58 cm) from point to point.
- Larger Sizes: Continue adding rounds until the hexagon reaches the desired measurement for the wearer.
- Trial & Error: The best way to size is to try on one folded hexagon! Fold it in half. The folded edge should comfortably span from your wrist (where the sleeve cuff will be) to your hip/waist (where the back will be). The open V-shape should fit around your armpit.
- Yarn Choice:
- Fiber: Any yarn can work, but acrylic, wool, or a blend are popular choices for their warmth, drape, and stitch definition. Cotton works too, especially for a lighter summer cardigan.
- Weight: DK (Light Worsted / #3) or Worsted Weight (#4) are most common. Bulky yarns can create a very cozy, quick-to-make cardigan.
- Quantity: This will vary greatly depending on your size and yarn weight. For a medium adult size using worsted weight, expect around 1000-1500 yards (915-1370 meters). It’s an excellent stash-buster!
- Colors: This is where the fun begins! Use multiple colors for a classic granny square look, or a single color for a more modern, minimalist design. Self-striping yarn creates automatic color changes.
2. Materials You’ll Need
- Yarn: Your chosen yarn (see above).
- Crochet Hook:
- For DK weight, a 4.0 mm (G-6 US) or 4.5 mm (7 US) hook.
- For Worsted weight, a 5.0 mm (H-8 US) or 5.5 mm (I-9 US) hook.
- Always check your gauge and adjust hook size as needed to achieve your desired fabric density and drape. You generally want a hook size that creates a fabric with nice drape, not too stiff.
- Scissors: For cutting yarn.
- Yarn Needle (Tapestry Needle): For weaving in ends and seaming.
- Stitch Markers (Optional but Helpful): To mark corners if you lose your place.
- Measuring Tape: Essential for checking the size of your hexagons.
3. Essential Crochet Stitches (Review)
- Slip Knot
- Chain (ch)
- Slip Stitch (sl st): For joining rounds.
- Double Crochet (dc): The main stitch for granny clusters.
- To make a DC: YO, insert hook, YO, pull up a loop (3 loops on hook), YO, pull through 2 loops, YO, pull through last 2 loops.
4. Making Your Granny Hexagon (Make 2 Identical Hexagons)
The core of your cardigan! Each hexagon is worked in joined rounds. Pattern Note: Ch 3 at the beginning of a round counts as your first DC.
- Foundation Ring: Make a Magic Ring (recommended for a tight center).
- Alternative: Ch 4, sl st to first ch to form a ring.
- Round 1: Ch 3 (counts as 1st dc), 2 dc into the ring, ch 2 (corner).
- (3 dc into the ring, ch 2) 5 more times.
- Sl st to the top of the beginning Ch 3 to join.
- You should have 6 “3-dc clusters” separated by 6 “ch-2 spaces.”
- Round 2: Ch 3 (counts as 1st dc).
- (2 dc, ch 2, 3 dc) all into the first ch-2 corner space from the previous round. (This is your first corner increase).
- Ch 1 (side space).
- (3 dc, ch 2, 3 dc) all into the next ch-2 corner space. Ch 1.
- Repeat from * 4 more times.
- Sl st to the top of the beginning Ch 3 to join.
- You now have 12 “3-dc clusters” and 6 “ch-2 corner spaces.”
- Round 3: Ch 3 (counts as 1st dc).
- (2 dc, ch 2, 3 dc) all into the first ch-2 corner space.
- Ch 1.
- 3 dc into the next ch-1 side space.
- Ch 1.
- (3 dc, ch 2, 3 dc) all into the next ch-2 corner space. Ch 1. 3 dc into the next ch-1 side space. Ch 1.
- Repeat from * 4 more times.
- Sl st to the top of the beginning Ch 3 to join.
- You now have 18 “3-dc clusters” and 6 “ch-2 corner spaces.” Notice that the number of “3-dc clusters” along each side increases by one in each round.
- Subsequent Rounds: Ch 3 (counts as 1st dc).
- (2 dc, ch 2, 3 dc) all into the first ch-2 corner space.
- Ch 1.
- Work (3 dc into next ch-1 side space, ch 1) across the side until you reach the next ch-2 corner space.
- (3 dc, ch 2, 3 dc) all into the next ch-2 corner space. Ch 1. Work (3 dc into next ch-1 side space, ch 1) across the side until you reach the next ch-2 corner space.
- Repeat from * 4 more times.
- Sl st to the top of the beginning Ch 3 to join.
- Continue Repeating: Keep crocheting rounds using this pattern until your hexagon reaches the desired size for your cardigan (refer to the “Sizing” section above). Your hexagon won’t lay perfectly flat, it will naturally ruffle a bit – this is normal and helps it shape into the cardigan!
- Fasten Off after the last round, leaving a long tail for weaving in. Make a second identical hexagon. Weave in all the color change tails as you go or at the end.
5. Assembling Your Cardigan: The Magical Fold
This is where the two hexagons come together.
- Lay Hexagons Flat: Place both finished hexagons flat on a surface. Each hexagon has 6 sides.
- The Fold: Take one hexagon. Fold it in half along one set of opposite points. This creates an “L” shape or a V-shape. One open edge of the “L” will become the arm opening. The longer folded edge will be part of the back and side of the cardigan.
- Positioning:
- Lay both folded hexagons side-by-side.
- The long folded edges will form the top/shoulders and half of the back of your cardigan.
- The V-shaped opening of each folded hexagon will be the armholes.
- The remaining flat edges that aren’t part of the armhole or the initial folded edge will be the front opening of the cardigan.
- Seaming the Back:
- Identify the two long folded edges that will meet to form the back seam of the cardigan.
- Using your yarn needle and a long strand of matching yarn, seam these two edges together. You can use a whip stitch, mattress stitch (for an invisible seam), or even a slip stitch join if you prefer a crocheted seam. Seam from the top of the back (neckline) down to the desired length of the cardigan’s back.
- Stop seaming when the remaining unseamed portion is about 6-8 inches (15-20 cm) from the bottom edge of the cardigan. This will be the bottom opening of your cardigan.
- Seaming the Shoulders:
- Now, identify the top edges of the “L” shape that will form the shoulder seams.
- Seam these edges together, starting from the neckline and going outwards along the top of each “shoulder” until you reach the point where the armhole begins.
6. Finishing Touches: Refine & Customize
Once the basic shape is formed, you can add details to make your cardigan truly unique.
- Weave in All Remaining Ends: This is crucial for a professional-looking finish. Take your time!
- Add Length to the Body (Optional): If your cardigan isn’t as long as you’d like, you can add extra rows to the bottom.
- Join yarn at the bottom back seam. Ch 3 (counts as dc).
- Work granny clusters (3 dc) into each ch-1 space and between each cluster across the entire bottom opening. Work (3 dc, ch 1, 3 dc) into the bottom corner spaces for shaping.
- Work back and forth in rows, turning your work at the end of each row, until you reach your desired length. Fasten off.
- Add Length/Cuffs to Sleeves (Optional): If your sleeves are too short, or you want a tighter cuff.
- Join yarn in the armpit area of one sleeve. Ch 3.
- Work granny clusters (3 dc) into each ch-1 space around the armhole, and work clusters between existing clusters. Join with a sl st to the beginning Ch 3.
- Repeat rounds until sleeves are desired length.
- For a cuff, you can switch to a smaller hook and work a few rounds of single crochet (sc) or half double crochet (hdc) in the back loop only (for ribbing effect) to tighten the opening.
- Add a Front Border/Edging (Optional):
- Join yarn at the bottom corner of one front panel.
- Work a row or two of single crochet (sc) or half double crochet (hdc) evenly around the entire front opening and neckline. This creates a neat, finished edge. You can use a contrasting color or the same color.
- If you want buttonholes, incorporate them into this border by chaining over skipped stitches.
- Blocking (Highly Recommended):
- Even for acrylic, blocking helps set the stitches, evens out any irregularities, and improves the overall drape and fit of your cardigan.
- Wet block (for cotton/wool) or steam block (for acrylic). Gently shape your cardigan to its ideal dimensions and allow it to dry completely.
You’ve now created a unique and stylish Granny Hexagon Cardigan! It’s a fantastic conversation starter and a testament to the versatility of crochet. Enjoy wearing your beautiful, handmade garment!
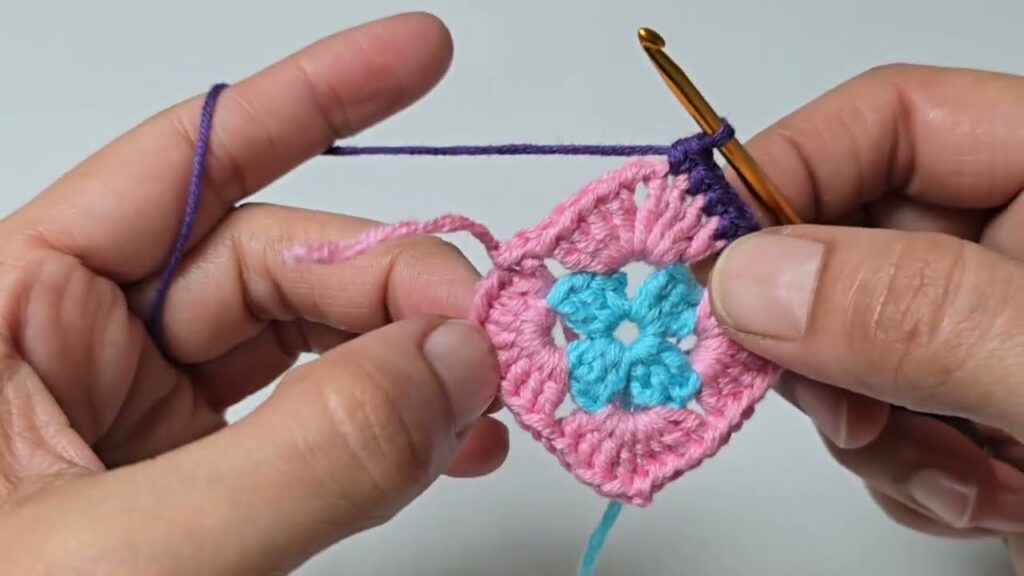
Video tutorial:


