
How to Crochet Cat Stitches: Adding Feline Fun to Your Projects!
Are you a cat lover who also enjoys crocheting? Then you’re in for a treat! “Cat stitches” in crochet aren’t a single, universally defined stitch. Instead, they refer to a delightful variety of techniques and stitch combinations that evoke the playful, adorable, or elegant nature of our feline friends. Whether you want to create realistic cat faces, subtle paw prints, or a textured fabric reminiscent of a cat’s fur, there’s a “cat stitch” out there for you.
This detailed guide will explore several popular ways to crochet “cat stitches,” ranging from simple textured stitches to more intricate designs, so you can infuse your next project with purr-fectly charming feline flair!
Understanding “Cat Stitches” in Crochet
The term “cat stitch” is broad and can encompass:
- Textured Stitches: Stitches that create a bumpy, fur-like, or paw-print texture.
- Colorwork: Using multiple colors to create cat-themed images like faces, silhouettes, or paw prints.
- Appliqués: Crocheting separate cat shapes (heads, bodies, paws) and attaching them to a project.
- Specific Stitch Patterns: Sometimes, a stitch pattern might be named “cat stitch” due to its visual resemblance to cat ears, paw pads, or tracks.
Let’s dive into some specific methods!
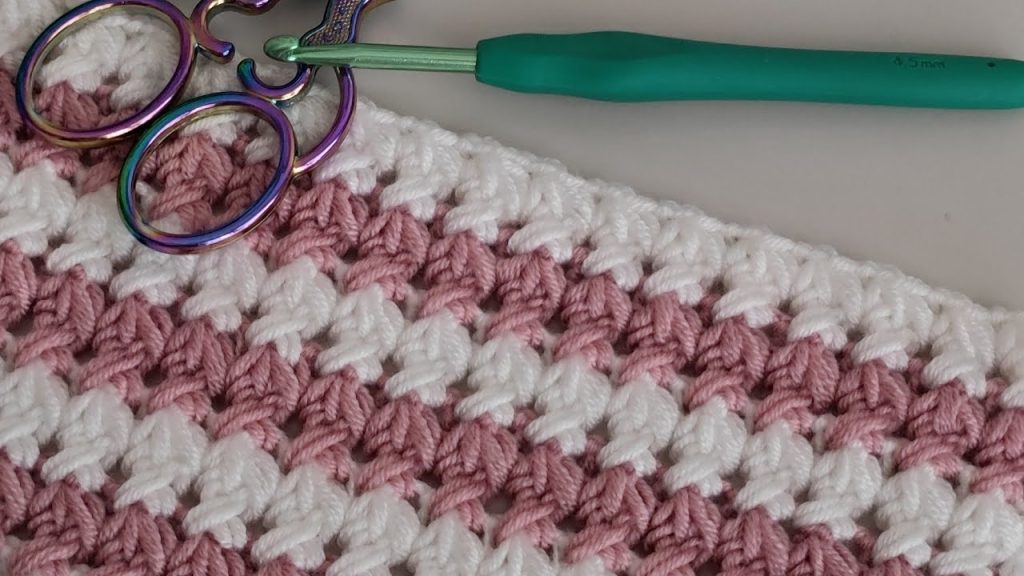
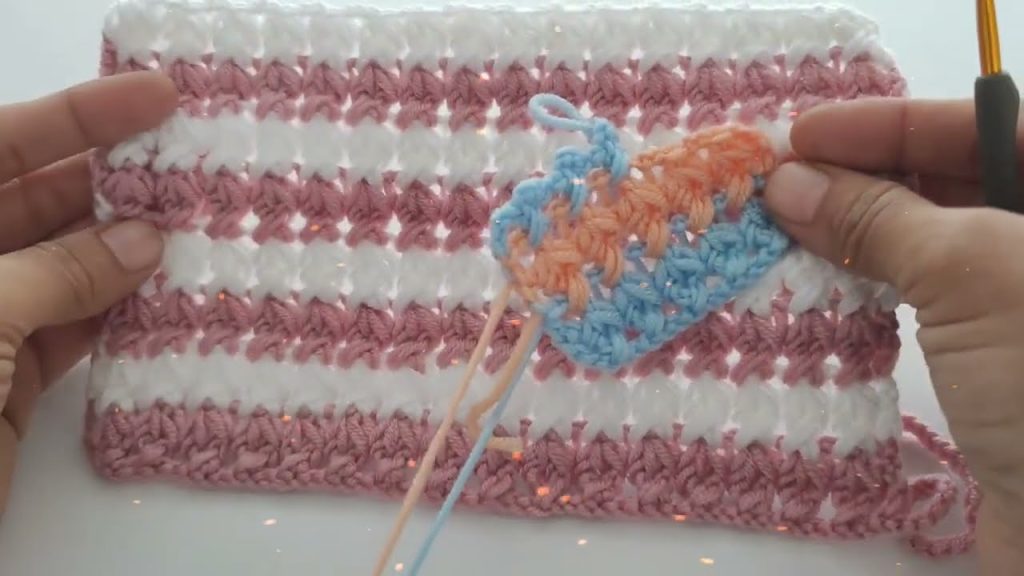
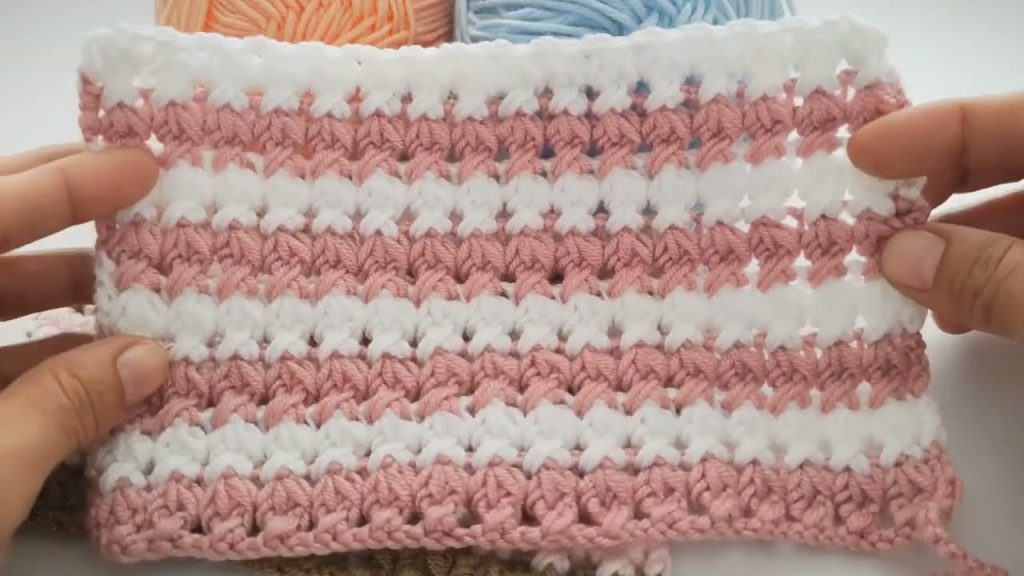
Method 1: The “Paw Print” Stitch (Textured)
This stitch creates a subtle, repeated texture that looks like little paw prints marching across your fabric. It’s fantastic for blankets, scarves, or even cushions.
Skill Level: Easy
Stitches Used:
- Chain (ch)
- Single Crochet (sc)
- Double Crochet (dc)
- Puff Stitch: (YO, insert hook into st, YO, pull up loop) 3 times into the same st (7 loops on hook). YO, pull through all 7 loops. Ch 1 to close.
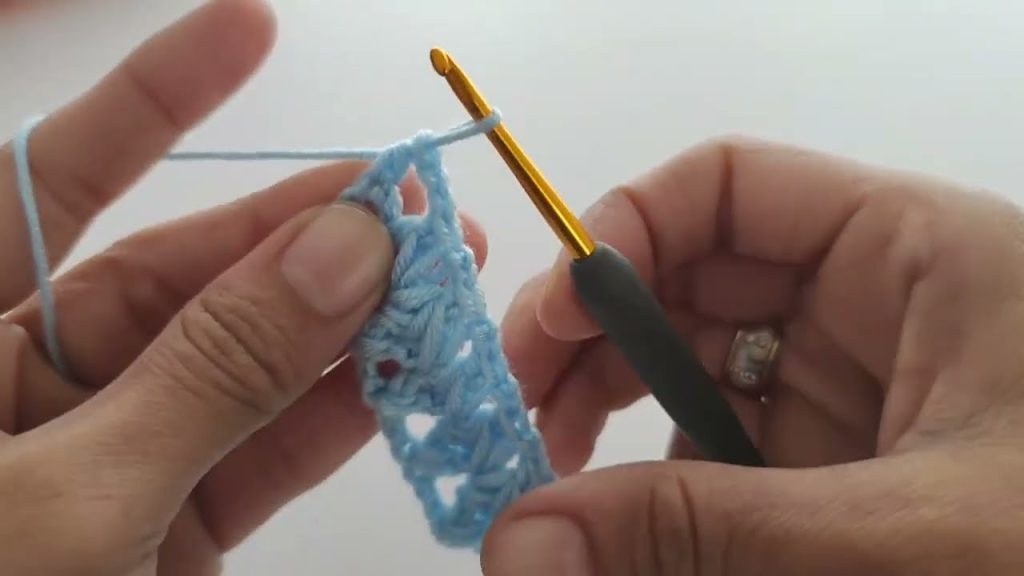
Pattern (Worked in Rows):
- Foundation Chain: Chain any multiple of 6 + 2 (e.g., Ch 26 for 4 paw prints).
- Row 1: Sc in 2nd ch from hook, sc in each ch across. (Total sc = starting chain – 1).
- Row 2: Ch 1, turn. Sc in first st. Ch 3, sk 3 sc. Sc in next sc. Repeat from * to * across to last 5 sc. Ch 3, sk 3 sc. Sc in last 2 sc.
- Row 3: Ch 1, turn. Sc in first st. Work 3 dc into the ch-3 space. Sc in the next sc. Repeat from * to * across to last ch-3 space. Work 3 dc into the last ch-3 space. Sc in the last sc.
- Row 4: Ch 1, turn. Sc in first st. Sc in next 3 dc. Sc in next sc. Repeat from * to * across. (This should bring you back to the same stitch count as Row 1).
- Row 5: Ch 1, turn. Sc in first 4 sc. Ch 3, sk 3 sc. Sc in next sc. Repeat from * to * across to last sc (or last few sc if your chain was longer). Adjust as needed to center the next set of paw prints. The goal is to offset the ch-3 spaces from the previous row’s ch-3 spaces.
- Pro Tip: Look for the center of the previous paw print (the middle dc of the 3-dc cluster) and make your next sc there, then ch 3, sk 3, and sc again to create an offset.
- Row 6: Ch 1, turn. Sc in first st. Work 3 dc into the ch-3 space. Sc in the next sc. Repeat from * to * across.
- Row 7: Ch 1, turn. Sc in each st across.
- Repeat Rows 2-7 for the paw print pattern.
Method 2: The “Kitty Ears” Edging (Decorative)
This simple edging adds adorable little triangular “ears” to blankets, hats, or garments.
Skill Level: Easy
Stitches Used:
- Slip Stitch (sl st)
- Single Crochet (sc)
- Half Double Crochet (hdc)
- Double Crochet (dc)
Pattern (Worked along an edge):
- Join yarn with a sc into any stitch along the edge where you want the ears.
- Skip 1 stitch. (Sc, hdc, dc, hdc, sc) all into the next stitch. Skip 1 stitch. Sl st into the next stitch.
- Repeat from * to * all along the edge.
- Fasten off and weave in ends.
Method 3: Tapestry Crochet Cat Silhouettes/Faces (Colorwork)
Tapestry crochet is perfect for creating defined cat shapes using multiple colors within the same row. This technique creates a dense fabric, great for bags, pillow covers, or wall hangings.
Skill Level: Intermediate (requires managing multiple yarn strands)
Stitches Used: Primarily Single Crochet (sc) or Half Double Crochet (hdc) worked tightly.
How it Works:
- You carry the unused color(s) inside your stitches, crocheting over them as you work.
- When you need to switch colors, you insert your hook into the stitch, yarn over with the current color, pull up a loop, then drop the current color and yarn over with the new color to complete the stitch.
Example (Simplified for concept – you’d need a specific chart):
- Find a Chart: Search for “tapestry crochet cat chart” or “pixel art cat.” Each square on the chart represents one sc stitch.
- Foundation: Chain the number of stitches required by your chart, plus 1 for the turning chain.
- Row 1: Sc in each chain across using your background color.
- Row 2 (Start Colorwork): Ch 1, turn. Follow your chart row by row.
- When the chart shows a color change, remember to switch colors on the last yarn over of the stitch before the color change.
- Carry the inactive yarn tightly over the previous stitches as you work to avoid gaps.
- Keep your tension consistent so the carried yarn doesn’t show through.
Tips for Tapestry Crochet:
- Work tightly.
- Use a hook size smaller than you normally would for the yarn weight.
- Practice switching colors smoothly.
- Always bring the new color over the old color to prevent twisting the yarns too much.
Method 4: Amigurumi Cat Appliqués (Dimensional)
If you want a cat on your project without integrating it into the fabric, crochet a separate cat shape and sew it on! This is perfect for blankets, hats, or garment embellishments.
Skill Level: Beginner to Intermediate (depending on complexity of cat shape)
Stitches Used: Typically single crochet (sc) worked in the round for dimensional shapes, or sc/hdc worked flat for flatter shapes.
Basic Cat Head Appliqué Idea:
- Head (Main Circle):
- Rnd 1: 6 sc in a magic ring (or Ch 2, 6 sc in 2nd ch from hook). (6 sc)
- Rnd 2: 2 sc in each sc around. (12 sc)
- Rnd 3: (Sc in next sc, 2 sc in next sc) 6 times. (18 sc)
- Continue increasing rounds as desired for head size. Sl st to join, fasten off.
- Ears (Make 2):
- Ch 5.
- Sc in 2nd ch from hook, hdc in next ch, dc in next ch, hdc in next ch, sc in last ch. Fasten off, leaving a long tail for sewing.
- Assembly:
- Sew the ears to the top of the head circle.
- Use black yarn to embroider eyes, nose, and whiskers.
- Sew the finished cat head appliqué onto your project using your yarn needle.
Method 5: “Furry” Stitches (Texture)
While not explicitly “cat stitches,” these techniques create a wonderfully soft, fur-like texture that’s perfect for a cat-themed blanket or toy.
Skill Level: Intermediate
- Loop Stitch: Creates loops of yarn on one side of your fabric, which can be brushed out for a shaggy fur effect.
- Brushable Yarn: Use yarns that are designed to be brushed (like some mohair blends or special acrylics) to create a fuzzy, realistic fur.
- Faux Fur Yarn: Simply crochet with specialty faux fur yarn for instant fluffiness!

General Tips for Crocheting Cat Stitches
- Yarn Choice: Soft, smooth yarns will show stitch definition best for patterns like “paw prints” or “kitty ears.” For “furry” effects, choose textured or brushable yarns.
- Tension: Consistent tension is key, especially for colorwork and defined textured stitches.
- Practice: Some of these techniques, like tapestry crochet, take a bit of practice to get a neat result. Don’t be discouraged!
- Embellish: Add embroidered details like whiskers, eyes, or paw pads to enhance your “cat” theme.
- Mix and Match: Combine different “cat stitch” methods in a single project for a layered, interesting look!
With these techniques, you’re now equipped to infuse your crochet creations with all the charm and playfulness of your beloved feline companions. Happy hooking!
Video tutorial:


