
Crochet slippers are the perfect project for a beginner looking for a quick and satisfying win. They are practical, cozy, and work up in a flash, making them ideal for last-minute gifts or a weekend self-care project. Forget complicated shaping and tricky stitches—the fastest and most beginner-friendly slipper patterns rely on a simple concept: building a cozy rectangle and then transforming it into a slipper with a few clever seams.
This detailed guide will walk you through the why, what, and how of making the fastest crochet slippers, with a simple, adaptable pattern that even a complete novice can master.
Why Choose the “Rectangle to Slipper” Method?
When you’re new to crochet, the idea of a 3D object like a slipper can seem intimidating. Traditional slipper patterns often involve working in the round, increasing and decreasing stitches to create a foot shape, which can be challenging to keep track of. The “rectangle to slipper” method eliminates this complexity entirely.
- No Shaping: You’re simply crocheting a flat rectangle. This means no tricky increases or decreases. If you can make a swatch, you can make this slipper.
- Minimal Sewing: The magic happens with a few simple seams at the toe and heel. This is the only sewing you’ll do, and it’s a great way to practice basic finishing techniques.
- Customizable Fit: Because this pattern is based on your own foot measurements, you can easily adapt it for any size—from a child’s tiny feet to a man’s large feet.
- Fast & Fun: Using bulky or super bulky yarn, you can easily complete a pair of these slippers in an evening. The instant gratification will motivate you to keep crocheting!
Essential Tools and Materials
Before you begin, gather your supplies. The right materials will make this project even faster and more enjoyable.
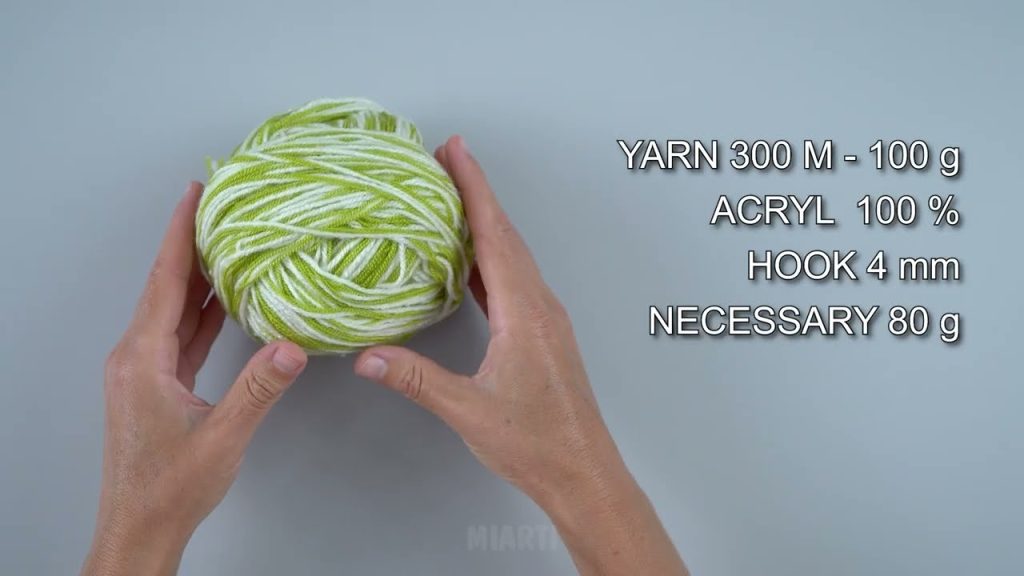
- Yarn: This is the key to speed. Opt for a bulky (#5) or super bulky (#6) weight yarn. A wool-acrylic blend or 100% acrylic is perfect for a soft, warm, and washable slipper. A single skein is often enough for a pair of adult slippers.
- Crochet Hook: Match your hook size to your yarn. For bulky yarn, a 6.5mm (K) or 8.0mm (L) hook is a good starting point. For super bulky, you might use a 9.0mm (M/N) or 10.0mm (P) hook. The yarn label will provide a recommended size.
- Yarn Needle (Tapestry Needle): This is essential for seaming your slipper together and weaving in the ends.
- Scissors: For cutting your yarn.
- Measuring Tape: To get the perfect custom fit.
The Fastest Crochet Slipper Pattern: The Simple Rectangle
This pattern is a template, not a rigid set of numbers. You will be measuring your own foot to get a perfect, personalized fit. This is a crucial step for success!
Step 1: Take Your Measurements
This is the most important step to ensure a perfect fit.
- Foot Length: Measure from the tip of your longest toe to the back of your heel.
- Foot Circumference: Wrap your measuring tape around the widest part of your foot, right behind your toes.
Step 2: Create the Foundation Chain
Using your chosen yarn and hook, create a foundation chain that is slightly longer than your foot’s length measurement. This will be the length of your slipper. Don’t worry about being precise; you can always add or subtract stitches later.
Step 3: Crochet the Rectangle
The fastest stitches for this project are those that build height quickly. Half-double crochet (hdc) is a fantastic choice, as it’s taller than a single crochet but still creates a dense, cozy fabric.
- Row 1: Hdc in the second chain from the hook and in each chain across. Ch 2 and turn. (The ch 2 does not count as a stitch).
- Row 2 and beyond: Hdc in the first stitch and in each stitch across. Ch 2 and turn.
Step 4: Continue Until Your Rectangle is Complete
Keep crocheting rows until the height of your rectangle matches your foot’s circumference measurement. The fabric should wrap comfortably around the widest part of your foot. Once you reach the correct height, fasten off your yarn, leaving a long tail (at least 15-20 inches) for seaming.
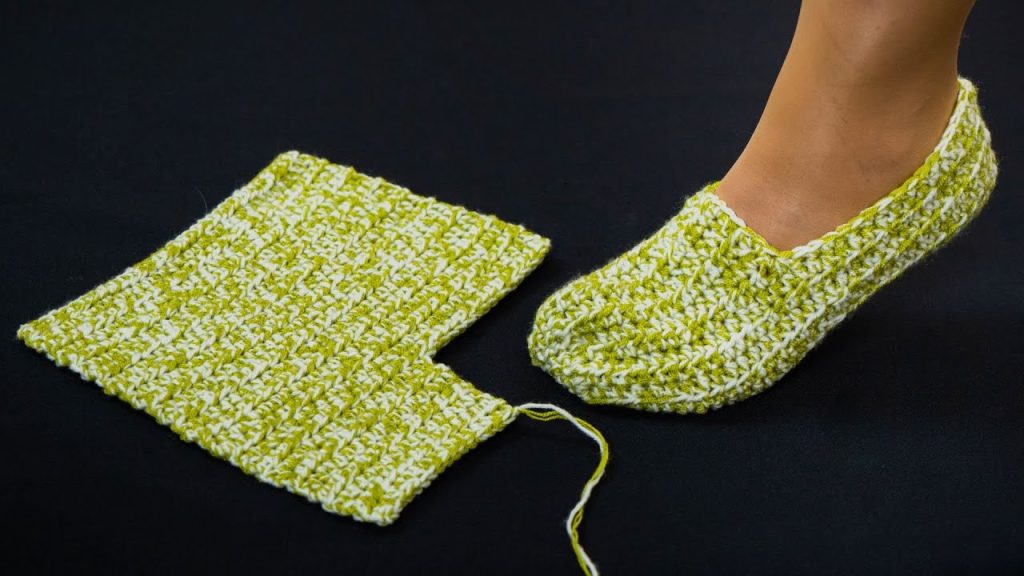
Congratulations! You have now crocheted the main body of your slipper.
Part 2: The Magical Transformation
This is the fun part! You’ll be turning your flat rectangle into a 3D slipper with just two seams.
Step 1: The Toe Seam
- Fold your rectangle in half lengthwise.
- With your yarn needle and the long yarn tail, sew a seam along one of the short ends. This seam will close the top of your slipper and create the toe.
- You can use a simple whip stitch or a running stitch. The goal is to securely close the gap.
- Once the end is sealed, pull your yarn to gather the stitches, creating a nice, rounded toe shape. Secure the gathering with a knot and weave in the end.
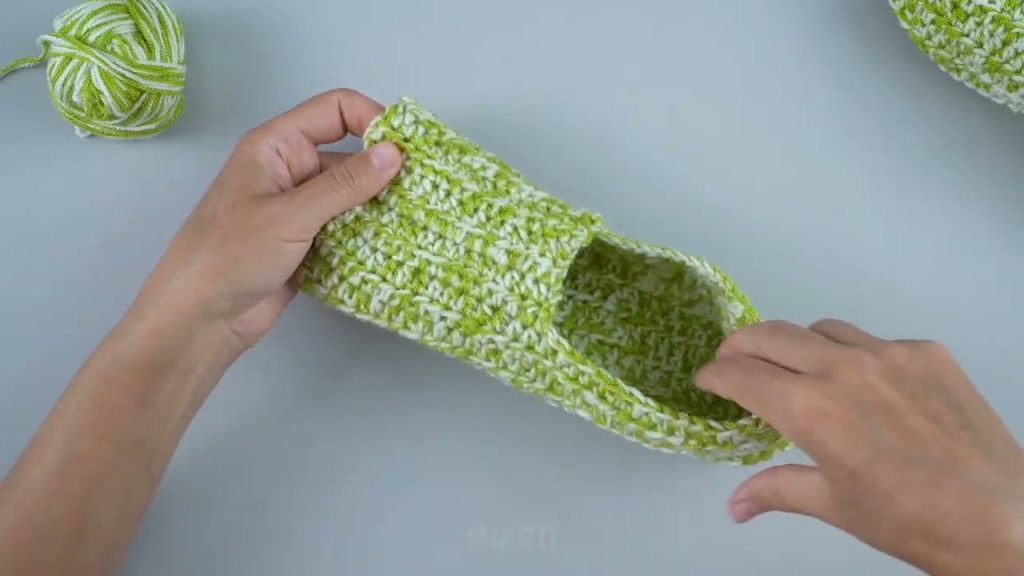
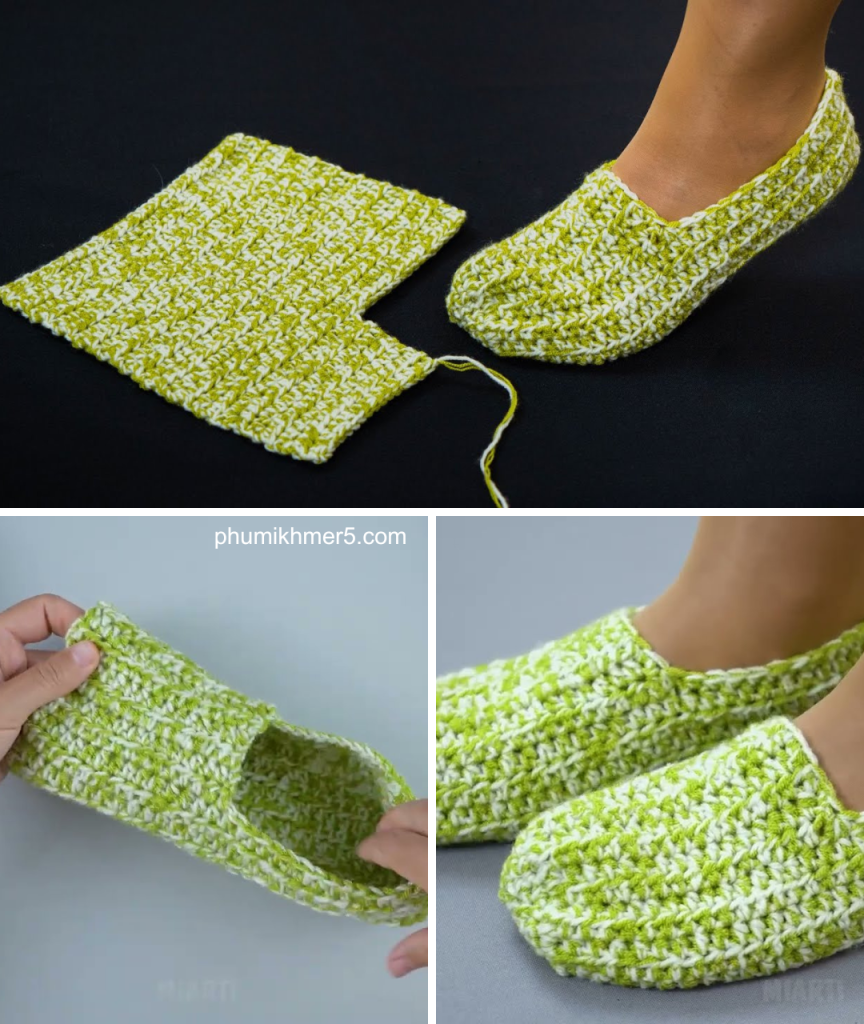
Step 2: The Heel Seam
- Bring the two raw edges of the long side together, from the base of the toe seam to the back of the heel.
- Using your yarn needle, sew the seam together. This will form the top of the slipper and the heel.
- Whip stitch is an excellent choice for this seam, as it creates a sturdy and clean finish.
- Fasten off and weave in the end.
Step 3: Finishing Touches
- Turn your slipper right side out.
- Optional: If you want to add a cuff, join a new color of yarn to the opening of the slipper and work a few rounds of single crochet (sc) or slip stitch (sl st) for a neat finish.
- Repeat the entire process to create a second, matching slipper.

How to Make it Even Faster
If you’re truly in a race against the clock, here are a few more tips for maximum speed:
- Skip the Gauge Swatch: For a project like this, a perfect gauge isn’t critical. As long as your fabric is a good density for a slipper, you’re fine.
- The Chainless Foundation: Instead of a foundation chain followed by a row, learn a chainless foundation stitch like the chainless half-double crochet foundation. This saves a step and often results in a stretchier, more comfortable sole.
- Embrace Simple Stitches: Stick to half-double crochet (hdc) or even double crochet (dc) to build your fabric quickly.
- Use Jumbo Yarn: A super bulky or even jumbo weight yarn will work up in a matter of minutes.
The Beauty of “Imperfection”
Don’t let the quest for perfection slow you down. The beauty of these fast slippers is their handmade charm. A slightly uneven stitch or a wonky seam only adds to their character. These are meant to be cozy, comfortable, and a testament to your newfound crochet skills.
Whether you’re making a pair for yourself, for a friend, or as a practice project, these speedy slippers prove that crochet doesn’t have to be a long, drawn-out process. Grab a hook and some chunky yarn, and you’ll have a pair of warm, handmade slippers on your feet in no time. Happy crocheting!
Video tutorial:


