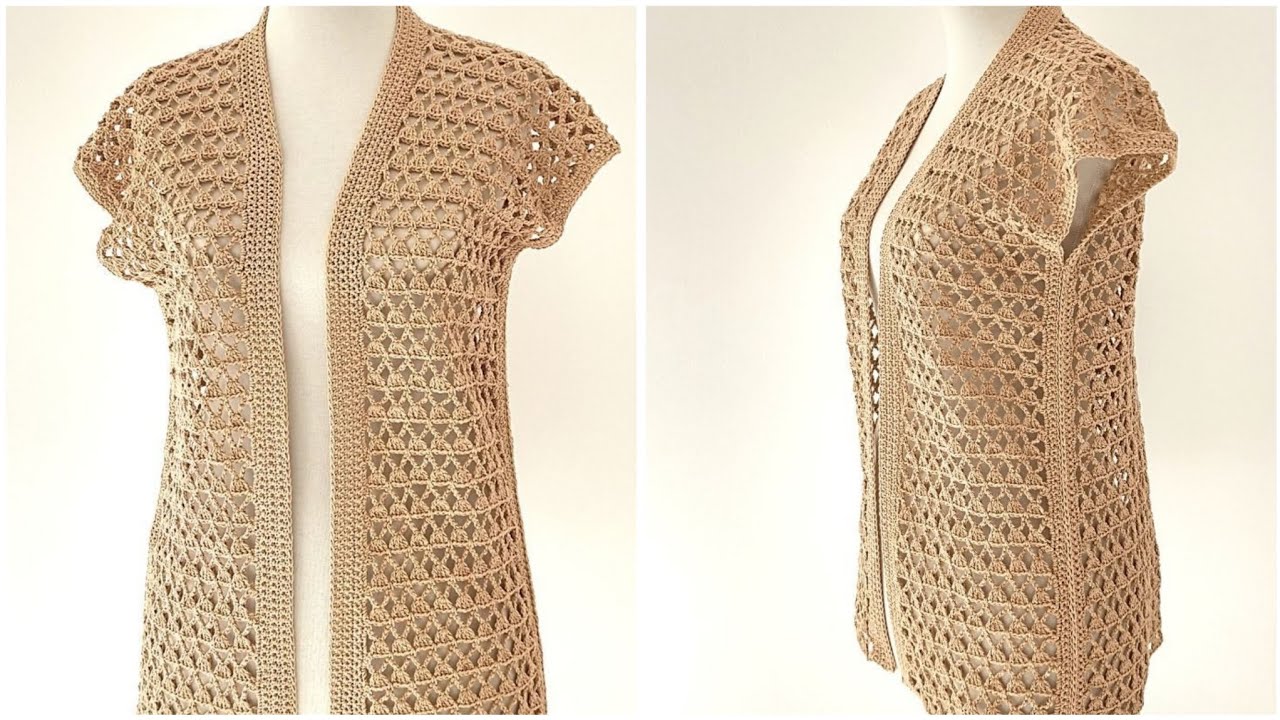
Dreaming of crocheting your own clothes but feel overwhelmed by complex patterns? This tutorial is for you! Creating a stylish and comfortable crochet sweater top is far more achievable than you might think, even for absolute beginners. We’ll break down the process into simple, manageable steps, using basic stitches and minimal shaping. This “Super Easy Sweater Top” pattern focuses on simplicity and drape, ensuring your first wearable crochet project is a resounding success.
Get ready to wear your stitches with pride!
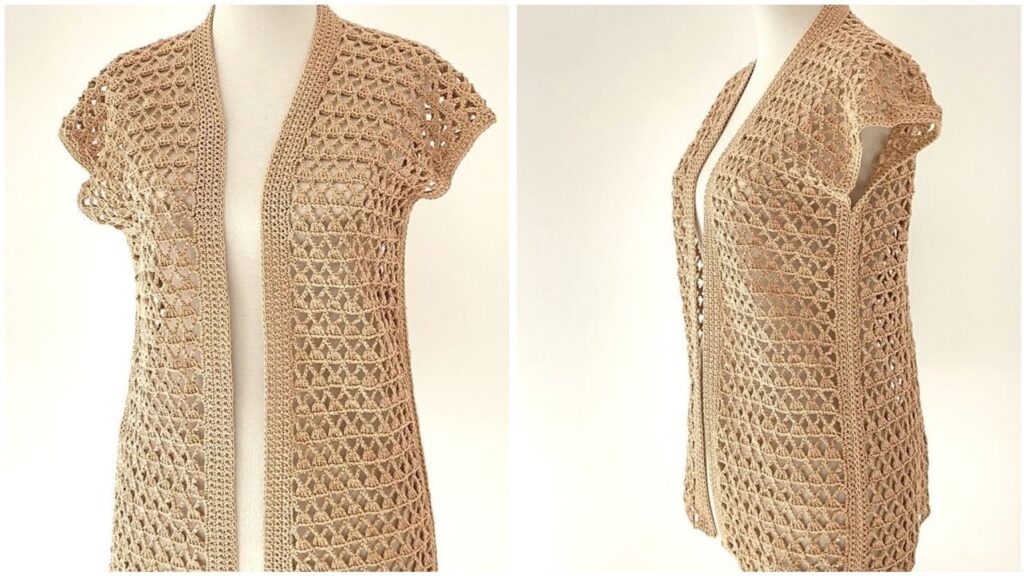
Why This Sweater Top Pattern is Super Easy for Beginners
- Simple Construction: We’ll use a “rectangle construction” method – crocheting two large rectangles (front and back panels) and seaming them together. This eliminates complex shaping for sleeves and body curves.
- Basic Stitches: Relies on just one or two fundamental stitches, allowing you to focus on consistent tension and rhythm.
- Minimal Shaping: Any shaping for the neckline or armholes will be kept incredibly simple, often just skipping stitches rather than intricate decreases.
- Customizable Fit: The forgiving nature of the design and the emphasis on gauge swatching make it easy to adapt to various sizes.
- Quick to Work Up: Using a slightly larger hook and a simple stitch means your sweater will grow relatively fast, keeping you motivated.
1. Planning Your Super Easy Sweater Top
Careful planning is the foundation of any successful crochet garment.
- Sizing:
- This pattern is designed to be oversized/relaxed fit. You’ll choose your size based on your actual bust measurement.
- Recommended Sizes (finished bust circumference):
- S/M: 38-42 inches (96.5-106.5 cm)
- L/XL: 46-50 inches (117-127 cm)
- 2XL/3XL: 54-58 inches (137-147 cm)
- Measure Yourself: Take your actual bust measurement. Add 8-12 inches (20-30 cm) for positive ease (the amount of extra fabric beyond your body measurement for a comfortable, relaxed fit). This will be your target finished bust circumference.
- Yarn Choice (Crucial for Drape!):
- Fiber: For a comfortable, breathable sweater, choose cotton, linen, bamboo, or a lightweight acrylic/blend yarn. Avoid stiff or overly heavy yarns; you want something with good drape that feels soft against the skin.
- Weight: DK (Light Worsted / #3) or Worsted Weight (#4) yarn is ideal. DK will create a lighter, lacier fabric, while Worsted will yield a cozier, slightly denser top. This tutorial will assume Worsted Weight for faster work-up.
- Quantity: This will vary significantly with size and yarn weight. For an Adult Medium (S/M), estimate 800-1200 yards (730-1100 meters). For larger sizes, budget more (e.g., 1200-1800+ yards). Always buy a bit extra!
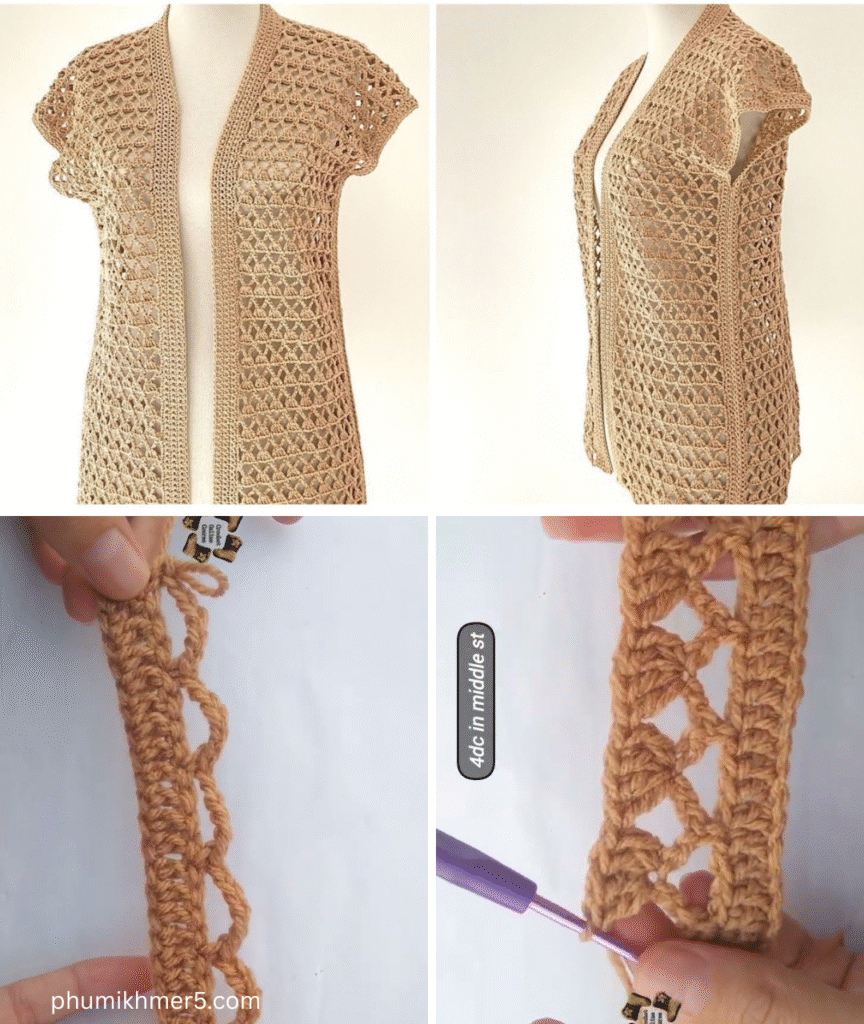
- Stitch Pattern: We will use the Half Double Crochet (HDC) stitch, worked in rows. This stitch creates a lovely, dense-yet-drapey fabric that works up quickly and is easy for beginners to maintain even tension.

2. Materials You’ll Need
- Yarn: Approximately 800-1800+ yards (730-1650+ meters) of Worsted Weight (#4) yarn in your chosen fiber and color.
- Crochet Hook: 6.0 mm (J-10 US). (Or the size needed to obtain gauge – see next section.)
- Scissors: For cutting yarn.
- Yarn Needle (Tapestry Needle): A large, blunt-tipped needle for weaving in ends and seaming.
- Stitch Markers (Highly Recommended): At least 4, for marking corners, neckline, and shoulder points.
- Measuring Tape: Absolutely essential for checking gauge and garment dimensions.
3. Understanding & Achieving Gauge (THIS IS NON-NEGOTIABLE!)
For garments, gauge is critical. It determines the finished size of your sweater. Even if you use the recommended yarn and hook, your personal tension might differ.
- Make a Gauge Swatch:
- Chain 17.
- Row 1: HDC in the 3rd chain from the hook, and in each chain across. (15 HDC)
- Row 2: Ch 2 (counts as first HDC), turn. HDC in the next HDC and in each HDC across. Make sure to work your last HDC into the top of the beginning Ch 2 from the previous row. (15 HDC)
- Repeat Row 2 until your swatch measures about 6 inches (15 cm) tall.
- Measure: Lay your swatch flat without stretching it. Using a ruler, count how many HDC stitches you have in 4 inches (10 cm) horizontally, and how many rows you have in 4 inches (10 cm) vertically.
- Target Gauge: You should aim for approximately 12-13 HDC stitches in 4 inches (10 cm) and 9-10 rows in 4 inches (10 cm).
- Adjust:
- If you have more stitches/rows per 4 inches, your tension is too tight. Go up a hook size (e.g., to 6.5 mm).
- If you have fewer stitches/rows per 4 inches, your tension is too loose. Go down a hook size (e.g., to 5.5 mm).
- Remake your swatch until you match the target gauge as closely as possible. This ensures your sweater fits!
4. Crochet Abbreviations Used
- ch: chain
- sl st: slip stitch
- hdc: half double crochet
- st(s): stitch(es)
- FO: Fasten Off
5. Let’s Crochet Your Super Easy Sweater Top! (Making the Panels)
We’ll make two identical rectangular panels: one for the front and one for the back.
Calculating Your Starting Chain (for Width):
- Determine Panel Width: Take your chosen “Target Finished Bust Circumference” (e.g., 42 inches for S/M). Divide this by 2 (since you’re making two panels).
- Example: 42 inches / 2 = 21 inches (desired width for each panel).
- Calculate Chains: Use your gauge swatch to find out how many HDC stitches equal your desired panel width.
- (Desired Panel Width in inches / Stitches per 4 inches) x Stitches in your gauge swatch (e.g., 12 or 13) = Number of HDC stitches for your first row.
- Example (using 12 HDC per 4 inches): (21 / 4) x 12 = 63 HDC stitches.
- Add 2 extra chains for the turning chain: So, if you want 63 HDC stitches, you will chain 63 + 2 = 65 chains to start.
Sizing Chart (Approximate Starting Chains based on 12 HDC per 4 inches):
| Size | Target Finished Bust | Panel Width (Approx.) | Starting Chains |
|---|---|---|---|
| S/M | 42 inches (106.5 cm) | 21 inches (53.5 cm) | Ch 65 |
| L/XL | 50 inches (127 cm) | 25 inches (63.5 cm) | Ch 77 |
| 2XL/3XL | 58 inches (147 cm) | 29 inches (73.5 cm) | Ch 89 |
Remember to adjust these chain counts based on YOUR personal gauge!
Part 1: Front Panel (Make one)
- Starting Chain: Make a slip knot. Ch your calculated number of chains (e.g., Ch 65 for S/M). Ensure your chain is not too tight.
- Row 1: HDC in the 3rd chain from the hook (this Ch 2 counts as your first HDC). HDC in each chain across. [You should have your calculated number of HDC stitches, e.g., 63 HDC].
- Row 2: Ch 2 (counts as first HDC), turn your work. HDC in the next HDC (the 2nd stitch from your hook). HDC in each HDC across the row. Your last HDC will go into the top of the beginning Ch 2 from the previous row. [Total HDC should remain the same, e.g., 63 HDC].
- Always make sure you work into the very last stitch/turning chain of the previous row to keep your edges straight.
- Repeat Row 2: Continue repeating Row 2 until your panel measures approximately 20-22 inches (51-56 cm) from the beginning (or your desired length from shoulder to hem).
- This will be about 45-50 rows for the S/M size, but check your measurement against your body for fit.
- For a shorter/cropped top, work fewer rows. For a longer top, work more rows.
- Fasten Off, leaving a very long tail (at least 30-40 inches / 75-100 cm) for seaming.
Part 2: Back Panel (Make one)
- Repeat all steps exactly from Part 1 to create an identical back panel. Make sure both panels have the same number of rows.
- Fasten Off, leaving another very long tail for seaming.
6. Assembling Your Super Easy Sweater Top
Now we transform two rectangles into a wearable sweater!
- Weave in Ends (Except Seaming Tails): Use your yarn needle to weave in any short starting or joining tails on both panels. Leave the two long Fasten Off tails for seaming.
- Lay Out Panels: Lay one panel flat with the “right side” facing up (if your stitches have a distinct right/wrong side, otherwise it doesn’t matter). Place the second panel directly on top, with its “right side” facing down (so the right sides are together). Align all the edges perfectly.
- Shoulder Seams:
- Using your yarn needle and one of the long tails, starting from an outer shoulder corner, seam the top edges together using the mattress stitch (for an invisible seam) or whip stitch (for a slightly more visible seam).
- Seam inwards about 4-6 inches (10-15 cm) for the shoulder. The unseamed portion in the middle will be your neck opening.
- Secure the yarn and weave in the tail.
- Repeat for the other shoulder, ensuring your neck opening is centered and roughly symmetrical.
- For S/M: Leave about 8-10 inches (20-25 cm) unseamed for the neck opening.
- For L/XL: Leave about 10-12 inches (25-30 cm) unseamed.
- For 2XL/3XL: Leave about 12-14 inches (30-35 cm) unseamed.
- Side Seams:
- Using your yarn needle and the remaining long tail (or join new yarn if needed), start from the bottom corner of one side.
- Seam upwards along the side edge using the mattress stitch or whip stitch.
- Stop seaming when you are about 7-9 inches (18-23 cm) from the top shoulder seam. This unseamed portion will be your armhole opening.
- Secure the yarn and weave in the tail.
- Repeat for the other side seam, ensuring both armholes are the same length.
7. Finishing Touches (Optional but Recommended)
These steps will give your sweater a more polished, finished look.
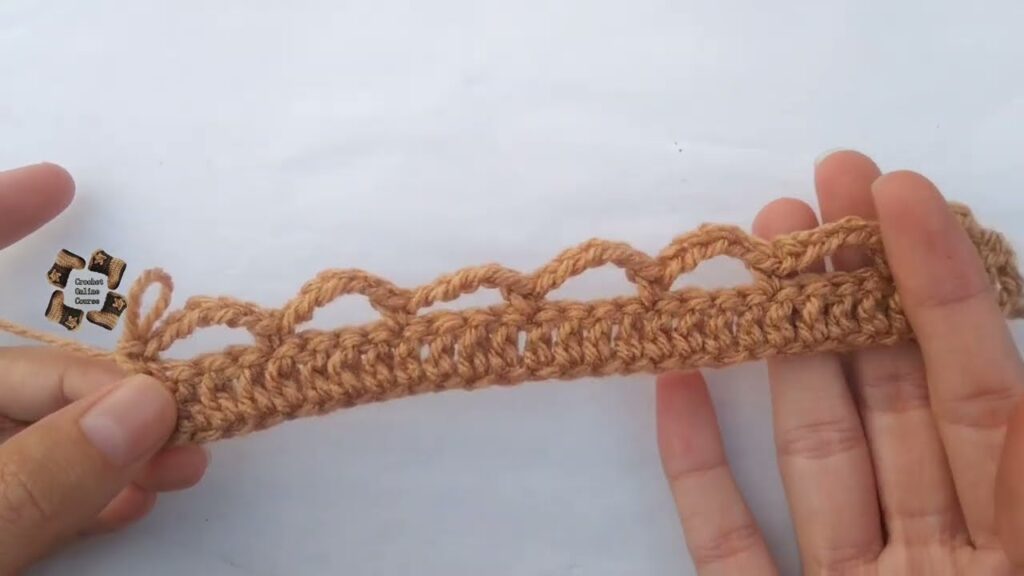
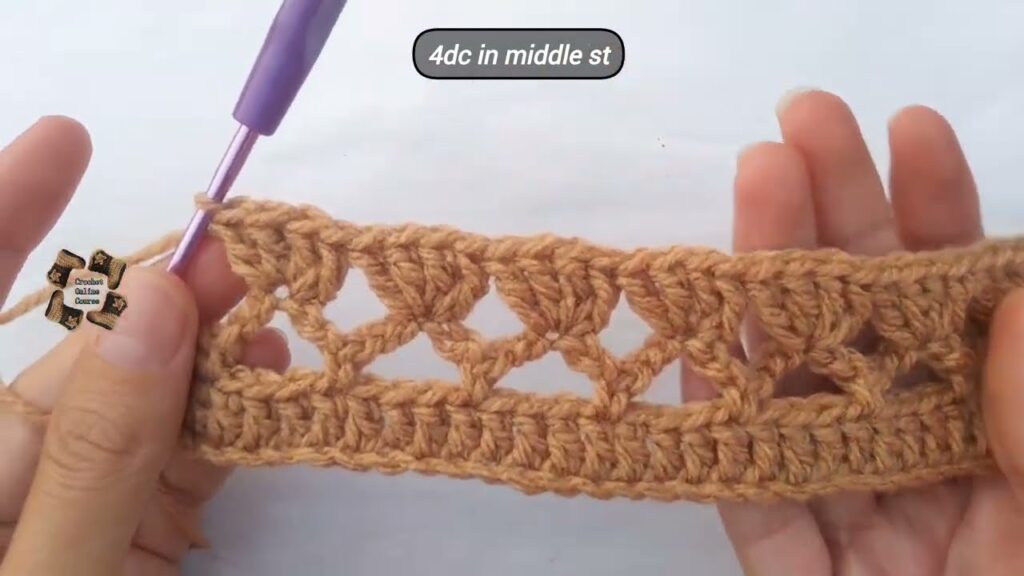
- Neckline Edging:
- Join yarn with a sl st anywhere along the neck opening.
- Ch 1. Work SC stitches evenly around the entire neckline. Aim for 1 SC per stitch along the top of the panels, and 1 SC per row end along the sides of the armhole shaping (if any).
- Join with a sl st to the first SC. FO. Weave in ends.
- You can do 1-3 rounds of SC for a neat band, or even a simple border of HDC.
- Armhole Edging:
- Repeat the neckline edging steps for each armhole. Work SC stitches evenly around the armhole opening.
- You can do 1-2 rounds of SC for a clean finish, or if you prefer a subtle “sleeve,” you can do a few rounds of HDC.
- Weave in Any Remaining Ends: Ensure all tails are securely hidden.
8. Blocking Your Sweater Top (Crucial for Garments!)
Blocking is the process of wetting or steaming your finished crochet piece and shaping it to its final dimensions while it dries. It dramatically improves the drape, evens out stitches, and makes the sweater look professional.
- Wet Blocking (Recommended for Cotton/Blends):
- Gently submerge your sweater in cool water with a little mild soap (if desired). Let it soak for 15-20 minutes.
- Carefully remove it, gently squeezing out excess water without twisting or wringing. Roll it in a clean towel and press firmly to absorb more water.
- Lay the damp sweater flat on a clean, dry surface (blocking mats, a clean bed sheet on the floor). Gently stretch and shape it to your desired finished measurements (refer to your initial planning for width and length). Pin it in place if using mats.
- Allow it to air dry completely (this can take 24-48 hours). Do not move it until it’s bone dry.
- Steam Blocking (for Acrylic or if you can’t wet block):
- Lay your dry sweater flat on a heat-safe surface.
- Hover a steam iron (do not touch the iron to the yarn unless the yarn label specifically allows it, as acrylic can melt) over the fabric, allowing the steam to penetrate and relax the fibers.
- Gently pat and shape with your hands.
- Let cool and dry completely.
9. Care for Your Crocheted Sweater Top
Always refer to your yarn label for specific care instructions, as they can vary by fiber type.
- Machine Washable (for most acrylics/superwash wools): Usually machine wash on a gentle cycle in cool water.
- Drying: Tumble dry on low heat or, ideally, lay flat to dry to maintain shape and prevent stretching.
- Avoid Bleach: Do not use bleach unless specifically instructed by the yarn label.
Congratulations! You’ve just crocheted your very own Super Easy Women’s Sweater Top. This project is a fantastic achievement for any beginner, offering comfort, style, and the immense satisfaction of wearing something you made with your own hands! Enjoy your new favorite top!
Video tutorial:


