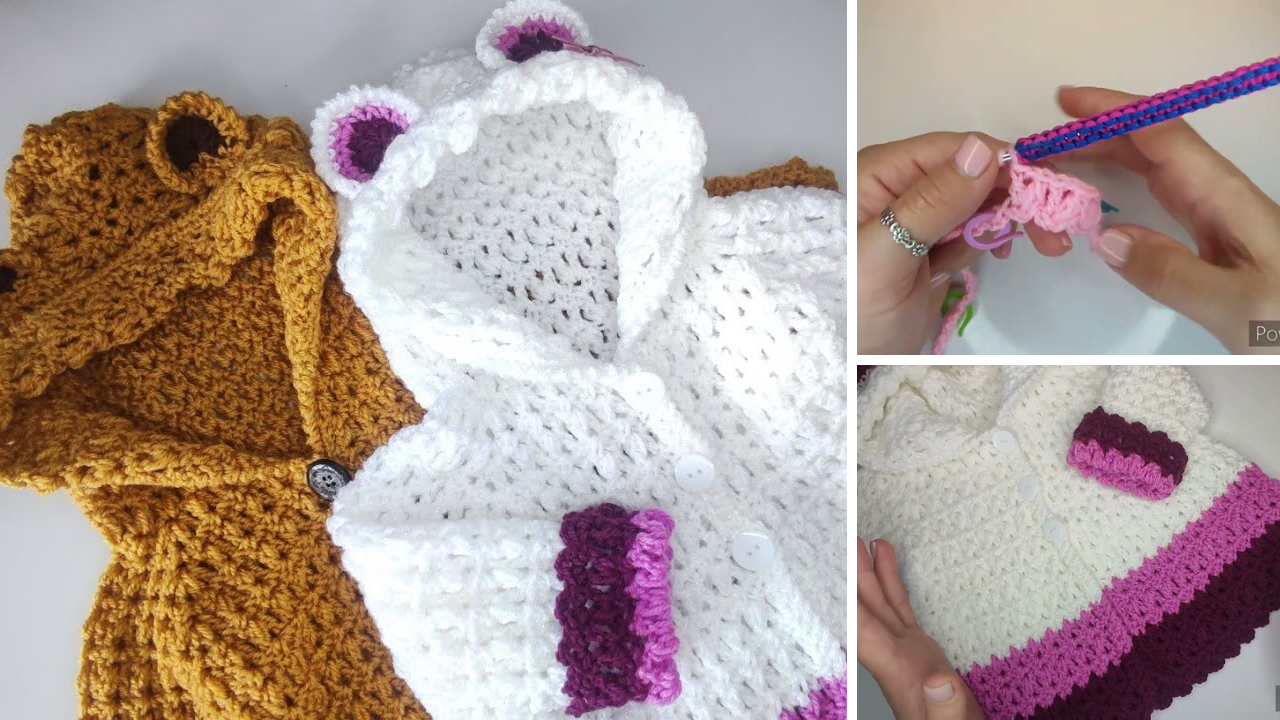
How to Crochet a Cozy Hoodie for Baby Girls and Boys: Warmth and Cuteness Combined!
A crocheted hoodie for a baby is the ultimate blend of comfort, practicality, and undeniable cuteness. Perfect for keeping little ones snug during cooler weather, a handmade hoodie offers warmth without being bulky, allowing for plenty of movement and play. Plus, making one yourself means you can choose the softest yarns and customize the colors to suit any baby girl or boy.
This detailed article will guide you through creating a cozy, functional, and adorable crochet hoodie for babies, focusing on a top-down, seamless construction for minimal finishing and maximum comfort. Get ready to craft a cherished garment that’ll be loved by both parents and little wearers!
Why Crochet a Baby Hoodie?
- Ultimate Comfort: Soft yarn and a flexible crochet fabric make it incredibly cozy for sensitive baby skin.
- Practicality: Provides warmth for the head, neck, and torso, making it ideal for layering.
- Easy to Wear: Simple to slip on and off, perfect for busy parents and wiggly babies.
- Gender-Neutral Appeal: Choose colors and stitch patterns that suit any baby.
- Skill Building: Practice top-down garment construction, raglan shaping, and adding details like a hood and edging.
- Heartfelt Gift: A handmade hoodie is a truly thoughtful and cherished present for a baby shower or new arrival.
1. Planning Your Cozy Baby Hoodie: Size & Materials
Careful planning ensures your hoodie is perfectly sized and wonderfully soft.
- Sizing: This pattern is primarily written for Newborn (0-3 Months), with instructions on how to adjust for other common baby sizes.
- Finished Chest Circumference (approx.):
- Newborn (0-3 Months): 18 inches (46 cm)
- 3-6 Months: 20 inches (51 cm)
- 6-12 Months: 22 inches (56 cm)
- 12-18 Months: 24 inches (61 cm)
- Pro Tip: If possible, measure the baby’s actual chest for the best fit, adding 1-2 inches (2.5-5 cm) for positive ease (breathing room).
- Finished Chest Circumference (approx.):
- Yarn Choice (Crucial for Baby Comfort!):
- Fiber: Opt for super soft, hypoallergenic, and machine-washable yarn.
- Baby-specific Acrylic: Often labeled “baby yarn,” these are designed to be extra gentle, durable, and easy to clean.
- Superwash Merino Wool: Incredibly soft, breathable, and warm, but ensure it’s specifically “superwash” for easy care.
- Cotton or Cotton Blends: Good for a slightly lighter hoodie, but ensure it’s a soft variety, as some cotton can be stiff.
- Weight: DK (Light Worsted / #3) or Worsted Weight (#4) are ideal. DK creates a lighter fabric, while Worsted makes a cozier, faster-to-make hoodie. This tutorial uses Worsted Weight.
- Quantity (Worsted Weight):
- Newborn: Approx. 300-400 yards (275-365 meters)
- 3-6 Months: Approx. 400-500 yards (365-457 meters)
- 6-12 Months: Approx. 500-600 yards (457-550 meters)
- 12-18 Months: Approx. 600-700 yards (550-640 meters)
- Always buy a bit extra to be safe!
- Fiber: Opt for super soft, hypoallergenic, and machine-washable yarn.
- Stitch Pattern: We’ll use the Half Double Crochet (HDC) stitch for the main body. It’s fast, creates a dense and warm fabric, and has a lovely texture. For ribbing, we’ll use Half Double Crochet in the Back Loop Only (HDC BLO).

2. Materials You’ll Need
- Yarn: Your chosen quantity of Worsted Weight (#4) soft baby-friendly yarn.
- Crochet Hook: 5.0 mm (H-8 US). (Or the size needed to obtain your gauge for a dense yet flexible fabric.)
- Scissors: For cutting yarn.
- Yarn Needle (Tapestry Needle): For weaving in ends and joining the hood.
- Stitch Markers (Essential!): At least 4, for marking raglan increase points.
- Measuring Tape: Crucial for checking gauge and garment dimensions.
- Buttons (Optional): 3-5 small (0.5-0.75 inch / 1.25-2 cm) buttons for the front opening.
- Needle and Thread: For attaching buttons.
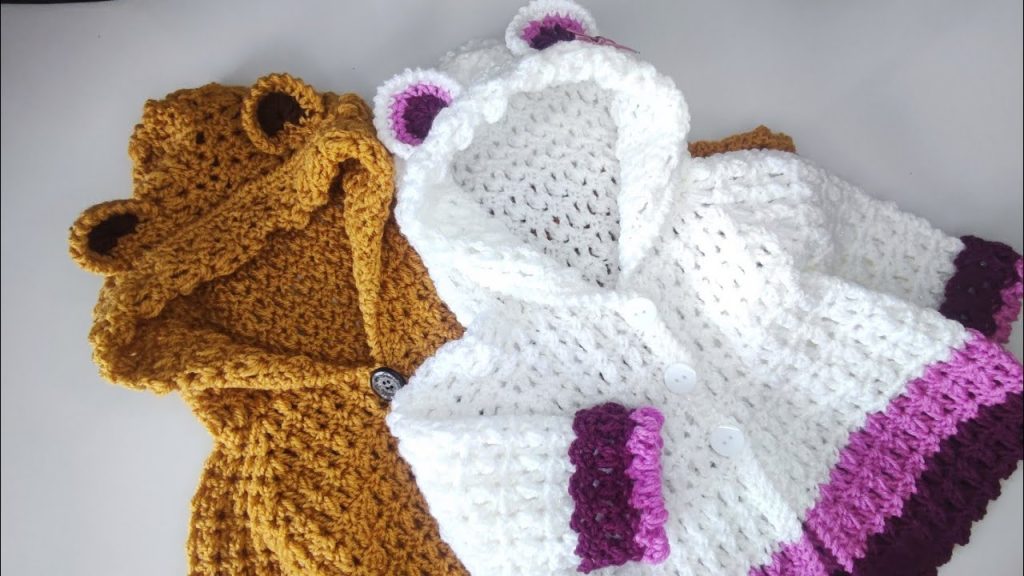
3. Essential Crochet Stitches & Techniques (Review & Practice)
Ensure you’re comfortable with these fundamental stitches and garment construction techniques:
- Slip Knot
- Chain (ch)
- Slip Stitch (sl st): For joining and neatening edges.
- Half Double Crochet (hdc):
- To make a HDC: Yarn over (YO), insert hook into stitch, YO, pull up a loop (3 loops on hook), YO, pull through all 3 loops on hook.
- Half Double Crochet in Back Loop Only (HDC BLO): Work your HDC stitch by inserting the hook only into the back loop of the stitch. This creates a ribbed effect.
- Working in Rows: Turning your work at the end of each row.
- Turning Chains: Ch 2 at the start of a row/round will count as your first HDC (unless specified otherwise).
- Raglan Increases: A specific increase method to shape the shoulders and sleeves in top-down garments.
4. Gauge Swatch: Your Blueprint for the Right Fit (Do Not Skip!)
Gauge is absolutely critical for garments to ensure the correct size and drape. A small difference in gauge can result in a hoodie that’s too big or too small, or too stiff.
- Make a Gauge Swatch (using HDC):
- Chain 17.
- Row 1: HDC in the 3rd ch from hook, HDC in each ch across. (15 HDC)
- Row 2: Ch 2 (counts as first HDC), turn. HDC in each HDC across. (15 HDC)
- Repeat Row 2 until your swatch measures about 4 inches (10 cm) tall.
- Measure: Lay your swatch flat. Count how many HDC stitches you have in 4 inches (10 cm) horizontally, and how many rows you have in 4 inches (10 cm) vertically.
- Target Gauge (approximate for Worsted Weight): Approximately 13-14 HDC stitches in 4 inches (10 cm) and 10-11 rows in 4 inches (10 cm).
- Adjust:
- If you have more stitches/rows per 4 inches, your tension is too tight; go up a hook size.
- If you have fewer stitches/rows per 4 inches, your tension is too loose; go down a hook size.
- Remake your swatch until you match the target gauge as closely as possible.
5. Let’s Crochet Your Cozy Baby Hoodie! (Top-Down Construction)
We’ll start at the neckline, work the yoke, separate for body and sleeves, and then add the hood.
Pattern Notes:
- Ch 2 at the start of a row/round counts as 1 HDC unless otherwise specified.
- Increases for raglan shaping are always done in the designated corner stitch/space.
Part 1: The Yoke (Neckline & Shoulder Shaping)
This section forms the neckline and the increases that create the shoulders and armholes. We’ll work in rows to create a front opening for easy dressing.
- Foundation Chain (Neckline): Ch 42 (46, 50, 54).
- Newborn: Ch 42
- 3-6 Months: Ch 46
- 6-12 Months: Ch 50
- 12-18 Months: Ch 54
- Row 1 (Yoke Setup): HDC in 3rd ch from hook (counts as 2 HDC).
- [Right Front Panel] HDC in next 4 (5, 6, 7) chs. Total 5 (6, 7, 8) HDC.
- [1st Raglan Corner] (HDC, ch 1, HDC) in next ch. Place stitch marker in ch-1 sp.
- [1st Sleeve Panel] HDC in next 6 (7, 8, 9) chs. Total 7 (8, 9, 10) HDC.
- [2nd Raglan Corner] (HDC, ch 1, HDC) in next ch. Place stitch marker in ch-1 sp.
- [Back Panel] HDC in next 12 (14, 16, 18) chs. Total 13 (15, 17, 19) HDC.
- [3rd Raglan Corner] (HDC, ch 1, HDC) in next ch. Place stitch marker in ch-1 sp.
- [2nd Sleeve Panel] HDC in next 6 (7, 8, 9) chs. Total 7 (8, 9, 10) HDC.
- [4th Raglan Corner] (HDC, ch 1, HDC) in next ch. Place stitch marker in ch-1 sp.
- [Left Front Panel] HDC in next 5 (6, 7, 8) chs. Total 6 (7, 8, 9) HDC.
- Total stitches: 54 (62, 70, 78) HDC + 4 ch-1 sps.
- Row 2 (Yoke Increase): Ch 2 (counts as 1st HDC), turn.
- HDC in each HDC until you reach the 1st marked ch-1 sp.
- (HDC, ch 1, HDC) into the marked ch-1 sp. Move marker to new ch-1 sp.
- HDC in each HDC across the sleeve panel until you reach the 2nd marked ch-1 sp.
- (HDC, ch 1, HDC) into the marked ch-1 sp. Move marker.
- HDC in each HDC across the back panel until you reach the 3rd marked ch-1 sp.
- (HDC, ch 1, HDC) into the marked ch-1 sp. Move marker.
- HDC in each HDC across the sleeve panel until you reach the 4th marked ch-1 sp.
- (HDC, ch 1, HDC) into the marked ch-1 sp. Move marker.
- HDC in each remaining HDC across the front panel.
- Stitch count increases by 8 HDC each row (2 HDC per corner).
- Repeat Row 2: Continue repeating Row 2 for a total of 6 (7, 8, 9) increase rows.
- Newborn: 6 rows total
- 3-6 Months: 7 rows total
- 6-12 Months: 8 rows total
- 12-18 Months: 9 rows total
- At the end of the final yoke row, your piece should lay relatively flat and the sleeve sections should be wide enough to comfortably fit around the arm.
Part 2: Separating Body and Sleeves
This step defines the armholes and forms the main body of the hoodie.
- Next Row (Separation): Ch 2 (counts as 1st HDC), turn.
- HDC in each HDC across the Right Front Panel until you reach the 1st marked ch-1 sp.
- (HDC, ch 1, HDC) into the 1st marked ch-1 sp.
- Skip all HDC stitches of the 1st Sleeve Panel.
- (HDC, ch 1, HDC) into the 2nd marked ch-1 sp.
- HDC in each HDC across the Back Panel until you reach the 3rd marked ch-1 sp.
- (HDC, ch 1, HDC) into the 3rd marked ch-1 sp.
- Skip all HDC stitches of the 2nd Sleeve Panel.
- (HDC, ch 1, HDC) into the 4th marked ch-1 sp.
- HDC in each remaining HDC across the Left Front Panel.
- You will now be working on the main body of the hoodie.
Part 3: The Body (Working Downwards)
Continue the HDC pattern down the body until you reach the desired length.
- Body Row 1: Ch 2 (counts as 1st HDC), turn. HDC in each HDC across the entire body, working into the ch-1 spaces created during separation.
- Repeat Body Row 1: Continue repeating Body Row 1 until the hoodie measures approximately 9 (10, 11, 12) inches / 23 (25.5, 28, 30.5) cm from the neckline down to the bottom hem.
- Try it on a doll or measure against the baby’s torso for the best length.
- Fasten Off, leaving a tail for weaving.

Part 4: The Sleeves (Working in Rounds)
Now we’ll add the sleeves. You can choose full-length or 3/4 sleeves.
- Join Yarn: Join yarn with a sl st in the armpit area of one armhole (e.g., in the ch-1 space formed during separation).
- Sleeve Round 1: Ch 2 (counts as 1st HDC). HDC in each HDC around the armhole, and into any ch-1 spaces. Join with a sl st to the top of the beginning Ch 2.
- Aim for an even number of stitches for the ribbed cuff later.
- Sleeve Rounds 2 onwards: Ch 2, HDC in each HDC around. Join with a sl st.
- Repeat Sleeve Rounds: Continue repeating until the sleeve reaches the desired length, stopping about 1 inch (2.5 cm) short of the final cuff length.
- For a Newborn, sleeves might be 6-7 inches (15-18 cm) long from armpit to cuff.
- Cuff (Ribbed):
- Cuff Round 1: Ch 1 (does NOT count as a st). Sc in each HDC around. Join with a sl st to the first sc.
- Cuff Rounds 2-3: Ch 1, HDC in BLO of each sc around. Join with a sl st. (Creates a nice ribbed cuff).
- Fasten Off, leaving a tail for weaving.
- Repeat for the second sleeve.
6. The Hood (Worked Flat & Joined)
This makes your cozy hoodie complete!
- Hood Start: Rejoin yarn with a sl st to the center back stitch of the initial neckline chain.
- Count stitches from the front opening edges. For a 42-ch neckline, count in about 10-12 stitches from the first front opening stitch to find the center back area to rejoin.
- Row 1: Ch 2 (counts as 1st HDC). HDC in each of the next 20-24 stitches across the back half of the neckline. (Adjust this number to ensure the hood covers the top of the head well, usually slightly less than half of the initial neck chain).
- [20-24 HDC]
- Row 2: Ch 2 (counts as 1st HDC), turn. HDC in each HDC across.
- [20-24 HDC]
- Repeat Row 2: Continue repeating Row 2 until your hood piece is deep enough to comfortably cover the head, typically 15-20 rows for a newborn.
- You can hold it up to the poncho and estimate, or measure it against a child’s head.
- Fasten Off, leaving a very long tail (at least 24-30 inches / 60-75 cm) for seaming.

7. Assembly & Final Touches
Bringing your cozy hoodie to life!
- Seam the Hood:
- Fold the hood piece in half lengthwise, bringing the last row you crocheted together.
- Using your long tail and yarn needle, seam the top edge of the hood together. Use a whip stitch or mattress stitch for a strong, invisible join. This forms the top curve of the hood.
- Weave in the remaining tail securely.
- Attach the Hood to the Hoodie Neckline:
- Position the seamed hood correctly on the hoodie’s neckline. The seam of the hood should align with the center back of the hoodie’s neck opening.
- Pin the hood to the neckline evenly around.
- Using your yarn needle and a new strand of yarn, securely sew the hood to the hoodie’s neckline. Go through each stitch of the hood edge and the corresponding stitch on the hoodie’s neckline for a strong, neat join.
- Weave in all tails securely.
- Front Opening Edging & Buttonholes:
- Join yarn with a sl st at the bottom of one front opening panel.
- Edging Row 1: Ch 1 (does NOT count as a st). Sc evenly up the front opening edge, around the neckline of the hood opening, and down the other front opening panel. Aim for 1 sc per HDC row end, or 2 sc for every 3 HDC rows for a smooth edge.
- Buttonhole Row: Ch 1, turn. Sc in the first few sc sts. Ch 2 (or 3, depending on button size), sk 2 (or 3) sts. Sc in next few sts. Repeat for 3-5 evenly spaced buttonholes along one front panel. Continue sc to the end of the row.
- Final Edging Row: Ch 1, turn. Sc in each sc around, working 2 (or 3) sc into each ch-2 (or ch-3) buttonhole space. Sl st to join at the beginning.
- Fasten Off.
- Weave in All Ends: Use your yarn needle to carefully weave in any remaining loose yarn tails. For baby garments, ensure they are extremely secure and won’t come undone or pose a hazard.
- Attach Buttons: Sew your small buttons onto the front panel opposite the buttonholes, aligning them perfectly. Secure them very well with needle and thread.
- Blocking (Recommended):
- Blocking helps even out your stitches, sets the shape, and improves the overall drape and fit of the hoodie.
- Steam Blocking (for acrylic): Lay the hoodie flat. Hover a steam iron (do not touch the iron to the yarn!) over the fabric, allowing the steam to relax the fibers. Gently pat and shape with your hands. Let cool and dry completely.
- Wet Blocking (for wool blends/cotton): Gently submerge the hoodie in cool water with a little mild soap. Squeeze out excess water without twisting. Lay it flat on a clean towel or blocking mats, shaping it to the desired dimensions. Let it air dry completely.
8. Care for Your Crocheted Baby Hoodie
Always refer to your yarn label for specific care instructions. For most baby-friendly yarns:
- Machine Washable: Usually machine wash on a gentle cycle in cool water.
- Drying: Tumble dry on low heat or, ideally, lay flat to air dry to maintain shape and prevent stretching.
- Avoid Bleach: Do not use bleach unless specifically instructed by the yarn label.
Congratulations! You’ve just crocheted a wonderfully cozy and utterly adorable hooded jacket for a baby girl or boy. This handmade garment is sure to be a treasured item, keeping them warm and stylish throughout the cooler months. Enjoy seeing your little one snug in your creation!
Video tutorial:


