Knitting is not just a craft—it’s a meditative, rewarding, and deeply creative outlet that lets you transform simple yarn into something warm and functional. One of the most beloved beginner projects is knitted slippers, and the “2-loop method” has taken the knitting world by storm for its simplicity and speed. With just two loops and some basic techniques, you can create cozy, stretchy slippers in less than an afternoon.

In this article, we’ll walk you through everything you need to know about knitting easy slippers from 2 loops. Whether you’re new to knitting or just looking for a quick, satisfying project, this guide has you covered.
🧶 What Are “2-Loop” Knitted Slippers?
The “2-loop” method refers to a super simple slipper pattern that relies on working with two loops of yarn or stitches in a clever way to shape the entire slipper from a flat piece of knitting. Often done in garter stitch (knit every row), the slipper is then folded and sewn in specific places to create the heel and toe.
These slippers are:
- Stretchy and soft
- Easy to customize
- Ideal for gifts
- Perfect stash-busting projects
They can be knit flat on straight needles and require minimal shaping—no need for double-pointed needles or complex decreases.
🧰 Materials You’ll Need
Before we jump into the step-by-step process, let’s gather your supplies:
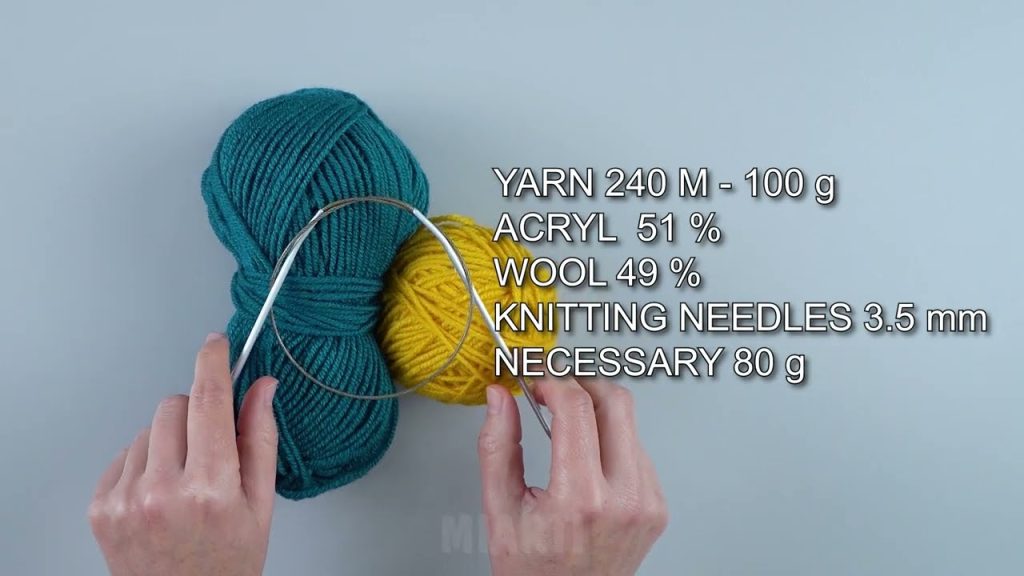
Yarn
- Worsted weight yarn or bulky yarn works best
- Choose a soft acrylic, wool, or cotton blend for comfort
- Approximately 100g (depending on size)
Needles
- Straight knitting needles, size 4.5mm to 6mm (US 7–10), depending on your yarn
- Optional: circular needles if you prefer them for flat knitting
Other Tools
- Yarn needle (for sewing seams)
- Scissors
- Measuring tape
- Stitch markers (optional)
📏 Sizing the Slippers
The beauty of the 2-loop slipper pattern is how easily it can be adjusted for different foot sizes.
Basic Formula:
- Foot Length = Approx. Length of Knitted Piece
- Foot Width = Half the Width of Knitted Piece
Example: To fit a size 8 women’s foot (~9.5 inches long), your knitted rectangle should measure about 9.5″ long by 7″ wide.
Don’t stress over precision—these slippers are stretchy and forgiving!
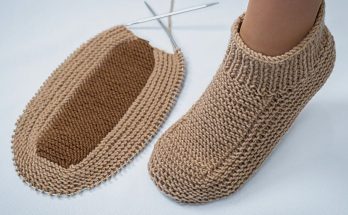
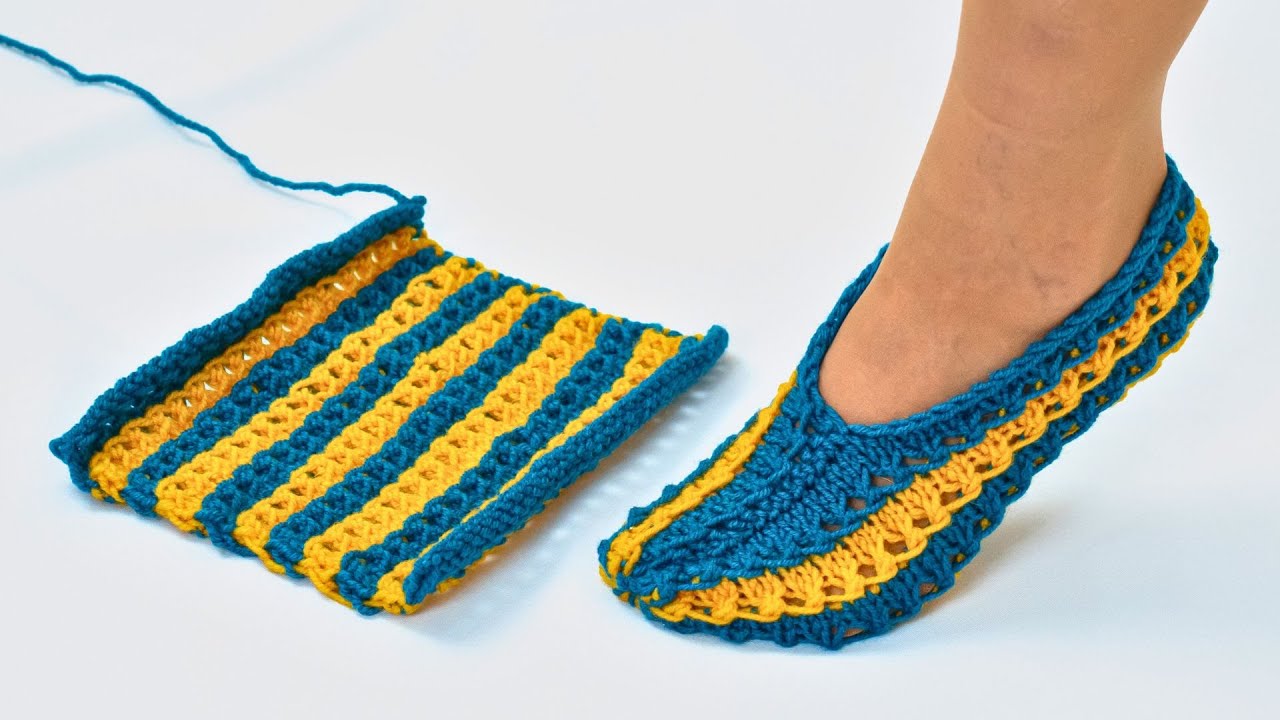
🪡 How the Construction Works
You’ll be knitting a flat rectangle, then folding and sewing to form the shape. The “2 loops” in the title refer to the way the top is shaped using just two main corner points—giving a soft, gathered effect over the toe.
Here’s how the basic construction goes:
- Knit a rectangle in garter stitch
- Fold it in half
- Sew one short edge (the heel)
- Gather the opposite edge (the toe) using two loops or points
- Sew part of the top to shape the foot
Let’s dive into the full instructions!
🧵 Step-by-Step Instructions: Knitting Easy Slippers from 2 Loops
Step 1: Cast On
- Use the long tail cast-on for a stretchy edge.
- Cast on 30 to 36 stitches, depending on desired width and your gauge.
For a standard adult size, 32 stitches in worsted weight yarn is a good starting point.
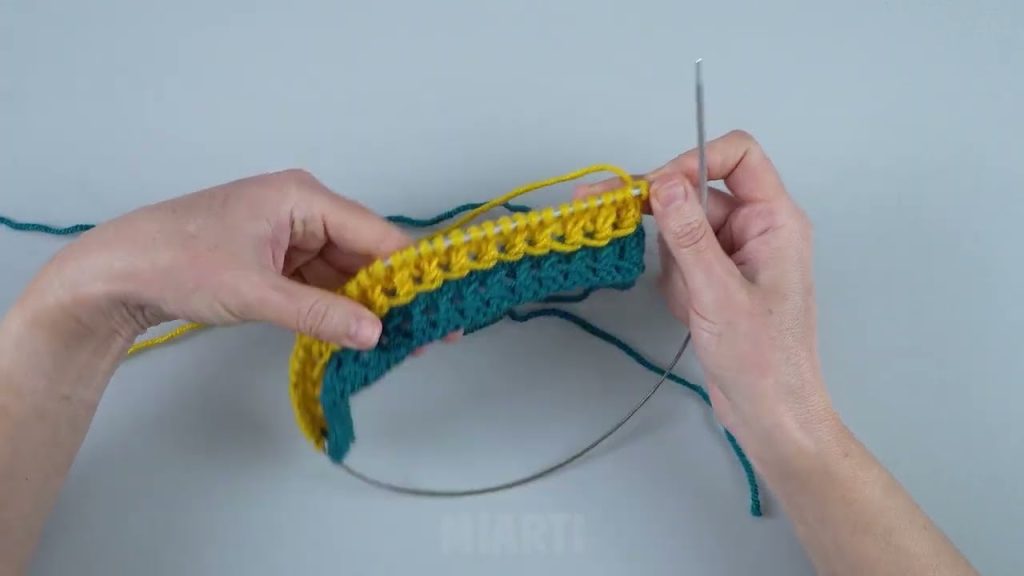
Step 2: Knit the Rectangle
- Work in garter stitch (knit every row) until the piece measures the length of the foot.
Average adult: ~9 to 10 inches long
Child: ~6 to 8 inches
You can try wrapping the piece around your foot lengthwise to check fit.
Step 3: Bind Off
- Bind off all stitches loosely so the edge stays stretchy.
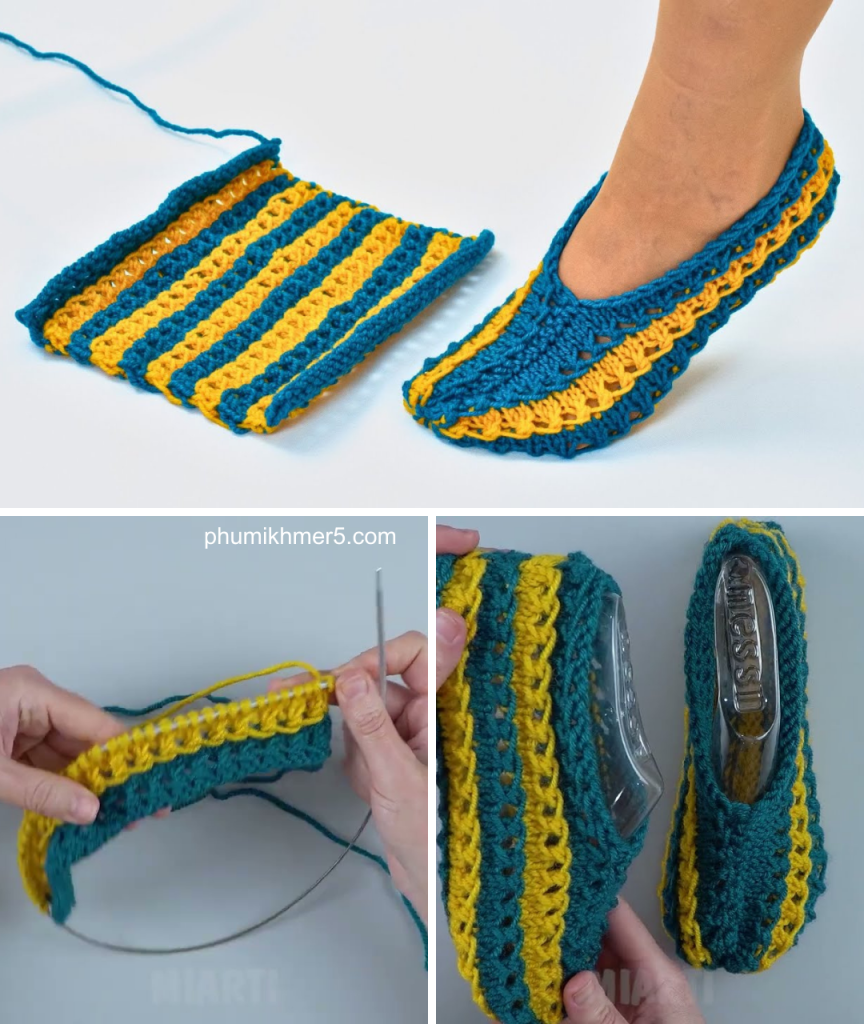
Step 4: Fold and Seam the Heel
- Fold your rectangle in half widthwise (so cast-on and bind-off edges are at either end).
- Sew one short side closed—this becomes the heel.
Use the mattress stitch or whip stitch with your yarn needle.
Step 5: Create the “2 Loops” at the Toe
- On the open short edge (opposite the heel), find the two corner points.
- Thread a yarn needle with a long piece of matching yarn.
- Insert the needle into one corner of the open end, then the other.
- Pull both ends of the yarn to gather the toe—like drawing a drawstring.
This forms the rounded toe shape using just the “2 loops” or points at the corners.
Step 6: Shape the Top
- Once the toe is gathered, continue sewing about ⅓ to ½ of the way up the top of the slipper to create the instep.
- Leave the top open enough to easily slide the foot in.
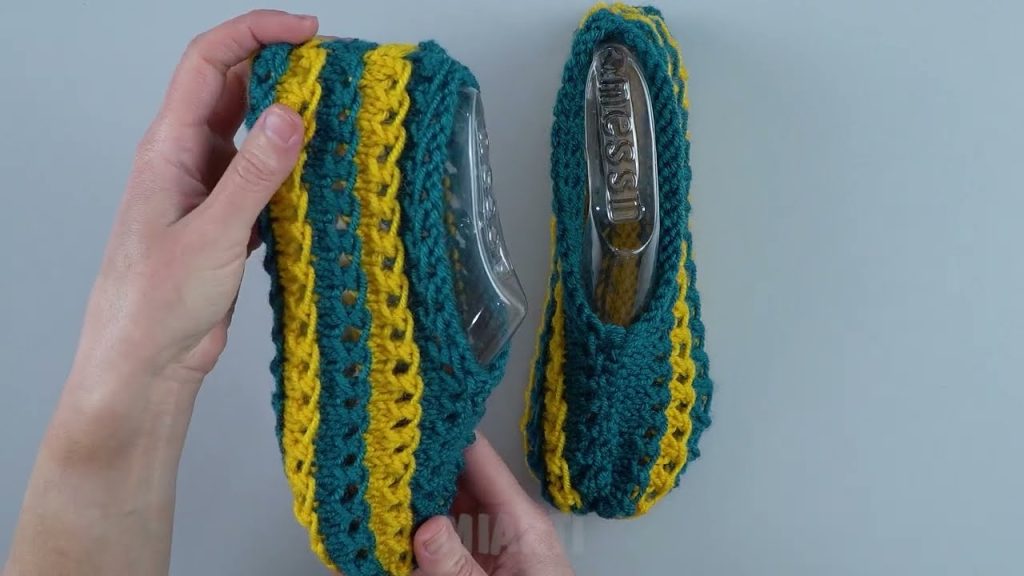
🧽 Finishing Touches
- Weave in all loose yarn ends using your yarn needle.
- Try the slipper on and adjust fit if needed.
- (Optional) Add a decorative button or crochet trim to the top.
🧒 Adapting the Pattern for Kids and Babies
This same pattern works for all ages—just scale down the number of stitches and rows.
Baby Size Example:
- Cast on 20 stitches
- Knit until piece measures 5–6 inches
- Follow the same construction
For children, use around 24–28 stitches and adjust length accordingly.
🧼 Washing and Care Tips
Most slipper yarns are machine washable, especially if made from acrylic or superwash wool. But always check the yarn label.
- Machine wash cold on gentle cycle
- Lay flat to dry
- Avoid hot water or drying in a machine (unless yarn allows)
💡 Tips for Success
- Test Gauge: Knit a small swatch to ensure you’re getting the right size.
- Add a Non-Slip Sole: Use puffy fabric paint or leather patches on the bottom for safety.
- Use Colorful Yarn: Self-striping or variegated yarn adds visual flair without extra work.
- Embellish: Add pompoms, tassels, or embroidered initials to personalize.
❤️ Why You’ll Love Making These
Here are just a few reasons people keep coming back to the 2-loop slipper method:
- Fast Finish: One slipper takes under an hour once you get the hang of it.
- Minimal Counting: No need to follow complex charts or row-by-row instructions.
- Perfect Gift: Great for holiday presents, care packages, or craft fairs.
- Customizable: Change the yarn, color, or stitch pattern to suit your style.
🧵 Final Thoughts
Knitting slippers from 2 loops is a clever, cozy project that even beginners can tackle confidently. With just a flat piece of knitting and two clever seams, you’ll create a pair of warm, stretchy slippers that are both functional and fun. They’re a wonderful way to use up leftover yarn, practice basic techniques, and make heartfelt gifts for friends and family.
So grab your needles, pick your favorite yarn, and knit your way into comfort—two loops at a time.
Video tutorial: