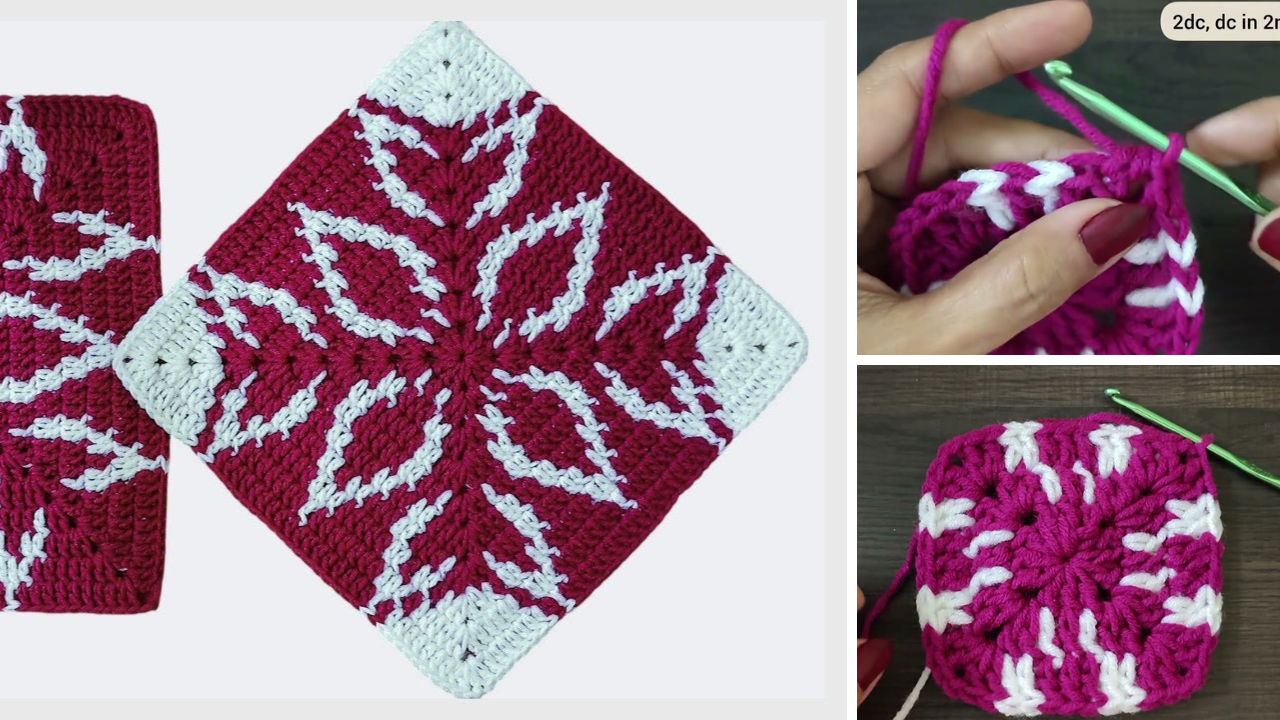
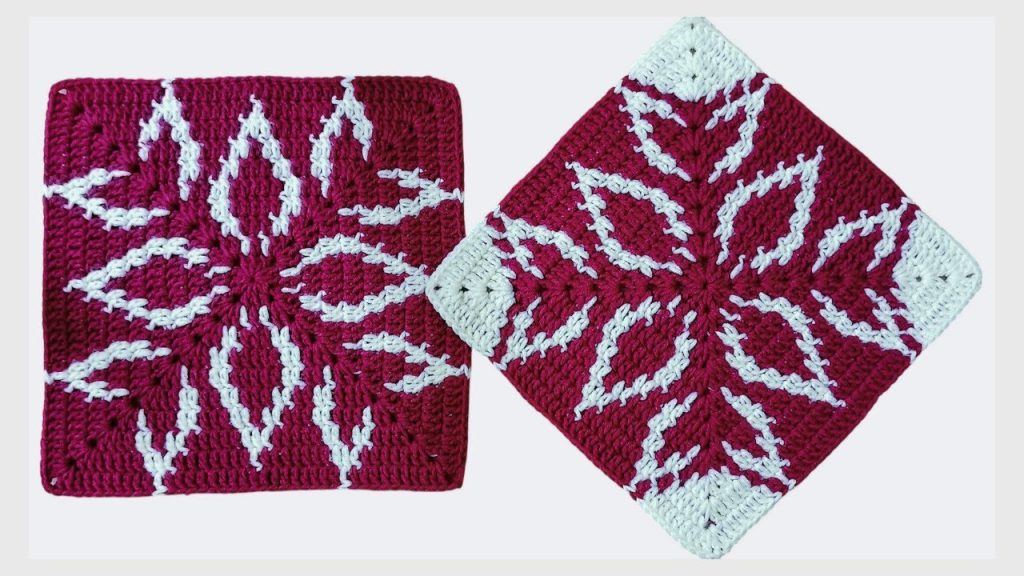
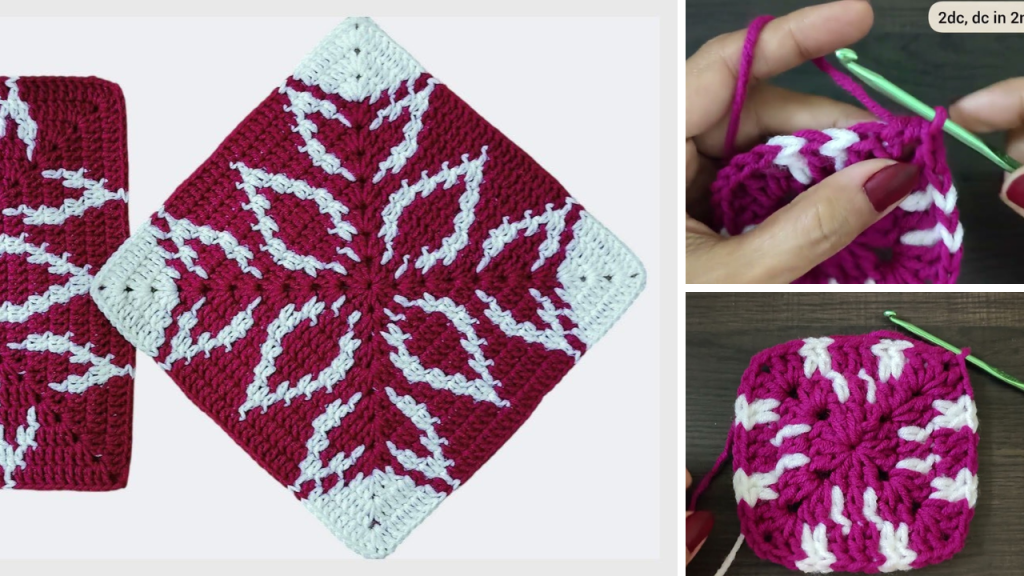
The classic granny square is a timeless crochet staple, and for good reason! It’s versatile, beautiful, and a joy to create. This tutorial will guide you through crocheting an impressive “Grand Meadow” 11-inch granny square, a substantial and detailed square that’s perfect for blankets, throws, or even a stunning crochet rug or pillow. This pattern builds on the traditional granny stitch to create a square with a rich texture and a beautiful, intricate finish.
This project is a fantastic way to practice your skills, as it involves working in the round, creating clusters, and shaping corners. The size of this square means you’ll need fewer squares to complete a full blanket, making it a relatively fast project with a high-impact result!
Why Crochet the Grand Meadow Square?
- Perfect for Larger Projects: At 11 inches, these squares work up quickly and make creating a full-sized blanket much more manageable.
- Timeless Appeal: The granny square is a beloved classic that never goes out of style.
- Skill Building: You’ll practice working in the round, building clusters, and creating a perfect square shape.
- Versatile: Use it for blankets, pillow covers, tote bags, or even a rug.
- Stash Buster: A great way to use up leftover yarn, or create a beautiful, multicolored patchwork effect.
1. Planning Your Square: Size & Materials
- Finished Size: This pattern will create a square that is approximately 11 inches x 11 inches (28 cm x 28 cm). You can make it slightly larger or smaller by adding or removing rounds.
- Yarn Choice: This square looks best in a yarn that shows off stitch definition. A standard Worsted Weight (#4) yarn is an excellent choice for a sturdy and cozy blanket or throw.
- Colors: A single color creates a sophisticated, cohesive look. Multiple colors can be used to emphasize each round and create a vibrant patchwork.
- Quantity: For a single 11-inch square, you will need approximately 50-60 yards (45-55 meters) of yarn.
2. Materials You’ll Need
- Yarn: A small amount of Worsted Weight (#4) yarn in your chosen color(s).
- Crochet Hook: 5.0 mm (H-8 US). (Or the hook size that gives you a nice drape and feel for your chosen yarn.)
- Scissors: For cutting yarn.
- Yarn Needle (Tapestry Needle): For weaving in ends.
- Stitch Marker (Optional): To mark the beginning of rounds if you find it helpful.
3. Essential Crochet Stitches & Techniques
- Slip Knot
- Chain (ch)
- Slip Stitch (sl st): For joining rounds.
- Double Crochet (dc)
- 3-DC Cluster (Granny Stitch): 3 dc worked into the same space.
- Magic Ring (or Adjustable Ring): The best way to start a square for a tight, closed center. (Alternatively, Ch 4 and join with a sl st to form a ring.)
4. Let’s Crochet the “Grand Meadow” Square!
We will work in joined rounds, starting from the center.
Pattern Notes:
- Ch 3 at the start of a round counts as a DC.
- All rounds are joined with a sl st to the top of the beginning chain unless otherwise specified.
- This pattern is written for a single color, but feel free to change colors on any round you like.
Round 1: The Center Ring
- Make a Magic Ring.
- Ch 3 (counts as 1 dc), work 2 dc into the ring. (This is your first 3-DC cluster).
- [Ch 2, 3 dc into the ring]. Repeat from * to * 3 more times.
- Ch 2, join with a sl st to the top of the beginning Ch 3.
- Pull the ring tight to close the center.
- [4 clusters, 4 ch-2 corner spaces]
Round 2: Expanding the Corners
- Sl st into the first ch-2 corner space.
- Ch 3 (counts as 1 dc), work 2 dc into the same space. Ch 2, 3 dc into the same space. (This is your first corner).
- Ch 1, (3 dc, ch 2, 3 dc) into the next ch-2 corner space. Repeat from * to * 3 more times.
- Ch 1, join with a sl st to the top of the beginning Ch 3.
- [8 clusters, 4 ch-2 corners, 4 ch-1 spaces]
Round 3: Building the Sides
- Sl st into the first ch-2 corner space.
- Ch 3 (counts as 1 dc), work 2 dc into the same space. Ch 2, 3 dc into the same space.
- Ch 1, 3 dc into the next ch-1 space. Ch 1, (3 dc, ch 2, 3 dc) into the next ch-2 corner space. Repeat from * to * 3 more times.
- Ch 1, 3 dc into the last ch-1 space. Ch 1.
- Join with a sl st to the top of the beginning Ch 3.
- [12 clusters, 4 ch-2 corners, 8 ch-1 spaces]
Round 4-10: The Repetitive Pattern
- Sl st into the first ch-2 corner space.
- Ch 3 (counts as 1 dc), work 2 dc into the same space. Ch 2, 3 dc into the same space.
- Ch 1, 3 dc into each ch-1 space along the side. Ch 1, (3 dc, ch 2, 3 dc) into the next ch-2 corner space. Repeat from * to * 3 more times.
- Join with a sl st to the top of the beginning Ch 3.
- Continue this pattern, increasing the number of 3-dc clusters on each side by one in every round, until you have reached Round 10.
- At the end of Round 10, your square should measure approximately 11 inches.
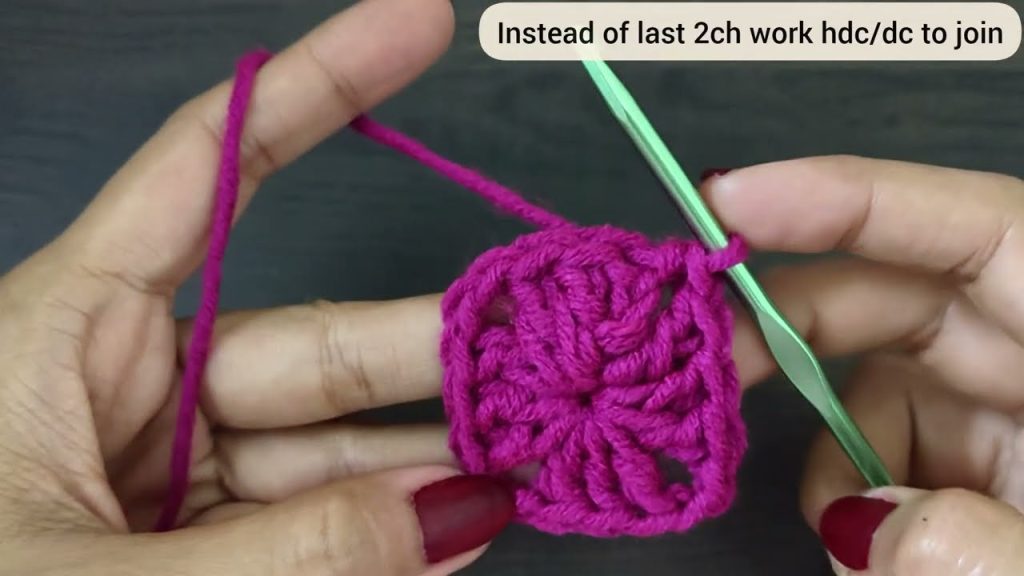
Round 11: The Final Scallop Border
This adds a lovely, decorative edge.
- Sl st into the first ch-2 corner space.
- Ch 1 (does not count as a stitch). Work (sc, ch 3, sc) into the corner space.
- Work 4 sc into each ch-1 space along the side.
- Work (sc, ch 3, sc) into the next ch-2 corner space.
- Repeat steps 3 and 4 for the remaining sides and corners.
- Join with a sl st to the first sc.
- Fasten off, and weave in all ends securely.
Tips for a Perfect Square
- Counting is Key: Always double-check your stitch count at the end of each round to ensure your square remains a perfect square.
- Consistent Tension: Try to maintain even tension throughout the project to avoid a wobbly square.
- Joining: When you have a collection of squares, you can join them using a whip stitch, slip stitch, or a join-as-you-go method.
Enjoy creating your “Grand Meadow” crochet squares. Their size and timeless design will make them a fantastic foundation for a beautiful, handcrafted heirloom!
Video tutorial:


