There’s something uniquely satisfying about crafting your own accessories, and a hand-knitted bag is no exception. It’s a wonderful way to express your personal style, create a truly unique piece, and enjoy the meditative process of knitting. This detailed guide will walk you through everything you need to know to create a beautiful and functional hand-knitted shoulder bag or handbag.
1. Design & Planning: What Kind of Bag Do You Envision?
Before you even pick up your needles, take some time to plan your project. Consider the following:
- Size: Do you want a small clutch for evenings, a medium shoulder bag for daily essentials, or a large tote for everything?
- Shape: Rectangular, square, round, or something more unique?
- Strap Type: Short handles, a long shoulder strap, or a cross-body strap? Will it be knitted, fabric, or a ready-made chain?
- Closure: Zipper, magnetic snap, button, toggle, or an open top?
- Lining: Will you add a fabric lining for structure and to prevent items from poking through? (Highly recommended!)
- Yarn Choice: This is crucial! Consider weight, fiber content, and color.
- Skill Level: If you’re a beginner, opt for simpler stitches and shapes.
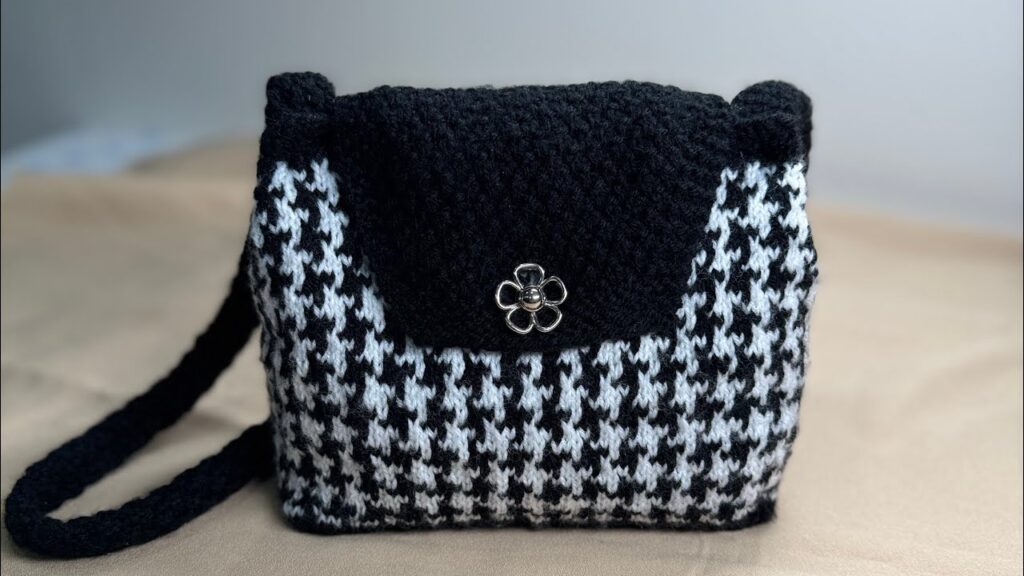
Example Bag Idea: A medium-sized rectangular shoulder bag, knitted in a sturdy worsted weight cotton, with a simple garter or stockinette stitch, and a fabric lining.
2. Materials You’ll Need
Gathering your materials before you start will make the process much smoother.
- Yarn:
- Fiber: Cotton, linen, or a cotton blend are excellent choices for bags as they offer good stitch definition and durability. Wool can work, but may stretch more. Acrylic is affordable but might not have the same structure.
- Weight: Worsted (Aran) or bulky weight yarns are generally best for bags as they create a sturdy fabric. Lighter weights can be used but will require more stitches and might result in a floppier bag.
- Quantity: This will depend on the size of your bag and the yarn weight. For a medium shoulder bag (approx. 10″ x 12″), you’ll likely need 300-500 yards (275-450 meters) of worsted weight yarn. Always buy a bit extra to be safe.
- Knitting Needles:
- Size: Match your needle size to your yarn weight, usually indicated on the yarn label. For worsted weight, common sizes are US 7-9 (4.5-5.5mm).
- Type: Straight needles are fine for simple rectangular pieces, but circular needles are often preferred for knitting larger pieces seamlessly or for working in the round if you choose that method.
- Stitch Markers: Useful for marking rows, repeating patterns, or the beginning of a round.
- Tapestry Needle (Darning Needle): For weaving in ends and seaming.
- Scissors: For cutting yarn.
- Measuring Tape: For checking your gauge and bag dimensions.
- Optional for Straps/Handles:
- D-rings or O-rings
- Strap hardware (sliders, swivel clasps) if making an adjustable or removable strap.
- Leather or fabric straps (pre-made) if you prefer not to knit them.
- For Lining (Highly Recommended):
- Fabric of your choice (cotton, linen, or a durable blend)
- Sewing machine or hand-sewing needle and thread
- Pins
- For Closure (Optional):
- Magnetic snap
- Zipper
- Button and loop
- Toggle
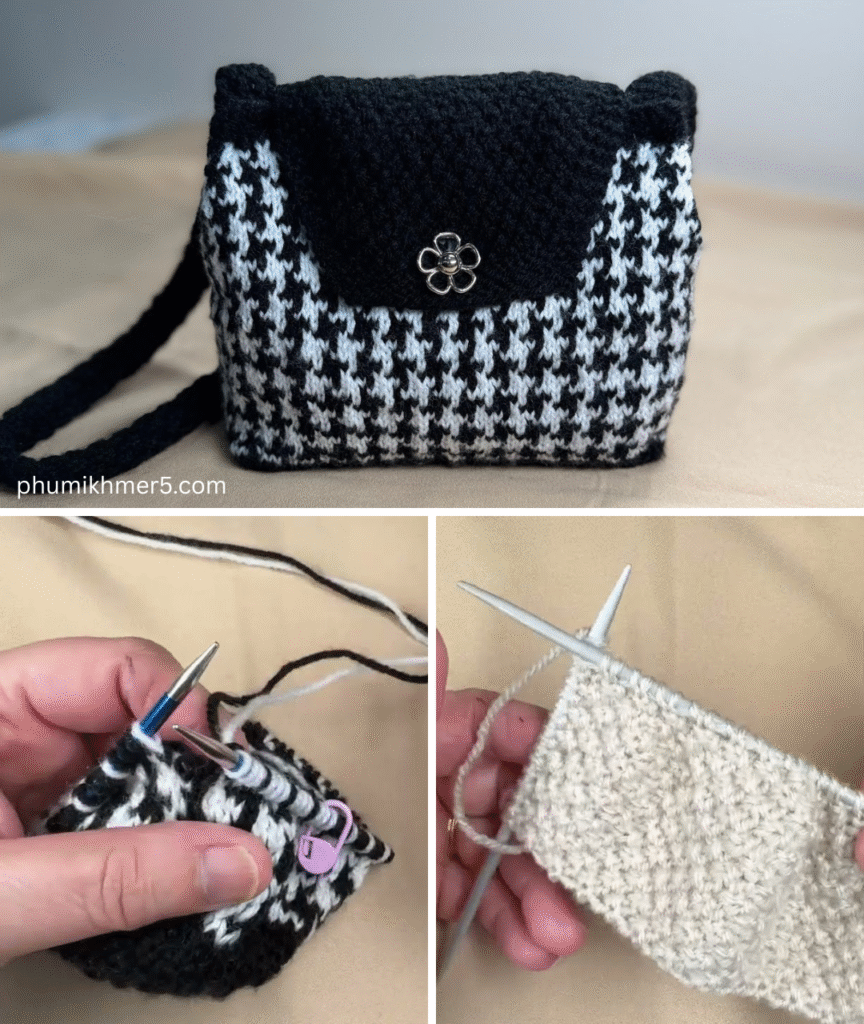
3. Essential Knitting Techniques for Your Bag
If you’re new to knitting, here are the fundamental stitches you’ll need. Practice these until you feel comfortable.
- Slip Knot: The very first step to start your knitting.
- Casting On (CO): Creating the initial row of stitches on your needle.
- Knit Stitch (K): The most basic knitting stitch.
- Purl Stitch (P): The second most basic knitting stitch, which creates a bumpy texture.
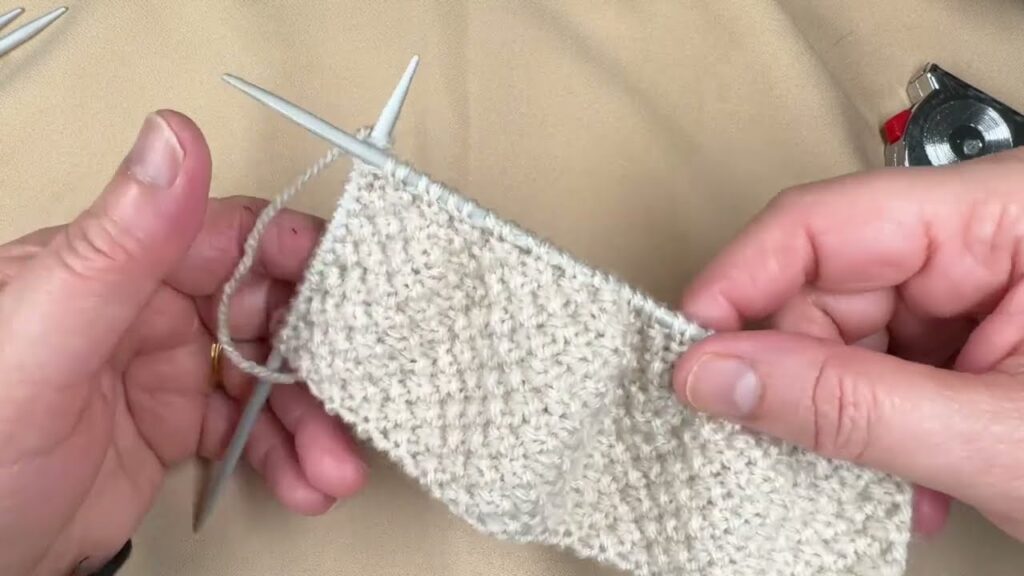
- Garter Stitch: Created by knitting every row. This creates a reversible, ridged fabric that is very stable and doesn’t curl. Excellent for bags!
- Stockinette Stitch: Created by knitting one row and purling the next (or knitting every stitch when working in the round). This creates a smooth fabric with V-shapes on the right side and bumps on the wrong side. It can curl at the edges, so a garter stitch border is often used.
- Binding Off (BO): Finishing your knitting by removing the stitches from the needle without unraveling.
- Weaving in Ends: Tidy up loose yarn tails using a tapestry needle.
4. Getting Started: The Gauge Swatch
DO NOT SKIP THIS STEP! Your gauge swatch is crucial for ensuring your bag turns out the correct size.
- Cast On: Cast on about 20-30 stitches.
- Knit: Work in your chosen stitch pattern (e.g., garter or stockinette) for about 4-6 inches (10-15 cm).
- Bind Off.
- Measure: Lay your swatch flat. Using a ruler, measure how many stitches you have in 4 inches (10 cm) and how many rows you have in 4 inches (10 cm).
- Adjust:
- If you have more stitches per 4 inches than the pattern calls for (or your desired density), your knitting is too tight. Go up a needle size.
- If you have fewer stitches per 4 inches, your knitting is too loose. Go down a needle size.
- Repeat until your swatch matches your desired gauge.
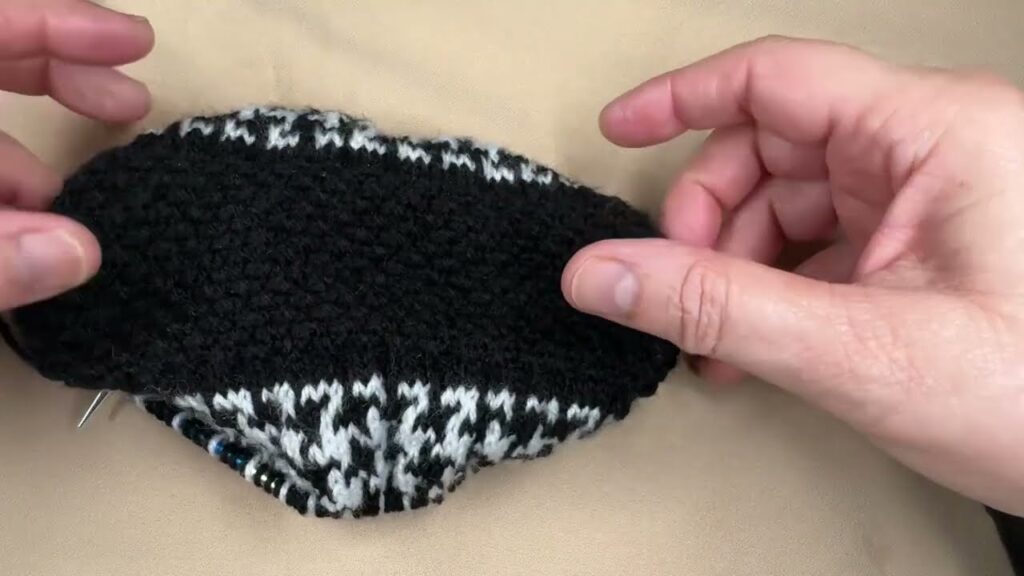
5. Knitting the Bag Body (Simple Rectangular Bag Example)
This example creates a simple rectangular bag, which is beginner-friendly and versatile.
Method 1: Two Separate Panels (Front & Back)
- Calculate Stitches: Based on your gauge swatch, determine how many stitches you need to cast on for the desired width of your bag.
- (Desired Bag Width / Stitches per 4 inches) x 4 = Number of Stitches to CO
- Add a few extra stitches if you want a wider border.
- Cast On: Cast on the calculated number of stitches.
- Knit the First Panel: Work in your chosen stitch pattern (e.g., garter stitch for a sturdy, reversible fabric, or stockinette with garter borders to prevent curling) until the piece reaches your desired height.
- Bind Off.
- Knit the Second Panel: Repeat steps 2-4 to create an identical second panel.
Method 2: One Long Panel (Folded Bag)
This method creates a bag body from a single long piece of knitting that is then folded and seamed. This is great for a seamless bottom.
- Calculate Stitches: Determine the number of stitches for the desired width of your bag.
- Cast On: Cast on the calculated number of stitches.
- Knit the Panel: Work in your chosen stitch pattern until the piece reaches twice your desired bag height, plus the depth of the base if you want a defined flat bottom.
- Example: For a 10″ tall bag with a 2″ base, you’d knit a panel approximately 22″ long (10″ front + 10″ back + 2″ base).
- Bind Off.
6. Creating the Straps/Handles
You have several options for straps:
- Knitted Straps:
- I-Cord: A thin, tubular knit cord that is very sturdy. Search for “how to knit I-cord” for a tutorial. You’ll need double-pointed needles.
- Flat Knit Straps: Cast on a small number of stitches (e.g., 6-10 depending on desired width) and knit in garter stitch until the desired length. This creates a flat, strong strap.
- Attaching: Sew the knitted straps securely to the top corners of your bag body. You can also incorporate D-rings at the top corners and attach the strap to the D-rings using a sewn tab or a small knitted loop.
- Fabric or Leather Straps: Purchase pre-made straps and sew or attach them to your bag. This is a quick and often very durable option.
- Chain Straps: Attach a metal chain to the bag using D-rings or by weaving the chain directly through stitches at the top edge.
7. Assembly: Bringing Your Bag to Life
This is where your knitted pieces transform into a functional bag!
- Seaming the Bag Body:
- For Two Panels: Place the two knitted panels right sides together. Using your tapestry needle and a length of matching yarn, seam the bottom and side edges together using a mattress stitch or whip stitch. The mattress stitch creates an almost invisible seam.
- For One Long Panel: Fold the long panel in half (or fold for the bottom and sides). Seam the side edges together using the mattress stitch. If you want a defined bottom, you can create “box corners” by folding the bottom corners into triangles and seaming them flat.
- Adding the Lining (Highly Recommended):
- Measure & Cut: Measure your knitted bag’s dimensions (width and height). Cut two pieces of your chosen lining fabric for the main body (front and back), adding a 1/2 inch (1.25 cm) seam allowance on all sides. For a bag with a defined bottom, cut an additional rectangle for the base.
- Sewing:
- If using two body pieces: Pin the fabric pieces right sides together and sew the side and bottom seams, leaving the top open.
- If using one long panel: Fold the fabric panel in half and sew the side seams. Create box corners if you did this with your knitted bag.
- Finishing the Top Edge: Fold under the top raw edge of the lining by about 1/2 inch (1.25 cm) and press.
- Insert & Hand Stitch: Place the fabric lining inside your knitted bag. Align the seams. Hand stitch the top edge of the lining to the inside top edge of your knitted bag using a small whip stitch, ensuring your stitches don’t show on the outside.
- Attaching Straps/Handles:
- Sew your knitted straps securely to the top corners of the bag using a tapestry needle and strong yarn. Go through multiple stitches to ensure durability.
- If using fabric or leather straps, follow the manufacturer’s instructions for attachment or hand-stitch them securely.
- Adding the Closure (Optional):
- Magnetic Snap: Position the snap pieces on the inside of the bag, usually on the lining, about 1 inch (2.5 cm) from the top edge and centered. Mark the prongs, cut small slits, insert prongs, and secure with metal washers.
- Zipper: Hand stitch a zipper to the top inside edge of your bag, ensuring it’s neatly hidden by the lining. This is more advanced and may require specific sewing machine feet if done by machine.
- Button/Toggle: Sew a button to one side of the bag and create a knitted loop on the other side.
8. Finishing Touches
- Weave in any remaining loose ends securely within your knitting.
- Block your bag (optional but recommended): Gently wet your finished bag and lay it flat on a towel, shaping it to your desired dimensions. Let it air dry completely. This helps to even out stitches and give the bag a professional finish.
- Adornments: Add tassels, charms, or other decorative elements if desired.
Care for Your Hand-Knitted Bag
Always refer to your yarn label for specific care instructions. Generally, hand-knitted bags made from cotton or blends should be hand-washed in cool water with a mild detergent, gently squeezed, and laid flat to dry to maintain their shape.
Knitting a bag takes time and patience, but the result is a beautiful, personalized accessory that you’ll cherish. Enjoy the creative process, and don’t be afraid to experiment with different yarns, stitches, and embellishments to make your knitted bag truly your own! Happy knitting!
Video tutorial: